Dell Inspiron One 2320 Owners Manual - Page 132
Clearing Forgotten Passwords - desktop computer
 |
View all Dell Inspiron One 2320 manuals
Add to My Manuals
Save this manual to your list of manuals |
Page 132 highlights
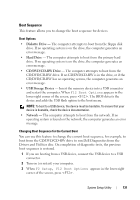
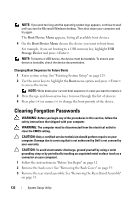
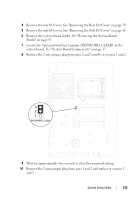
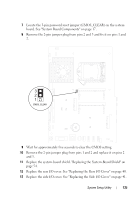
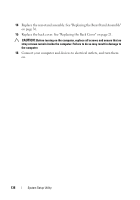
NOTE: If you wait too long and the operating system logo appears, continue to wait until you see the Microsoft Windows desktop. Then shut down your computer and try again. The Boot Device Menu appears, listing all available boot devices. 4 On the Boot Device Menu choose the device you want to boot from. For example, if you are booting to a USB memory key, highlight USB Storage Device and press . NOTE: To boot to a USB device, the device must be bootable. To ensure your device is bootable, check the device documentation. Changing Boot Sequence for Future Boots 1 Enter system setup. See "Entering System Setup" on page 125. 2 Use the arrow keys to highlight the Boot menu option and press to access the menu. NOTE: Write down your current boot sequence in case you want to restore it. 3 Press the up- and down-arrow keys to move through the list of devices. 4 Press plus (+) or minus (-) to change the boot priority of the device. Clearing Forgotten Passwords WARNING: Before you begin any of the procedures in this section, follow the safety instructions that shipped with your computer. WARNING: The computer must be disconnected from the electrical outlet to clear the CMOS setting. CAUTION: Only a certified service technician should perform repairs on your computer. Damage due to servicing that is not authorized by Dell is not covered by your warranty. CAUTION: To avoid electrostatic discharge, ground yourself by using a wrist grounding strap or by periodically touching an unpainted metal surface (such as a connector on your computer). 1 Follow the instructions in "Before You Begin" on page 11. 2 Remove the back cover. See "Removing the Back Cover" on page 19. 3 Remove the rear-stand assembly. See "Removing the Rear-Stand Assembly" on page 35. 132 System Setup Utility
-
 1
1 -
2
-
3
-
4
-
5
-
6
-
7
-
8
-
9
-
10
-
11
-
12
-
13
-
14
-
15
-
16
-
17
-
18
-
19
-
20
-
21
-
22
-
23
-
24
-
25
-
26
-
27
-
28
-
29
-
30
-
31
-
32
-
33
-
34
-
35
-
36
-
37
-
38
-
39
-
40
-
41
-
42
-
43
-
44
-
45
-
46
-
47
-
48
-
49
-
50
-
51
-
52
-
53
-
54
-
55
-
56
-
57
-
58
-
59
-
60
-
61
-
62
-
63
-
64
-
65
-
66
-
67
-
68
-
69
-
70
-
71
-
72
-
73
-
74
-
75
-
76
-
77
-
78
-
79
-
80
-
81
-
82
-
83
-
84
-
85
-
86
-
87
-
88
-
89
-
90
-
91
-
92
-
93
-
94
-
95
-
96
-
97
-
98
-
99
-
100
-
101
-
102
-
103
-
104
-
105
-
106
-
107
-
108
-
109
-
110
-
111
-
112
-
113
-
114
-
115
-
116
-
117
-
118
-
119
-
120
-
121
-
122
-
123
-
124
-
125
-
126
-
 127
127 -
 128
128 -
 129
129 -
 130
130 -
 131
131 -
 132
132 -
 133
133 -
 134
134 -
 135
135 -
 136
136 -
 137
137 -
138
 |
 |
