Dell PowerEdge 1300 Dell PowerEdge Systems Microprocessor Upgrade Guide - Page 21
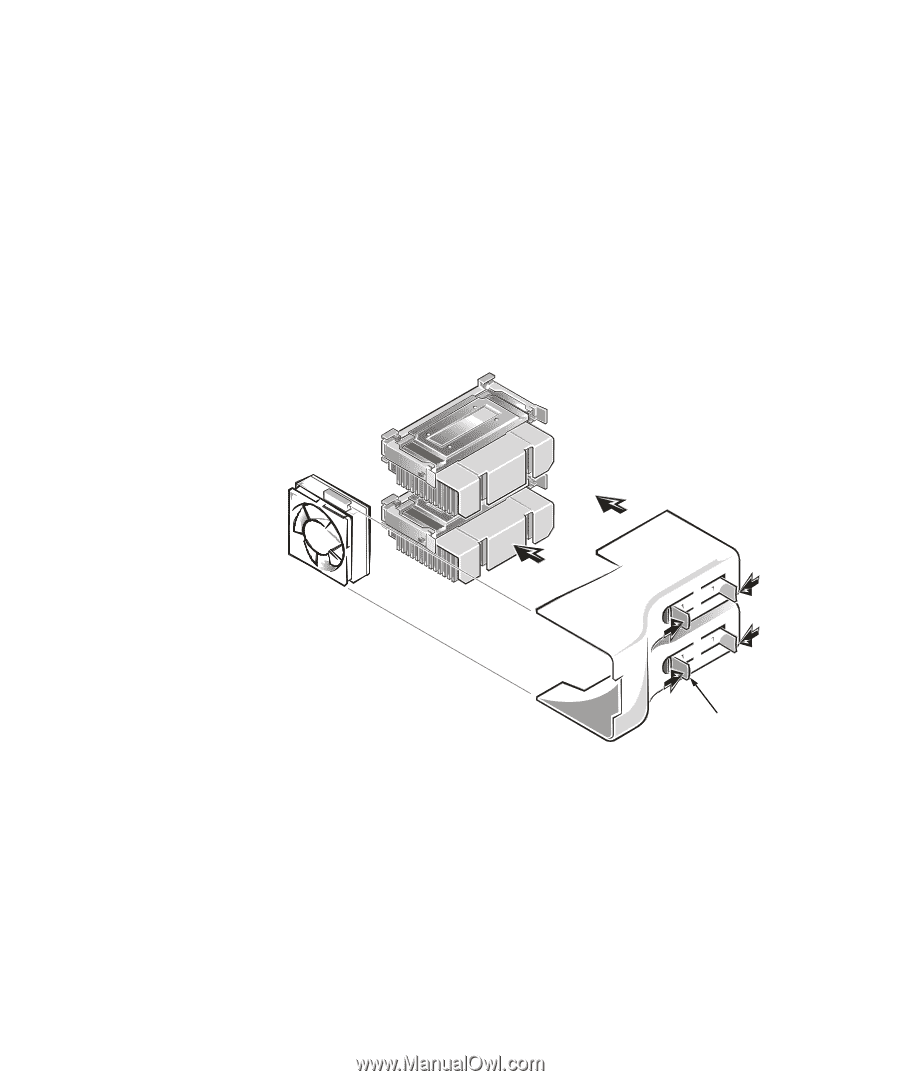
Installing a New Cooling Shroud in the PowerEdge 1300 and 2300, head fan and the top of the shroud
 |
View all Dell PowerEdge 1300 manuals
Add to My Manuals
Save this manual to your list of manuals |
Page 21 highlights
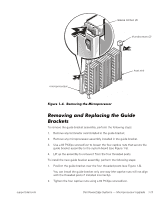
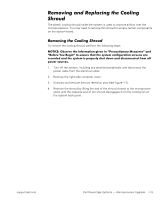
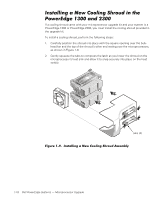
If a cooling shroud came with your microprocessor upgrade kit and your system is a PowerEdge 1300 or PowerEdge 2300, you must install the cooling shroud provided in the upgrade kit. To install a cooling shroud, perform the following steps: 1. Carefully position the shroud into place with the square opening over the bulk- head fan and the top of the shroud's other end resting over the microprocessors, as shown in Figure 1-9. 2. Gently squeeze the tabs to compress the latch as you lower the shroud on the microprocessor's heat sink and allow it to snap securely into place on the heat sink(s). tabs (4) 1-18 Dell PowerEdge Systems - Microprocessor Upgrade
-
 1
1 -
2
-
3
-
4
-
5
-
6
-
7
-
8
-
9
-
10
-
11
-
12
-
13
-
14
-
15
-
 16
16 -
 17
17 -
 18
18 -
 19
19 -
 20
20 -
 21
21 -
 22
22 -
 23
23
 |
 |
1-18
Dell PowerEdge Systems
—
Microprocessor Upgrade
ú¾·µÄĸºÂ¼µ¼(³É¼&¹¹Ä¸ºÂ¼'Ȳ¹¶Ç¼¸º¼·È³¼
±¹É³²Êdz¼ËÌÍͼµºÇ¼ÎÌÍÍ
If a cooling shroud came with your microprocessor upgrade kit and your system is a
PowerEdge 1300 or PowerEdge 2300, you
must
install the cooling shroud provided in
the upgrade kit.
To install a cooling shroud, perform the following steps:
1.
Carefully position the shroud into place with the square opening over the bulk-
head fan and the top of the shroud
’
s other end resting over the microprocessors,
as shown in Figure 1-9.
2.
Gently squeeze the tabs to compress the latch as you lower the shroud on the
microprocessor
’
s heat sink and allow it to snap securely into place on the heat
sink(s).
±²³´µ¶·¸¹-º··'¿ÄÀÆÊʲ¿³·Æ·(¶)·+½½Ê²¿³·ÂÁµ½´Ç·ÈÄĶ¼ÉÊÃ
tabs (4)