Dell PowerEdge 1300 Dell PowerEdge Systems Microprocessor Upgrade Guide - Page 9
Installing Upgrade Microprocessors in the PowerEdge 2300, Installation and Troubleshooting - specification
 |
View all Dell PowerEdge 1300 manuals
Add to My Manuals
Save this manual to your list of manuals |
Page 9 highlights
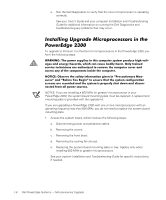
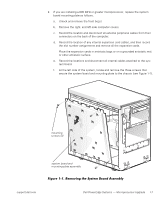
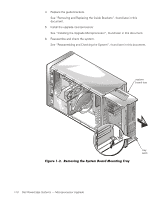
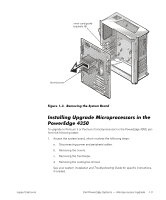
e. Run the Dell Diagnostics to verify that the new microprocessor is operating correctly. See your User's Guide and your computer Installation and Troubleshooting Guide for additional information on running the Dell Diagnostics and troubleshooting any problems that may occur. To upgrade to Pentium II or Pentium III microprocessors in the PowerEdge 2300, perform the following steps. NOTES: If you are installing a 600 MHz (or greater) microprocessor in your PowerEdge 2300, the system board mounting plate must be replaced. A replacement mounting plate is provided with the upgrade kit. If you are upgrading a PowerEdge 2300 with one or two microprocessors with an operating frequency less than 600 MHz, you do not need to replace the system board mounting plate. 1. Access the system board, which involves the following steps: a. Disconnecting power and peripheral cables. b. Removing the covers. c. Removing the front bezel. d. Removing the cooling fan shroud. e. Replacing the system board mounting plate or tray. Applies only when installing 600 MHz or greater microprocessors. See your system Installation and Troubleshooting Guide for specific instructions, if needed. 1-6 Dell PowerEdge Systems - Microprocessor Upgrade
-
 1
1 -
2
-
3
-
 4
4 -
 5
5 -
 6
6 -
 7
7 -
 8
8 -
 9
9 -
 10
10 -
 11
11 -
 12
12 -
 13
13 -
 14
14 -
15
-
16
-
17
-
18
-
19
-
20
-
21
-
22
-
23
 |
 |