Dell PowerEdge 1655MC Replacing the Server Module Board
Dell PowerEdge 1655MC Manual
 |
View all Dell PowerEdge 1655MC manuals
Add to My Manuals
Save this manual to your list of manuals |
Dell PowerEdge 1655MC manual content summary:
- Dell PowerEdge 1655MC | Replacing the
Server Module Board - Page 1
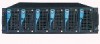
Dell™ PowerEdge™ 1655MC Systems Replacing the Server Module Board www.dell.com | support.dell.com - Dell PowerEdge 1655MC | Replacing the
Server Module Board - Page 2
to hardware or loss of data and tells you how to avoid the problem. CAUTION: A CAUTION indicates a potential for property damage, personal injury, or of Dell Computer Corporation is strictly forbidden. Trademarks used in this text: Dell, the DELL logo, and PowerEdge are trademarks of Dell Computer - Dell PowerEdge 1655MC | Replacing the
Server Module Board - Page 3
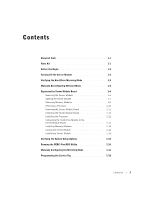
Hard-Drive Module to the Server Module Board 1-13 Installing Memory Modules 1-14 Closing the Server Module 1-14 Installing a Server Module 1-15 Verifying the System Setup Options 1-15 Running the PERC 4/im DOS Utility 1-16 Manually Configuring the Mirroring Mode 1-16 Programming the Service - Dell PowerEdge 1655MC | Replacing the
Server Module Board - Page 4
Figure 1-9. Turning Off the Server Module 1-3 Removing and Installing a Server Module . . . 1-6 Opening and Closing a Server Module . . . . . 1-7 An Open Server Module 1-8 Server Module Board Connectors 1-9 Removing and Installing a Memory Module 1-9 Removing and Installing the Heat Sink - Dell PowerEdge 1655MC | Replacing the
Server Module Board - Page 5
document provides instructions for replacing a server module board and enabling the mirroring function. Required Tools • PS/2 keyboard • Monitor • #2 Phillips screwdriver • Flat-tip screwdriver • A remote system with HyperTerminal version 6.3 • Null modem cable (PN 7W449) • USB diskette drive (PN - Dell PowerEdge 1655MC | Replacing the
Server Module Board - Page 6
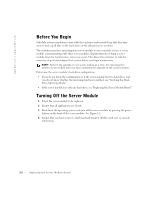
www.dell.com | support.dell.com Before You Begin Schedule system maintenance time with the customer and remind them that they may want to back up all files on the hard drives of the affected server modules. The customer may have mirroring from server module to server module or have a server module - Dell PowerEdge 1655MC | Replacing the
Server Module Board - Page 7
mode) or one SCSI drive is listed as a virtual disk (mirrored mode). The following is an example of the display if there are two drives installed in nonmirrored mode. If this display is seen during POST, proceed to "Turning Off the Server Module" and then "Replacing the Server Module Board." HBA ID - Dell PowerEdge 1655MC | Replacing the
Server Module Board - Page 8
displayed, press immediately before the server module boots to the operating system. Logical drive degraded A hard drive is faulty. See "Troubleshooting Hard Drives" in your Installation and Troubleshooting Guide. Manually Deconfiguring Mirrored Mode 1 Press - Dell PowerEdge 1655MC | Replacing the
Server Module Board - Page 9
to view or modify the mirroring mode. The two installed SCSI drives are listed with their SCSI IDs: SCSI ID 0 1 Device Select Exit the Configuration Utility and press . The server module reboots. During POST, the two SCSI drives are displayed as nonmirrored, as shown in the following - Dell PowerEdge 1655MC | Replacing the
Server Module Board - Page 10
www.dell.com | support.dell.com Replacing the Server Module Board The following procedures are required to replace the server module board. You must follow the procedures in the order given. Removing the Server Module CAUTION: See your System Information Guide for complete information about safety - Dell PowerEdge 1655MC | Replacing the
Server Module Board - Page 11
: See your System Information Guide for complete information about safety precautions, working inside the computer, and protecting against electrostatic discharge. 1 Orient the server module as shown in Figure 1-3 so that the two captive screws are on the left side of the server module. 2 Using - Dell PowerEdge 1655MC | Replacing the
Server Module Board - Page 12
com | support.dell.com 4 Set the two sides of the server module on a flat surface. See Figure 1-4. Figure 1-4. An Open Server Module tabs slots 5 Disconnect the hard drive SCSI interface and power cables from the server module board. See Figure 1-5. Removing Memory Modules CAUTION: See your System - Dell PowerEdge 1655MC | Replacing the
Server Module Board - Page 13
Figure 1-5. Server Module Board Connectors DIMM A DIMM B hard-drive power connector hard-drive SCSI interface connector Figure 1-6. Removing and Installing a Memory Module key ejectors (2) Replacing the Ser ver Module Board 1-9 - Dell PowerEdge 1655MC | Replacing the
Server Module Board - Page 14
dell.com | support.dell.com Removing a Processor CAUTION: See your System Information Guide for complete information about safety precautions, working inside the computer, and protecting against electrostatic discharge. 1 Press down on the heat-sink release and Installing the Heat Sink release lever - Dell PowerEdge 1655MC | Replacing the
Server Module Board - Page 15
slot processor socket front of server module Removing the Server Module Board The server module board is secured by six retaining tabs and a securing clip on the end of the board near the midplane board connector. CAUTION: See your System Information Guide for complete information about safety - Dell PowerEdge 1655MC | Replacing the
Server Module Board - Page 16
it backward out of the enclosure. See Figure 1-9. Figure 1-9. Removing and Installing the Server Module Board grounding pad retaining tabs alignment notches enclosure securing clip Installing the Server Module Board CAUTION: See your System Information Guide for complete information about - Dell PowerEdge 1655MC | Replacing the
Server Module Board - Page 17
the socket. 3 Install the processor in release lever until it latches onto the processor socket tab. 9 Repeat step 1 through step 8 for a second processor or step 1 through step 4 for a terminator. Connecting the Hard-Drive Module to the Server Module Board CAUTION: See your System Information Guide - Dell PowerEdge 1655MC | Replacing the
Server Module Board - Page 18
.dell.com | support.dell.com 3 Ensure that the power cable is not damaged. If the cable is damaged, use the spare power cable from the parts kit. 4 Connect the hard drive SCSI interface and power cables to the server module board. See Figure 1-5. Installing Memory Modules CAUTION: See your System - Dell PowerEdge 1655MC | Replacing the
Server Module Board - Page 19
or two drives are installed in nonmirrored mode, go to step 1. 1 Turn on the server module. See Figure 1-1. If the server module does not turn on, see "Getting Help" in your Installation and Troubleshooting Guide. 2 Enter the System Setup program. 3 Ensure that the processor, memory, and service tag - Dell PowerEdge 1655MC | Replacing the
Server Module Board - Page 20
1 Attach the USB diskette drive to the front of the server module. 2 Insert the PERC 4/im DOS Utility diskette. 3 Turn on the server module. See Figure 1-1. 4 Enter the System Setup program. 5 Ensure that the processor, memory, and service tag information is correct. The service tag should match the - Dell PowerEdge 1655MC | Replacing the
Server Module Board - Page 21
the mirroring mode. The two installed SCSI drives are listed with their SCSI IDs hard drive, which is reported as a virtual disk, is listed on the screen. This indicates that the drives are in mirrored mode. HBA ID LUN VENDOR PRODUCT 0 00 Dell VIRTUAL DISK 0 70 LSI Logic 1020/1030 The server - Dell PowerEdge 1655MC | Replacing the
Server Module Board - Page 22
www.dell.com | support.dell.com Programming the Service Tag NOTE: The service tag is automatically written to a server module that is replaced in the field. This procedure is required only if, for some reason, the service tag is not programmed or is programmed incorrectly. 1 Connect a null modem - Dell PowerEdge 1655MC | Replacing the Server Module Board - Page 23
- Dell PowerEdge 1655MC | Replacing the
Server Module Board - Page 24
Printed in the U.S.A. 0J1678A00 www.dell.com | support.dell.com
-
 1
1 -
 2
2 -
 3
3 -
 4
4 -
 5
5 -
 6
6 -
 7
7 -
8
-
9
-
10
-
11
-
12
-
13
-
14
-
15
-
16
-
17
-
18
-
19
-
20
-
21
-
22
-
23
-
24
 |
 |

www.dell.com | support.dell.com
Dell™ PowerEdge™ 1655MC Systems
Replacing the Server
Module Board