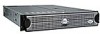
Dell PowerEdge 2550 Rack Installation Guide - Page 25
into place, locking the slide to the middle shoulder nut see
 |
View all Dell PowerEdge 2550 manuals
Add to My Manuals
Save this manual to your list of manuals |
Page 25 highlights
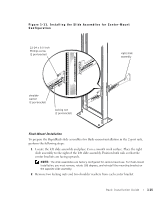
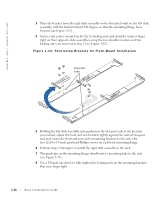
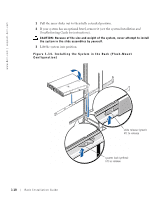
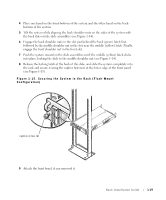
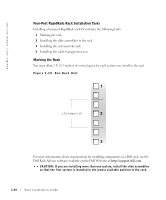
4 Place one hand on the front-bottom of the system and the other hand on the backbottom of the system. 5 Tilt the system while aligning the back shoulder nuts on the sides of the system with the back slots on the slide assemblies (see Figure 1-14). 6 Engage the back shoulder nuts in the slot just behind the back (green) latch first, followed by the middle shoulder nut in the slot near the middle (yellow) latch. Finally, engage the front shoulder nut in the front slot. 7 Push the system inward on the slide assemblies until the middle (yellow) latch clicks into place, locking the slide to the middle shoulder nut (see Figure 1-14). 8 Release the locking latch at the back of the slide, and slide the system completely into the rack and secure it using the captive fasteners at the lower edge of the front panel (see Figure 1-15). Figure 1-15. Securing the System in the Rack (Flush-Mount Configuration) captive screw (2) 9 Attach the front bezel, if you removed it. Rack Installation Guide 1-19
-
 1
1 -
2
-
3
-
4
-
5
-
6
-
7
-
8
-
9
-
10
-
11
-
12
-
13
-
14
-
15
-
16
-
17
-
18
-
19
-
 20
20 -
 21
21 -
 22
22 -
 23
23 -
 24
24 -
 25
25 -
 26
26 -
 27
27 -
 28
28 -
 29
29 -
 30
30 -
31
-
32
-
33
-
34
-
35
-
36
-
37
-
38
-
39
-
40
 |
 |
