Dell PowerEdge R660 PowerEdge RAID Controller S160 Users Guide - Page 26
Rescan disks, Virtual disk management, Configuring Windows RAID
 |
View all Dell PowerEdge R660 manuals
Add to My Manuals
Save this manual to your list of manuals |
Page 26 highlights
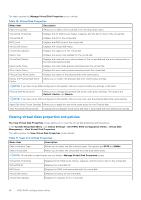
1. Enter the Dell PERC S160 Configuration Utility. See S160. 2. Click Controller Management > Convert to RAID Capable Disk. 3. Select the RAID type. NOTE: RAID type will not be available if a RAID is already configured. To enable RAID type, convert the disk to a non RAID disk (see Converting a physical disk to a Non-RAID disk) and then convert them back to RAID capable disk. 4. Select disk interface type. 5. Select the physical disk to convert to a RAID capable disk. If you wish to select all the available disks, select Check All. 6. Click Apply Changes to submit the changes selected. Rescan disks This option allows you to view the list of existing Physical and Virtual disks. NOTE: The Rescan disks option may take from 10 to 20 seconds to display the list of disks, depending on the number of disks available in the system. 1. Enter the Dell PERC S160 Configuration Utility. See Entering the DELL PERC S160 Configuration Utility. 2. Click Controller Management > Rescan Disks. The Rescan Disks screen is displayed. It provides information about the latest physical disk and virtual disk configurations. Virtual disk management This section allows you to create, manage and delete virtual disks. You can also view and modify some properties of the associated physical disk. Configuring Windows RAID NOTE: To enable RAID mode for NVMe PCIe SSDs, see Setting the NVMe PCIe SSDs to RAID mode . 1. Enter the Dell PERC S160 Configuration Utility. See Entering the DELL PERC S160 Configuration Utility. 2. Click Controller Management→Convert to RAID Capable Disk. 3. Select the RAID typeWindows RAID. 4. Select the Interface Type. The options are SATA and NVMe. 5. Select the physical disk and click Apply Changes. A confirmation screen is displayed. 6. Click Yes to continue. 7. Click Back to return to the configuration options screen. 8. After converting the physical disks, click the Virtual Disk Management in the Configuration Options screen. 9. Click Create Virtual Disks. 10. Click Select the Physical Disk. 11. Select the interface type, media type, sector size, and the physical disks. 12. Click Apply Changes. 13. Enter the virtual disk size and select the Virtual Disk Size Unit. NOTE: It is recommended to select the unit before specifying the disk size value. Changing the unit after entering the value may change the disk size. 14. Select the Read Cache Policy. 15. Select the Write Cache Policy. 16. Select the Physical Disk Write Cache. 17. Click Create Virtual Disk. The virtual disk is ready. 26 UEFI RAID configuration utility
-
 1
1 -
2
-
3
-
4
-
5
-
6
-
7
-
8
-
9
-
10
-
11
-
12
-
13
-
14
-
15
-
16
-
17
-
18
-
19
-
20
-
 21
21 -
 22
22 -
 23
23 -
 24
24 -
 25
25 -
 26
26 -
 27
27 -
 28
28 -
 29
29 -
 30
30 -
 31
31 -
32
-
33
-
34
-
35
-
36
-
37
-
38
-
39
-
40
-
41
-
42
-
43
-
44
-
45
-
46
-
47
-
48
-
49
-
50
-
51
 |
 |
