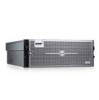
Dell PowerEdge R900 Hardware Owner's Manual (PDF) - Page 116
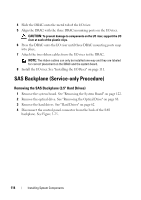
Installing the SAS Backplane (3.5-inch Hard Drives)
 |
View all Dell PowerEdge R900 manuals
Add to My Manuals
Save this manual to your list of manuals |
Page 116 highlights
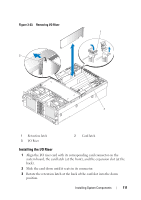
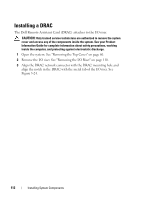
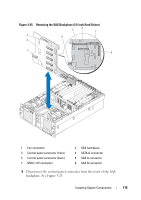
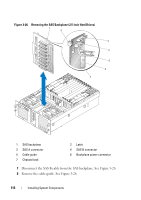
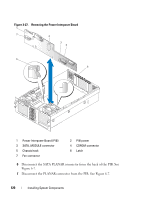
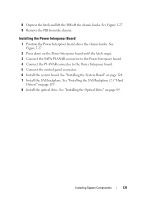
6 Disconnect the GND/+12V connector from the SAS backplane. See Figure 3-25. 7 Disconnect the SAS A connector from the SAS backplane. See Figure 3-25. 8 Disconnect the SATA_A connector from the SAS backplane. See Figure 3-25. 9 Pull the blue plunger on the SAS backplane forward and then lift the SAS backplane up to disengage it from the fan connectors. 10 Pull the SAS backplane away from the forward bulkhead of the chassis. Installing the SAS Backplane (3.5-inch Hard Drives) NOTE: Installation of the SAS backplane requires that the system board must not be installed in the system. 1 Position the SAS backplane against the chassis tabs behind the front fans with the fan connections of the SAS backplane directly above their mating connectors. 2 Press the SAS backplane down to engage the fan connectors. The blue plunger will snap into place. 3 Connect the SATA_A connector on the SAS backplane. See Figure 3-25. 4 Connect the SAS A connector on the SAS backplane. See Figure 3-25. 5 Connect the "GND/+12V" connector on the SAS backplane. See Figure 3-25. 6 Connect the "Backplane" connector on front of the SAS backplane. See Figure 3-25. 7 Connect the "Backplane" connector on back of the SAS backplane. See Figure 3-25. 8 Install the hard drives. See "Hard Drives" on page 62. 9 Install the optical drive. See "Installing the Optical Drive" on page 89. Removing the SAS Backplane (2.5-inch Hard Drives) 1 Remove power from the system, including any attached peripherals, and disconnect the system from the electrical outlet. 116 Installing System Components
-
 1
1 -
2
-
3
-
4
-
5
-
6
-
7
-
8
-
9
-
10
-
11
-
12
-
13
-
14
-
15
-
16
-
17
-
18
-
19
-
20
-
21
-
22
-
23
-
24
-
25
-
26
-
27
-
28
-
29
-
30
-
31
-
32
-
33
-
34
-
35
-
36
-
37
-
38
-
39
-
40
-
41
-
42
-
43
-
44
-
45
-
46
-
47
-
48
-
49
-
50
-
51
-
52
-
53
-
54
-
55
-
56
-
57
-
58
-
59
-
60
-
61
-
62
-
63
-
64
-
65
-
66
-
67
-
68
-
69
-
70
-
71
-
72
-
73
-
74
-
75
-
76
-
77
-
78
-
79
-
80
-
81
-
82
-
83
-
84
-
85
-
86
-
87
-
88
-
89
-
90
-
91
-
92
-
93
-
94
-
95
-
96
-
97
-
98
-
99
-
100
-
101
-
102
-
103
-
104
-
105
-
106
-
107
-
108
-
109
-
110
-
 111
111 -
 112
112 -
 113
113 -
 114
114 -
 115
115 -
 116
116 -
 117
117 -
 118
118 -
 119
119 -
 120
120 -
 121
121 -
122
-
123
-
124
-
125
-
126
-
127
-
128
-
129
-
130
-
131
-
132
-
133
-
134
-
135
-
136
-
137
-
138
-
139
-
140
-
141
-
142
-
143
-
144
-
145
-
146
-
147
-
148
-
149
-
150
-
151
-
152
-
153
-
154
-
155
-
156
-
157
-
158
-
159
-
160
-
161
-
162
-
163
-
164
-
165
-
166
-
167
-
168
-
169
-
170
-
171
-
172
-
173
-
174
-
175
-
176
-
177
-
178
-
179
-
180
-
181
-
182
-
183
-
184
-
185
-
186
-
187
-
188
-
189
-
190
 |
 |