Dell PowerEdge T710 Hardware Owner's Manual - Page 180
Turn off the system and attached peripherals, and disconnect the system, from the electrical outlet.
 |
View all Dell PowerEdge T710 manuals
Add to My Manuals
Save this manual to your list of manuals |
Page 180 highlights
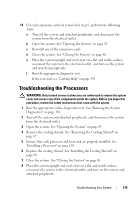
9 Run the appropriate online diagnostic test. If your system only has one processor and a problem is still indicated, see "Getting Help" on page 193. 10 For systems with multiple processors, turn off the system and attached peripherals, and disconnect the system from the electrical outlet. 11 Open the system. See "Opening the System" on page 85. 12 Remove the cooling shroud. See "Removing the Cooling Shroud" on page 87. 13 Remove all processors except for processor 1. See "Removing a Processor" on page 107. 14 Replace the cooling shroud. See "Installing the Cooling Shroud" on page 88. 15 Close the system. See "Closing the System" on page 86. 16 Place the system upright and on its feet on a flat and stable surface, reconnect the system to the electrical outlet, and turn on the system and attached peripherals. 17 Run the appropriate online diagnostic test. If the test fails, the processor is faulty. See "Getting Help" on page 193. 18 Turn off the system and attached peripherals, and disconnect the system from the electrical outlet. 19 Open the system. See "Opening the System" on page 85. 20 Remove the cooling shroud. See "Removing the Cooling Shroud" on page 87. 21 Replace processor 1 with processor 2. See "Processors" on page 107. 22 Repeat step 15 through step 17. If your system has more than two processors, continue installing and testing each processor in the processor 1 slot until you determine the faulty processor, and then replace the faulty processor. See "Getting Help" on page 193. If you have tested all the processors and the problem persists, the system board is faulty. See "Getting Help" on page 193. 180 Troubleshooting Your System
-
 1
1 -
2
-
3
-
4
-
5
-
6
-
7
-
8
-
9
-
10
-
11
-
12
-
13
-
14
-
15
-
16
-
17
-
18
-
19
-
20
-
21
-
22
-
23
-
24
-
25
-
26
-
27
-
28
-
29
-
30
-
31
-
32
-
33
-
34
-
35
-
36
-
37
-
38
-
39
-
40
-
41
-
42
-
43
-
44
-
45
-
46
-
47
-
48
-
49
-
50
-
51
-
52
-
53
-
54
-
55
-
56
-
57
-
58
-
59
-
60
-
61
-
62
-
63
-
64
-
65
-
66
-
67
-
68
-
69
-
70
-
71
-
72
-
73
-
74
-
75
-
76
-
77
-
78
-
79
-
80
-
81
-
82
-
83
-
84
-
85
-
86
-
87
-
88
-
89
-
90
-
91
-
92
-
93
-
94
-
95
-
96
-
97
-
98
-
99
-
100
-
101
-
102
-
103
-
104
-
105
-
106
-
107
-
108
-
109
-
110
-
111
-
112
-
113
-
114
-
115
-
116
-
117
-
118
-
119
-
120
-
121
-
122
-
123
-
124
-
125
-
126
-
127
-
128
-
129
-
130
-
131
-
132
-
133
-
134
-
135
-
136
-
137
-
138
-
139
-
140
-
141
-
142
-
143
-
144
-
145
-
146
-
147
-
148
-
149
-
150
-
151
-
152
-
153
-
154
-
155
-
156
-
157
-
158
-
159
-
160
-
161
-
162
-
163
-
164
-
165
-
166
-
167
-
168
-
169
-
170
-
171
-
172
-
173
-
174
-
 175
175 -
 176
176 -
 177
177 -
 178
178 -
 179
179 -
 180
180 -
 181
181 -
 182
182 -
 183
183 -
 184
184 -
 185
185 -
186
-
187
-
188
-
189
-
190
-
191
-
192
-
193
-
194
-
195
-
196
-
197
-
198
-
199
-
200
-
201
-
202
-
203
-
204
-
205
-
206
-
207
-
208
-
209
-
210
-
211
-
212
-
213
-
214
 |
 |