Dell PowerVault 100T DAT72 User's Guide - Page 22
Notice, Connecting the SAS Cable
 |
View all Dell PowerVault 100T DAT72 manuals
Add to My Manuals
Save this manual to your list of manuals |
Page 22 highlights
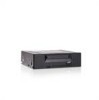
v Off the floor. v Where the tape cartridge can easily be inserted. Only the following mounting positions are supported: v In a horizontal or vertical position for external drives. v In a horizontal position for rack mounted drives. Notice: The external tape drive should not be stacked. Do not place anything on top of the unit. 2. Connecting Power An external Dell PowerVault Tape Drive will operate using any voltage in the range 100-240 volts (50-60 Hz). No adjustment is needed. To connect your drive to the power supply, proceed as follows: a. Plug the power cable securely into the socket on the rear panel of the drive. b. Plug the other end of the power cable into a grounded power outlet. c. Power on the tape drive by pressing the power on/off button. The tape drive runs the POST, which checks all hardware except the drive head. 3. Connecting the SAS Cable Attach one end of the SAS cable to the SAS host adapter card installed in the system. Attach the other end of the SAS cable to the SAS connector on the rear panel of the tape drive. The cable can be up to 5 m (16.4 ft) long. This configuration is shown in Figure 2-6. ltog2028 Figure 2-6. Connecting the SAS cable 1 System 4 2 SAS host adapter card 5 3 SAS cable Drive SAS connector Tape Drive To connect a second system to the tape drive, attach one end of the second SAS cable to the SAS host adaptor installed in the second system. Attach the other end of the second SAS cable to the other SAS port on the rear panel of the tape drive. This configuration is shown in Figure 2-7 on page 2-7. 2-6 Dell PowerVault LTO Tape Drive User's Guide
-
 1
1 -
2
-
3
-
4
-
5
-
6
-
7
-
8
-
9
-
10
-
11
-
12
-
13
-
14
-
15
-
16
-
 17
17 -
 18
18 -
 19
19 -
 20
20 -
 21
21 -
 22
22 -
 23
23 -
 24
24 -
 25
25 -
 26
26 -
 27
27 -
28
-
29
-
30
-
31
-
32
-
33
-
34
-
35
-
36
-
37
-
38
-
39
-
40
-
41
-
42
-
43
-
44
-
45
-
46
-
47
-
48
-
49
-
50
-
51
-
52
-
53
-
54
-
55
-
56
-
57
-
58
-
59
-
60
-
61
-
62
-
63
-
64
-
65
-
66
-
67
-
68
-
69
-
70
-
71
-
72
-
73
-
74
-
75
-
76
-
77
-
78
-
79
-
80
-
81
-
82
-
83
-
84
-
85
-
86
-
87
-
88
-
89
-
90
-
91
-
92
-
93
 |
 |
