Dell PowerVault 100T DAT72 User's Guide - Page 52
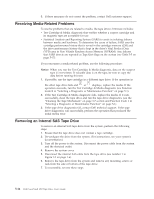
Resolving Media-Related Problems, Removing an Internal SAS Tape Drive
 |
View all Dell PowerVault 100T DAT72 manuals
Add to My Manuals
Save this manual to your list of manuals |
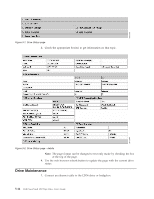
Page 52 highlights
3. If these measures do not correct the problem, contact Dell customer support. Resolving Media-Related Problems To resolve problems that are related to media, the tape drive's firmware includes: v Test Cartridge & Media diagnostic that verifies whether a suspect cartridge and its magnetic tape are acceptable for use. v Statistical Analysis and Reporting System (SARS) to assist in isolating failures between media and hardware. To determine the cause of failure, SARS uses the cartridge performance history that is saved in the cartridge memory (CM) and the drive performance history that is kept in the drive's Vital Product Data (VPD) area in Non Volatile Random Access Memory (NVRAM). Any failures that SARS detects are reported as TapeAlert flags on the system (see Table 5-5 on page 5-17). If you encounter a media-related problem, use the following procedure: Notice: When you run the Test Cartridge & Media diagnostic, data on the suspect tape is overwritten. If valuable data is on the tape, be sure to copy the data before running this test. 1. If possible, run the tape cartridge in a different tape drive. If the operation in the other tape drive fails and 6 or 7 displays, replace the media. If the operation succeeds, run the Test Cartridge & Media diagnostic (see Function Code E in "Selecting a Diagnostic or Maintenance Function" on page 5-1). 2. If the Test Cartridge & Media diagnostic fails, replace the media. If it runs successfully, clean the tape drive and run the tape drive diagnostics (see the "Cleaning the Tape Mechanism" on page 3-7 section and Function Code 1 in "Selecting a Diagnostic or Maintenance Function" on page 5-1). 3. If the tape drive diagnostics fail, contact Dell technical support. If the tape drive diagnostics run successfully, perform the operation that produced the initial media error. Removing an Internal SAS Tape Drive To remove an internal SAS tape drive from the system, perform the following steps: 1. Ensure that the tape drive does not contain a tape cartridge. 2. De-configure the drive from the system. (For instructions, see your system's documentation.) 3. Turn off the power to the system. Disconnect the power cable from the system and the electrical outlet. 4. Remove the system cover. 5. Disconnect the internal SAS cable from the tape drive (see number 1 in Figure 1-5 on page 1-6). 6. Remove the tape drive from the system and remove any mounting screws or rails from the side or bottom of the tape drive. 7. To reassemble, reverse these steps. 5-16 Dell PowerVault LTO Tape Drive User's Guide
-
 1
1 -
2
-
3
-
4
-
5
-
6
-
7
-
8
-
9
-
10
-
11
-
12
-
13
-
14
-
15
-
16
-
17
-
18
-
19
-
20
-
21
-
22
-
23
-
24
-
25
-
26
-
27
-
28
-
29
-
30
-
31
-
32
-
33
-
34
-
35
-
36
-
37
-
38
-
39
-
40
-
41
-
42
-
43
-
44
-
45
-
46
-
 47
47 -
 48
48 -
 49
49 -
 50
50 -
 51
51 -
 52
52 -
 53
53 -
 54
54 -
 55
55 -
 56
56 -
 57
57 -
58
-
59
-
60
-
61
-
62
-
63
-
64
-
65
-
66
-
67
-
68
-
69
-
70
-
71
-
72
-
73
-
74
-
75
-
76
-
77
-
78
-
79
-
80
-
81
-
82
-
83
-
84
-
85
-
86
-
87
-
88
-
89
-
90
-
91
-
92
-
93
 |
 |