Dell S3048-ON Networking S3048–ON Getting Started Guide - Page 16
Installing a Fan Module
 |
View all Dell S3048-ON manuals
Add to My Manuals
Save this manual to your list of manuals |
Page 16 highlights
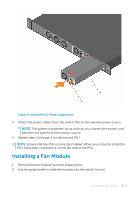
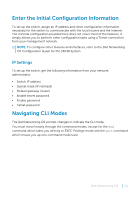
Figure 8. Install the AC Power Supply Unit 4 Attach the power cables from the switch PSU to the external power source. NOTE: The system is powered-up as soon as you connect the power cord between the system and the power source. 5 Repeat steps 1 through 3 for the second PSU. NOTE: Ensure that the PSU is correctly installed. When you correctly install the PSU, the power connector is on the left side of the PSU. Installing a Fan Module 1 Remove the fan module from the shipping box. 2 Use the grab handle to slide the module into the switch fan slot. Install the Hardware 16
-
 1
1 -
2
-
3
-
4
-
5
-
6
-
7
-
8
-
9
-
10
-
 11
11 -
 12
12 -
 13
13 -
 14
14 -
 15
15 -
 16
16 -
 17
17 -
 18
18 -
 19
19 -
 20
20 -
 21
21 -
22
-
23
-
24
-
25
-
26
-
27
-
28
-
29
-
30
-
31
 |
 |

Figure 8. Install the AC Power Supply Unit
4
Attach the power cables from the switch PSU to the external power source.
NOTE:
The system is powered-up as soon as you connect the power cord
between the system and the power source.
5
Repeat steps 1 through 3 for the second PSU.
NOTE:
Ensure that the PSU is correctly installed. When you correctly install the
PSU, the power connector is on the left side of the PSU.
Installing a Fan Module
1
Remove the fan module from the shipping box.
2
Use the grab handle to slide the module into the switch fan slot.
Install the Hardware
16