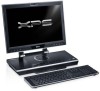
Dell XPS M2010 MXP061 XPS M2010 Owners Manual - Page 11
Using a Battery
 |
View all Dell XPS M2010 MXP061 manuals
Add to My Manuals
Save this manual to your list of manuals |
Page 11 highlights
Back to Contents Page Using a Battery Dell™ XPS™ M2010 Owner's Manual Replacing the Battery Battery Performance Checking the Battery Charge Charging the Battery Conserving Battery Power Storing a Battery Power Management Modes Configuring Power Management Settings Replacing the Battery CAUTION: Using an incompatible battery may increase the risk of fire or explosion. Replace the battery only with a compatible battery purchased from Dell. The battery is designed to work with your Dell™ computer. Do not use a battery from other computers with your computer. CAUTION: Before performing these procedures, turn off the computer, disconnect the AC adapter from the electrical outlet and the computer, disconnect the modem from the wall connector and computer, and remove any other external cables from the computer. NOTICE: You must remove all external cables from the computer to avoid possible connector damage. NOTE: The Service Tag label is located inside the battery compartment of your computer. Inserting the Battery 1. Ensure the keyboard is securely attached and the display is closed and latched before turning the computer over. See Closing the Display Panel. Then place the computer upside down on a clean flat surface. 2. Push the latch release button (#1) on the battery to open the battery access door. 3. Insert the battery straight down into the battery compartment with the battery access door in the open position. 4. Slide the battery in the direction of the #1 arrow until it snaps into place.
-
 1
1 -
2
-
3
-
4
-
5
-
 6
6 -
 7
7 -
 8
8 -
 9
9 -
 10
10 -
 11
11 -
 12
12 -
 13
13 -
 14
14 -
 15
15 -
 16
16 -
17
-
18
-
19
-
20
-
21
-
22
-
23
-
24
-
25
-
26
-
27
-
28
-
29
-
30
-
31
-
32
-
33
-
34
-
35
-
36
-
37
-
38
-
39
-
40
-
41
-
42
-
43
-
44
-
45
-
46
-
47
-
48
-
49
-
50
-
51
-
52
-
53
-
54
-
55
-
56
-
57
-
58
-
59
-
60
-
61
-
62
-
63
-
64
-
65
-
66
-
67
-
68
-
69
-
70
-
71
-
72
-
73
-
74
-
75
-
76
-
77
-
78
-
79
-
80
-
81
-
82
-
83
-
84
-
85
-
86
-
87
-
88
-
89
-
90
-
91
-
92
-
93
-
94
-
95
-
96
-
97
-
98
-
99
-
100
-
101
-
102
-
103
-
104
-
105
-
106
-
107
-
108
-
109
-
110
-
111
-
112
-
113
-
114
-
115
-
116
 |
 |
