Epson 1520 User Manual - Epson Stylus RIP Mac & PC - Page 46
For Windows 95/98/NT, once the EPSON Stylus RIP Installer - drivers
 |
UPC - 010343813328
View all Epson 1520 manuals
Add to My Manuals
Save this manual to your list of manuals |
Page 46 highlights
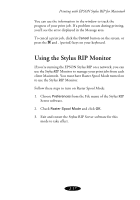
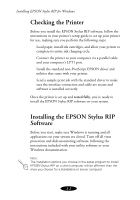
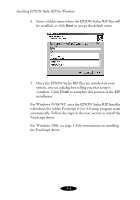
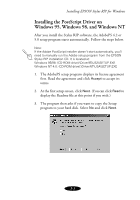
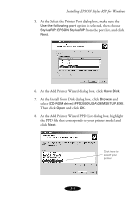
Installing EPSON Stylus RIP for Windows 4. Enter a folder name where the EPSON Stylus RIP files will be installed, or click Next to accept the default name. 5. Once the EPSON Stylus RIP files are installed on your system, you see a dialog box telling you that setup is complete. Click Finish to complete this portion of the RIP installation. For Windows 95/98/NT, once the EPSON Stylus RIP Installer is finished, the Adobe PostScript 4.2 or 5.0 setup program starts automatically. Follow the steps in the next section to install the PostScript driver. For Windows 2000, see page 3-8 for instructions on installing the PostScript driver. 3-4
-
 1
1 -
2
-
3
-
4
-
5
-
6
-
7
-
8
-
9
-
10
-
11
-
12
-
13
-
14
-
15
-
16
-
17
-
18
-
19
-
20
-
21
-
22
-
23
-
24
-
25
-
26
-
27
-
28
-
29
-
30
-
31
-
32
-
33
-
34
-
35
-
36
-
37
-
38
-
39
-
40
-
 41
41 -
 42
42 -
 43
43 -
 44
44 -
 45
45 -
 46
46 -
 47
47 -
 48
48 -
 49
49 -
 50
50 -
 51
51 -
52
-
53
-
54
-
55
-
56
-
57
-
58
-
59
-
60
-
61
-
62
-
63
-
64
-
65
-
66
-
67
-
68
-
69
-
70
-
71
-
72
-
73
-
74
-
75
-
76
-
77
-
78
-
79
 |
 |

3-4
Installing EPSON Stylus RIP for Windows
4.
Enter a folder name where the EPSON Stylus RIP files will
be installed, or click
Next
to accept the default name.
5.
Once the EPSON Stylus RIP files are installed on your
system, you see a dialog box telling you that setup is
complete. Click
Finish
to complete this portion of the RIP
installation.
For Windows 95/98/NT, once the EPSON Stylus RIP Installer
is finished, the Adobe PostScript 4.2 or 5.0 setup program starts
automatically. Follow the steps in the next section to install the
PostScript driver.
For Windows 2000, see page 3-8 for instructions on installing
the PostScript driver.