Epson 1520 User Manual - Epson Stylus RIP Mac & PC - Page 54
Connecting the Client Computers, Color Matching, During the EPSON Stylus RIP installation - stylus color test page
 |
UPC - 010343813328
View all Epson 1520 manuals
Add to My Manuals
Save this manual to your list of manuals |
Page 54 highlights
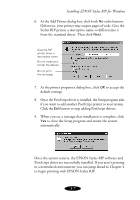
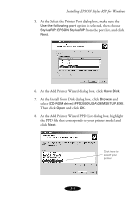
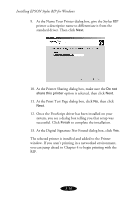
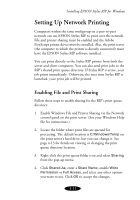
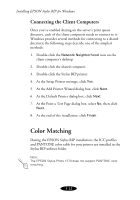
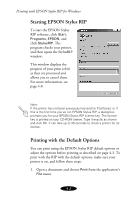
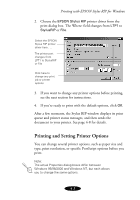
Installing EPSON Stylus RIP for Windows Connecting the Client Computers Once you've enabled sharing on the server's print queue directory, each of the client computers needs to connect to it. Windows provides several methods for connecting to a shared directory; the following steps describe one of the simplest methods: 1. Double-click the Network Neighborhood icon on the client computer's desktop. 2. Double-click the shared computer. 3. Double-click the Stylus RIP printer. 4. At the Setup Printer message, click Yes. 5. At the Add Printer Wizard dialog box, click Next. 6. At the Default Printer dialog box, click Next. 7. At the Print a Test Page dialog box, select No, then click Next. 8. At the end of the installation, click Finish. Color Matching During the EPSON Stylus RIP installation, the ICC profiles and PANTONE color table for your printer are installed in the Stylus RIP utilities folder. Note: The EPSON Stylus Photo 1270 does not support PANTONE color matching. 3-12
-
 1
1 -
2
-
3
-
4
-
5
-
6
-
7
-
8
-
9
-
10
-
11
-
12
-
13
-
14
-
15
-
16
-
17
-
18
-
19
-
20
-
21
-
22
-
23
-
24
-
25
-
26
-
27
-
28
-
29
-
30
-
31
-
32
-
33
-
34
-
35
-
36
-
37
-
38
-
39
-
40
-
41
-
42
-
43
-
44
-
45
-
46
-
47
-
48
-
 49
49 -
 50
50 -
 51
51 -
 52
52 -
 53
53 -
 54
54 -
 55
55 -
 56
56 -
 57
57 -
 58
58 -
 59
59 -
60
-
61
-
62
-
63
-
64
-
65
-
66
-
67
-
68
-
69
-
70
-
71
-
72
-
73
-
74
-
75
-
76
-
77
-
78
-
79
 |
 |
