Epson C31CA85090 Reference Guide - Page 88
Memory Switch Setting Mode, After the printing has been completed, press the Feed button for more
 |
View all Epson C31CA85090 manuals
Add to My Manuals
Save this manual to your list of manuals |
Page 88 highlights
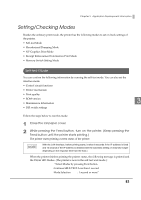
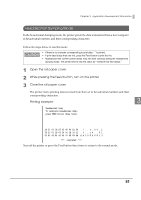
Memory Switch Setting Mode You can configure the memory switches (customized values) of the printer. • Print density • Communication conditions using a serial interface • Auto reduction of the amount of paper to use • Autocutting of paper while the cover is closed • Paper width • Default value of character code page/international character set • Auto replacement of font • Selection of an interface • Selection of USB class • Power supply capacity For detailed information about memory switches (customized value), see "Setting the Memory Switches (Customized Value)" on page 48. Follow the steps below to run this mode. 1 Close the roll paper cover. 2 Turn on the printer while pressing the Feed button. The printer prints current status of the printer. 3 After the printing has been completed, press the Feed button for more than one second. The printer starts printing instructions. 4 After the printing has been completed, press the Feed button three times. 5 Then press the Feed button for more than one second. The printer starts printing instructions. After one setting has been completed, the printer stores the setting and then starts initializing. After that, the printer returns to the normal mode. 88
-
 1
1 -
2
-
3
-
4
-
5
-
6
-
7
-
8
-
9
-
10
-
11
-
12
-
13
-
14
-
15
-
16
-
17
-
18
-
19
-
20
-
21
-
22
-
23
-
24
-
25
-
26
-
27
-
28
-
29
-
30
-
31
-
32
-
33
-
34
-
35
-
36
-
37
-
38
-
39
-
40
-
41
-
42
-
43
-
44
-
45
-
46
-
47
-
48
-
49
-
50
-
51
-
52
-
53
-
54
-
55
-
56
-
57
-
58
-
59
-
60
-
61
-
62
-
63
-
64
-
65
-
66
-
67
-
68
-
69
-
70
-
71
-
72
-
73
-
74
-
75
-
76
-
77
-
78
-
79
-
80
-
81
-
82
-
 83
83 -
 84
84 -
 85
85 -
 86
86 -
 87
87 -
 88
88 -
 89
89 -
 90
90 -
 91
91 -
 92
92 -
 93
93 -
94
-
95
-
96
-
97
-
98
-
99
-
100
-
101
-
102
-
103
-
104
-
105
-
106
-
107
-
108
-
109
-
110
-
111
-
112
-
113
-
114
-
115
-
116
-
117
-
118
-
119
-
120
-
121
-
122
-
123
-
124
-
125
-
126
-
127
-
128
-
129
-
130
-
131
-
132
-
133
-
134
-
135
-
136
-
137
-
138
-
139
-
140
-
141
-
142
-
143
-
144
-
145
-
146
-
147
-
148
-
149
-
150
-
151
-
152
-
153
-
154
-
155
-
156
-
157
-
158
 |
 |
