Epson Equity II User Manual - Page 15
Removing the disk drive protector sheet, The Back Panel
 |
View all Epson Equity II manuals
Add to My Manuals
Save this manual to your list of manuals |
Page 15 highlights
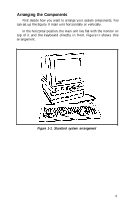
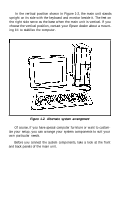
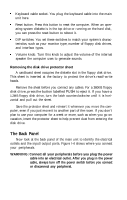
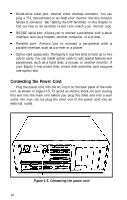
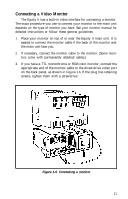
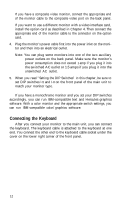
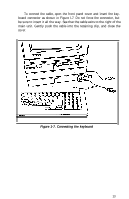
Keyboard cable socket. You plug the keyboard cable into the main unit here. Reset button. Press this button to reset the computer. When an operating system diskette is in the top drive or running on the hard disk, you can press the reset button to reboot it. DIP switches. You set these switches to match your system's characteristics, such as your monitor type, number of floppy disk drives, and interface types. Volume knob. Turn this knob to adjust the volume of the internal speaker the computer uses to generate sounds. Removing the disk drive protector sheet A cardboard sheet occupies the diskette slot in the floppy disk drive. This sheet is inserted at the factory to protect the drive's read/write heads. Remove the sheet before you connect any cables. For a 360KB floppy disk drive, press the button labelled PUSH to eject it. If you have a 1.2MB floppy disk drive, turn the latch counterclockwise until it is horizontal and pull out the sheet. Save the protector sheet and reinsert it whenever you move the computer, even if you just move it to another part of the room. If you don't plan to use your computer for a week or more, such as when you go on vacation, insert the protector sheet to help prevent dust from entering the disk drive. The Back Panel Now look at the back panel of the main unit to identify the electrical outlets and the input/output ports. Figure l-4 shows where you connect your peripherals. WARNING: Connect all your peripherals before you plug the power cable into an electrical outlet. After you plug in the power cable, always turn off the power switch before you connect or disconnect any peripheral.
-
 1
1 -
2
-
3
-
4
-
5
-
6
-
7
-
8
-
9
-
 10
10 -
 11
11 -
 12
12 -
 13
13 -
 14
14 -
 15
15 -
 16
16 -
 17
17 -
 18
18 -
 19
19 -
 20
20 -
21
-
22
-
23
-
24
-
25
-
26
-
27
-
28
-
29
-
30
-
31
-
32
-
33
-
34
-
35
-
36
-
37
-
38
-
39
-
40
-
41
-
42
-
43
-
44
-
45
-
46
-
47
-
48
-
49
-
50
-
51
-
52
-
53
-
54
-
55
-
56
-
57
-
58
-
59
-
60
-
61
-
62
-
63
-
64
-
65
-
66
-
67
-
68
-
69
-
70
-
71
-
72
-
73
-
74
-
75
-
76
-
77
-
78
-
79
 |
 |
