Epson Equity II User Manual - Page 24
Setting the DIP Switches, Location, DIP switches
 |
View all Epson Equity II manuals
Add to My Manuals
Save this manual to your list of manuals |
Page 24 highlights
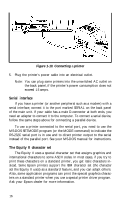
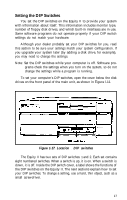
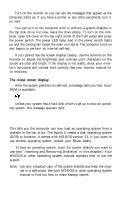
Setting the DIP Switches You set the DIP switches on the Equity II to provide your system with information about itself. This information includes monitor type, number of floppy disk drives, and which built-in interfaces are in use. Some software programs do not operate properly if your DIP switch settings do not match your hardware. Although your dealer probably set your DIP switches for you, read this section to be sure your settings match your system configuration. If you upgrade your system later (by adding a disk drive, for example), you may need to change the settings. Note: Set the DIP switches while your computer is off. Software pro- grams check the settings when you turn on the system, so do not change the settings while a program is running. To set your computer's DIP switches, open the cover below the disk drives on the front panel of the main unit, as shown in Figure l-11. Figure 1-17. Location of DIP switches The Equity II has two sets of DIP switches: 1 and 2. Each set contains eight numbered switches. When a switch is up, it is on. When a switch is down, it is off. Inside the DIP switch cover, a label shows the functions of the DIP switches on the Equity II. The next sections explain how to set your DIP switches. To change a setting, use a hard, thin object, such as a small screwdriver. 17
-
 1
1 -
2
-
3
-
4
-
5
-
6
-
7
-
8
-
9
-
10
-
11
-
12
-
13
-
14
-
15
-
16
-
17
-
18
-
 19
19 -
 20
20 -
 21
21 -
 22
22 -
 23
23 -
 24
24 -
 25
25 -
 26
26 -
 27
27 -
 28
28 -
 29
29 -
30
-
31
-
32
-
33
-
34
-
35
-
36
-
37
-
38
-
39
-
40
-
41
-
42
-
43
-
44
-
45
-
46
-
47
-
48
-
49
-
50
-
51
-
52
-
53
-
54
-
55
-
56
-
57
-
58
-
59
-
60
-
61
-
62
-
63
-
64
-
65
-
66
-
67
-
68
-
69
-
70
-
71
-
72
-
73
-
74
-
75
-
76
-
77
-
78
-
79
 |
 |
