Epson LX-300II User's Guide - Page 15
Paper Handling, Printing on Continuous Paper, Printing with the push tractor
 |
View all Epson LX-300II manuals
Add to My Manuals
Save this manual to your list of manuals |
Page 15 highlights
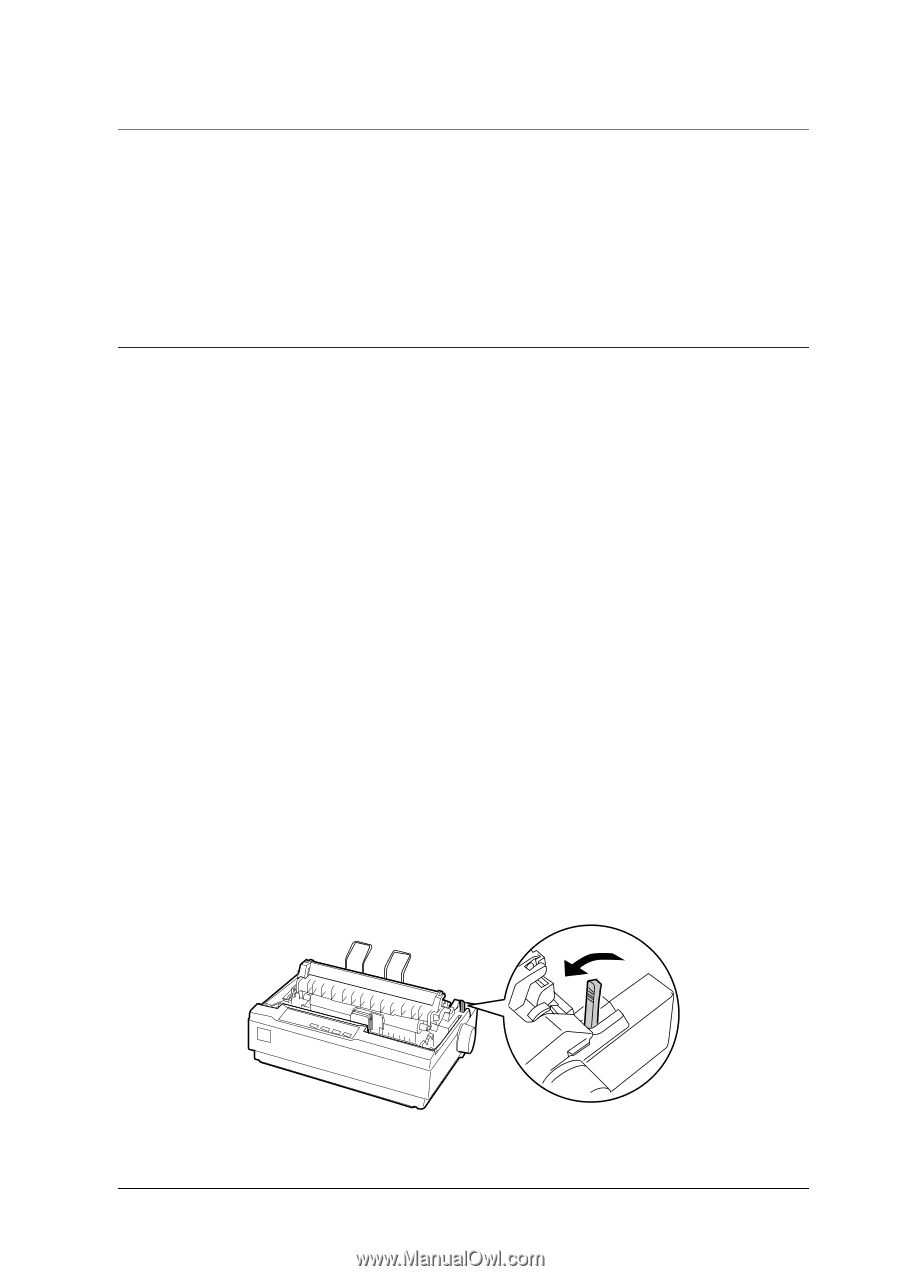
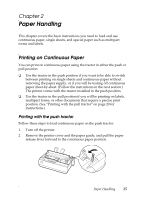
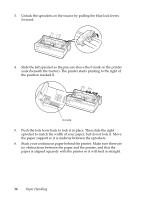
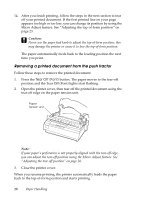
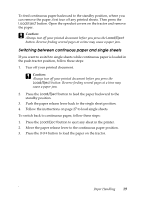
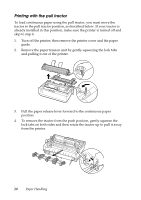
Chapter 2 Paper Handling This chapter covers the basic instructions you need to load and use continuous paper, single sheets, and special paper such as multipart forms and labels. Printing on Continuous Paper You can print on continuous paper using the tractor in either the push or pull position: ❏ Use the tractor in the push position if you want to be able to switch between printing on single sheets and continuous paper without removing the paper supply, or if you will be tearing off continuous paper sheet-by-sheet. (Follow the instructions in the next section.) The printer comes with the tractor installed in the push position. ❏ Use the tractor in the pull position if you will be printing on labels, multipart forms, or other documents that require a precise print position. (See "Printing with the pull tractor" on page 20 for instructions.) Printing with the push tractor Follow these steps to load continuous paper on the push tractor: 1. Turn off the printer. 2. Remove the printer cover and the paper guide, and pull the paper release lever forward to the continuous paper position. Paper Handling 15
-
 1
1 -
2
-
3
-
4
-
5
-
6
-
7
-
8
-
9
-
 10
10 -
 11
11 -
 12
12 -
 13
13 -
 14
14 -
 15
15 -
 16
16 -
 17
17 -
 18
18 -
 19
19 -
 20
20 -
21
-
22
-
23
-
24
-
25
-
26
-
27
-
28
-
29
-
30
-
31
-
32
-
33
-
34
-
35
-
36
-
37
-
38
-
39
-
40
-
41
-
42
-
43
-
44
-
45
-
46
-
47
-
48
-
49
-
50
 |
 |