Epson LX-300II User's Guide - Page 16
sprocket to match the width of your paper, but do not lock it. Move
 |
View all Epson LX-300II manuals
Add to My Manuals
Save this manual to your list of manuals |
Page 16 highlights
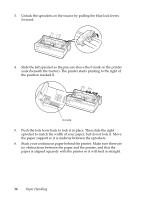
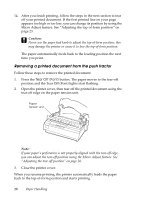
3. Unlock the sprockets on the tractor by pulling the blue lock levers forward. 4. Slide the left sprocket so the pins are above the 0 mark on the printer scale (beneath the tractor). The printer starts printing to the right of the position marked 0. 0 mark 5. Push the lock lever back to lock it in place. Then slide the right sprocket to match the width of your paper, but do not lock it. Move the paper support so it is midway between the sprockets. 6. Stack your continuous paper behind the printer. Make sure there are no obstructions between the paper and the printer, and that the paper is aligned squarely with the printer so it will feed in straight. 16 Paper Handling
-
 1
1 -
2
-
3
-
4
-
5
-
6
-
7
-
8
-
9
-
10
-
 11
11 -
 12
12 -
 13
13 -
 14
14 -
 15
15 -
 16
16 -
 17
17 -
 18
18 -
 19
19 -
 20
20 -
 21
21 -
22
-
23
-
24
-
25
-
26
-
27
-
28
-
29
-
30
-
31
-
32
-
33
-
34
-
35
-
36
-
37
-
38
-
39
-
40
-
41
-
42
-
43
-
44
-
45
-
46
-
47
-
48
-
49
-
50
 |
 |
16
Paper Handling
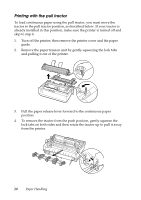
3.
Unlock the sprockets on the tractor by pulling the blue lock levers
forward.
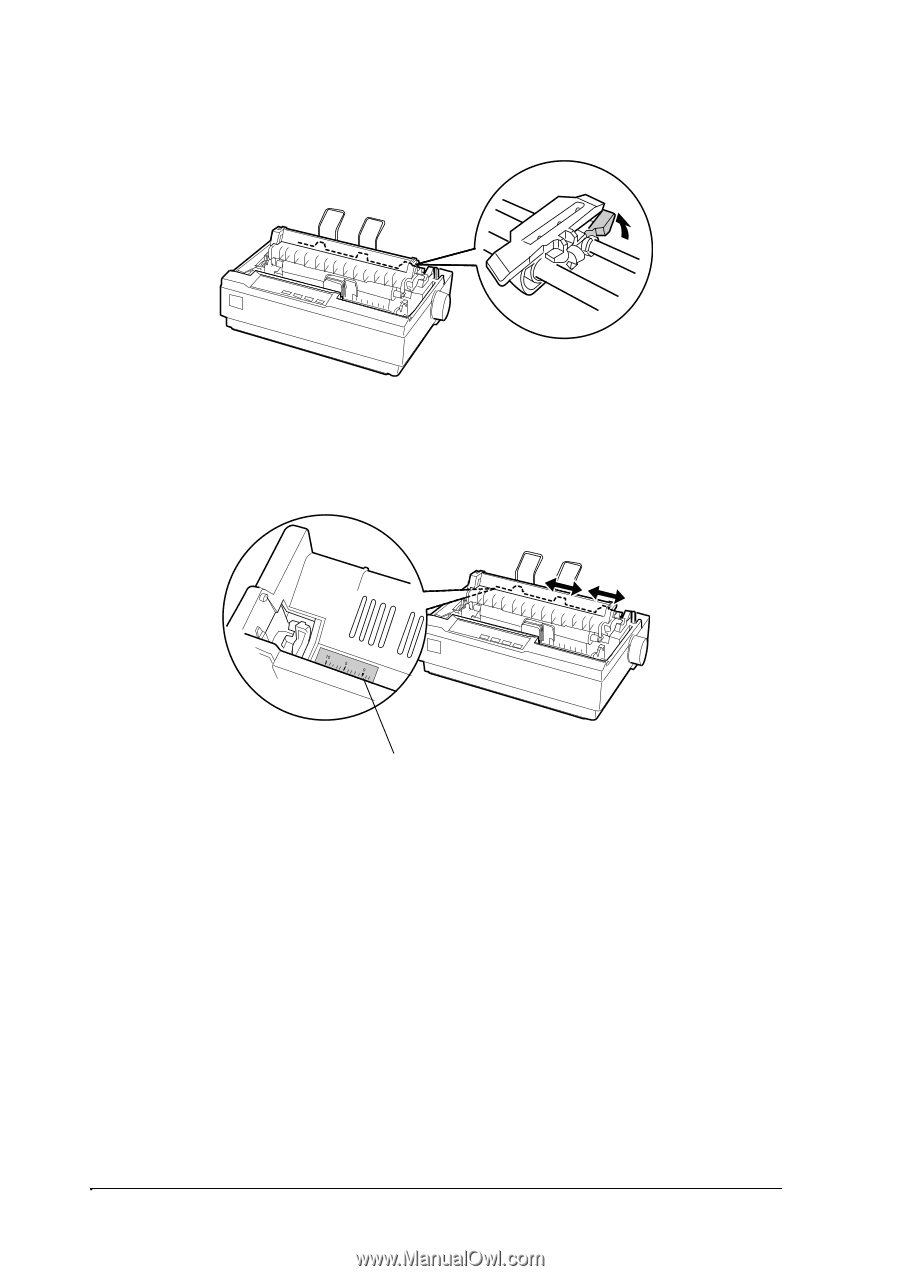
4.
Slide the left sprocket so the pins are above the 0 mark on the printer
scale (beneath the tractor). The printer starts printing to the right of
the position marked
0
.
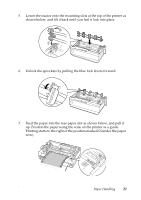
5.
Push the lock lever back to lock it in place. Then slide the right
sprocket to match the width of your paper, but do not lock it. Move
the paper support so it is midway between the sprockets.
6.
Stack your continuous paper behind the printer. Make sure there are
no obstructions between the paper and the printer, and that the
paper is aligned squarely with the printer so it will feed in straight.
0 mark