Epson Stylus Pro 7900 Proofing Edition Setup Guide ( Epson SpectroProofer &tra - Page 13
Insert the calibration tile into the holder. Remove the cover on the back
 |
View all Epson Stylus Pro 7900 Proofing Edition manuals
Add to My Manuals
Save this manual to your list of manuals |
Page 13 highlights
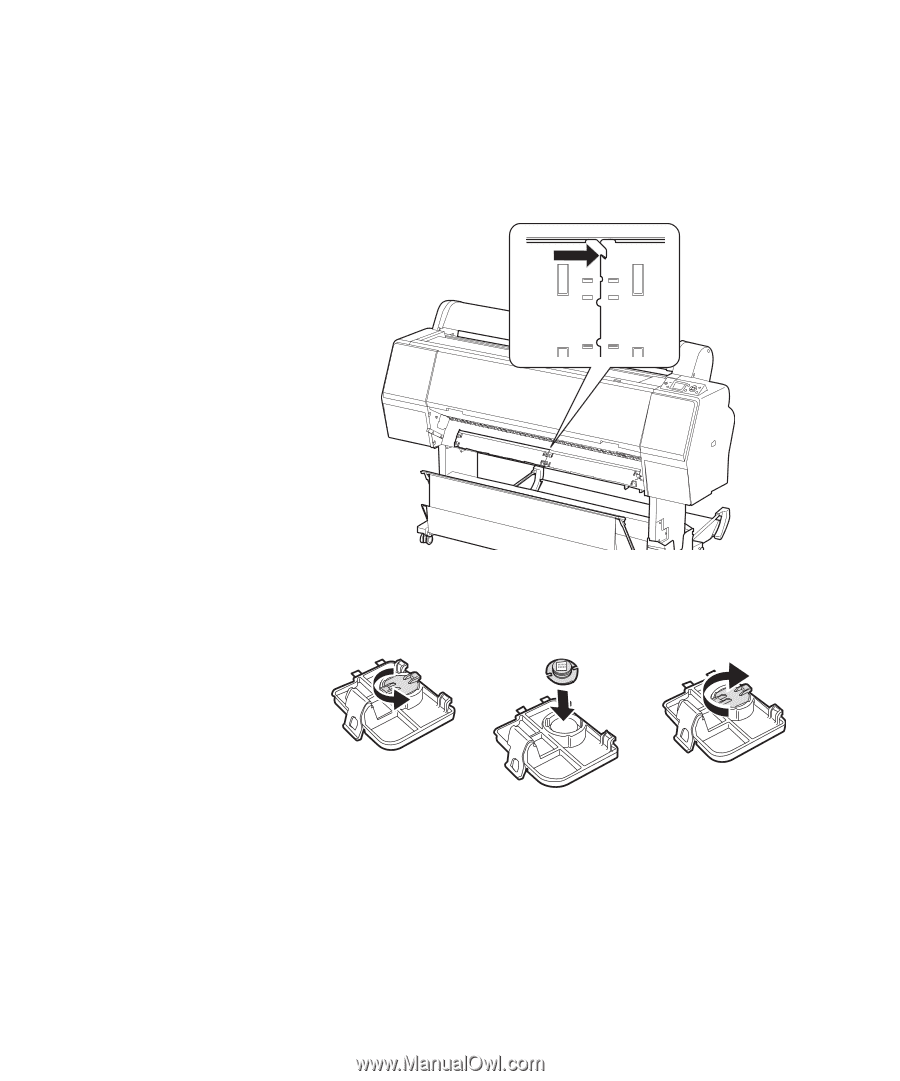
Setting Up the SpectroProofer | 13 For the 44" model, attach the first backing plate on the right side of the printer, then attach the second backing plate to its left. Make sure the plates hook together as shown. Ensure that both plates rest flush against the printer and don't move when you try to slide them. Caution: Do not touch the white surface of the tile. 5. Insert the calibration tile into the holder. Remove the cover on the back of the holder by rotating it. Drop in the tile with its white surface face-down. Replace the cover. 13
-
 1
1 -
2
-
3
-
4
-
5
-
6
-
7
-
 8
8 -
 9
9 -
 10
10 -
 11
11 -
 12
12 -
 13
13 -
 14
14 -
 15
15 -
 16
16 -
 17
17 -
 18
18 -
19
-
20
-
21
-
22
-
23
-
24
-
25
-
26
-
27
-
28
-
29
-
30
-
31
-
32
-
33
-
34
-
35
-
36
 |
 |
13
Setting Up the SpectroProofer
|
13
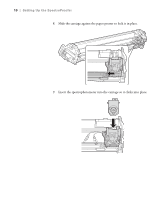
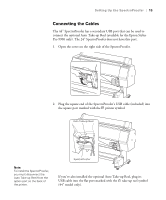
For the 44" model, attach the first backing plate on the right side of the
printer, then attach the second backing plate to its left. Make sure the
plates hook together as shown. Ensure that both plates rest flush against
the printer and don’t move when you try to slide them.
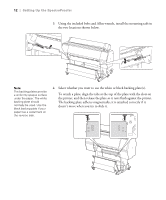
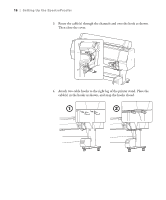
5.
Insert the calibration tile into the holder. Remove the cover on the back
of the holder by rotating it. Drop in the tile with its white surface
face-down. Replace the cover.
Caution:
Do not touch the white
surface of the tile.