Epson Stylus Pro 7900 Proofing Edition Setup Guide ( Epson SpectroProofer &tra - Page 15
Connecting the Cables, printer symbol.
 |
View all Epson Stylus Pro 7900 Proofing Edition manuals
Add to My Manuals
Save this manual to your list of manuals |
Page 15 highlights
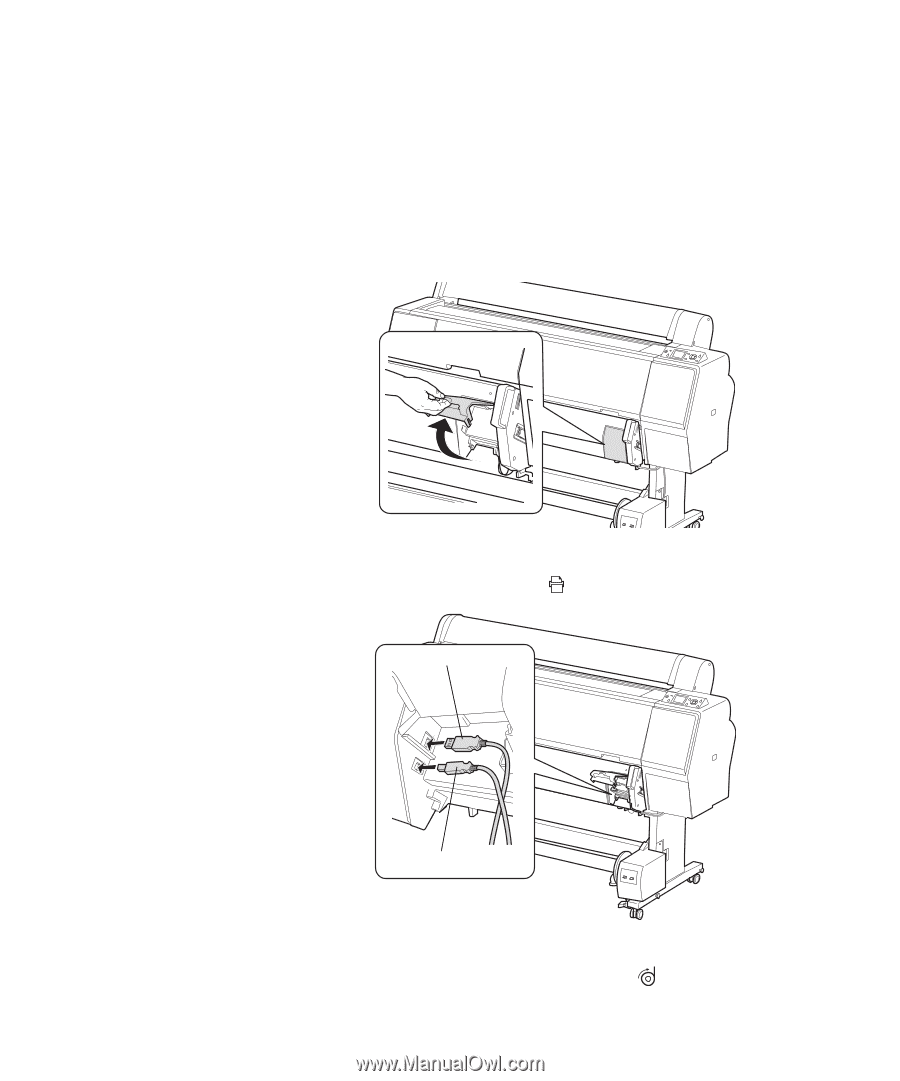
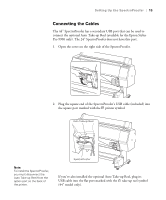
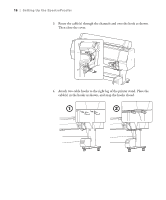
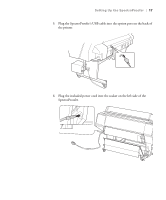
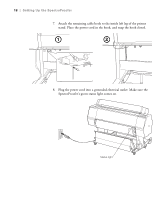
Setting Up the SpectroProofer | 15 Connecting the Cables The 44" SpectroProofer has a secondary USB port that can be used to connect the optional Auto Take-up Reel (available for the Epson Stylus Pro 9900 only). The 24" SpectroProofer does not have this port. 1. Open the cover on the right side of the SpectroProofer. 2. Plug the square end of the SpectroProofer's USB cable (included) into the square port marked with the printer symbol. Auto Take-up Reel Note: To install the SpectroProofer, you must disconnect the Auto Take-up Reel from the option port on the back of the printer. SpectroProofer If you've also installed the optional Auto Take-up Reel, plug its USB cable into the flat port marked with the take-up reel symbol (44" model only). 15
-
 1
1 -
2
-
3
-
4
-
5
-
6
-
7
-
8
-
9
-
 10
10 -
 11
11 -
 12
12 -
 13
13 -
 14
14 -
 15
15 -
 16
16 -
 17
17 -
 18
18 -
 19
19 -
 20
20 -
21
-
22
-
23
-
24
-
25
-
26
-
27
-
28
-
29
-
30
-
31
-
32
-
33
-
34
-
35
-
36
 |
 |