Epson Stylus Pro 7900 Proofing Edition Setup Guide ( Epson SpectroProofer &tra - Page 7
Unpacking and Assembly
 |
View all Epson Stylus Pro 7900 Proofing Edition manuals
Add to My Manuals
Save this manual to your list of manuals |
Page 7 highlights
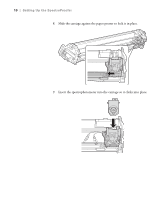
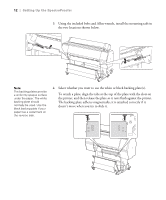
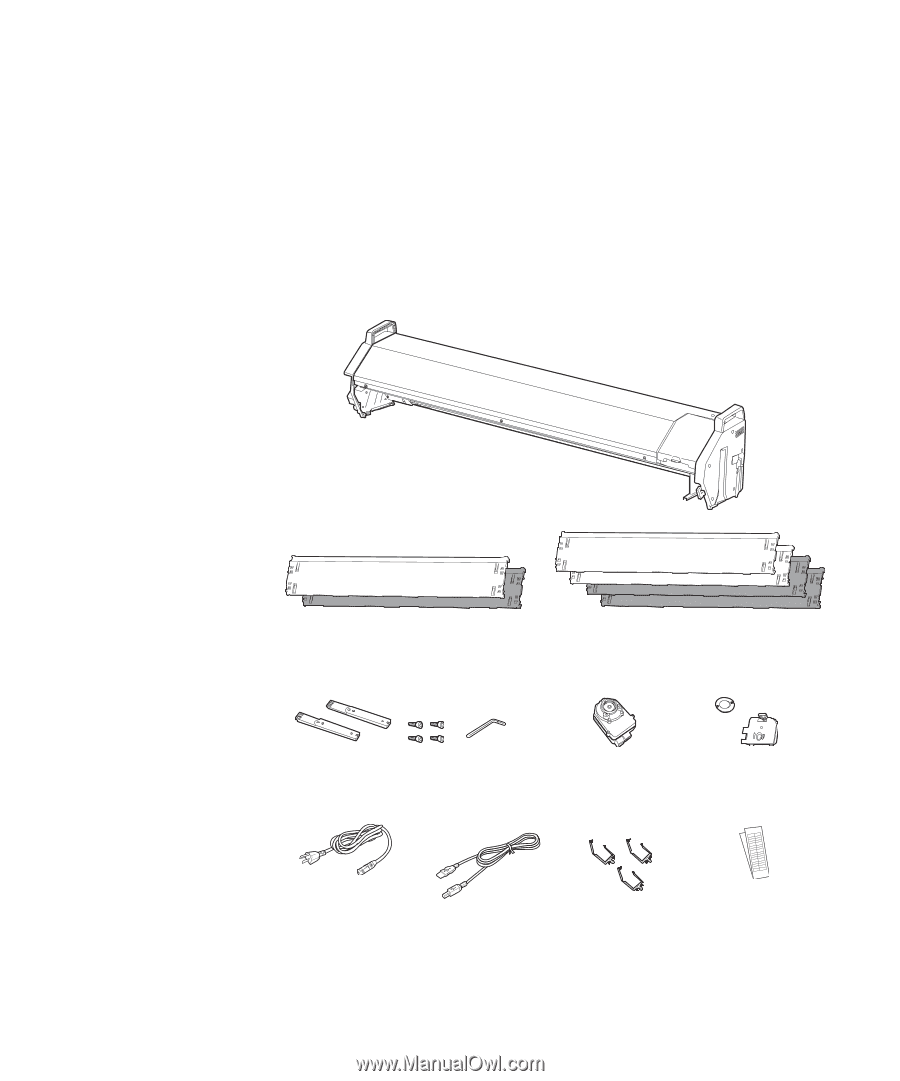
7 Setting Up the Follow the steps in this section to install the SpectroProofer in your printer. SpectroProofer Before using the SpectroProofer for the first time, you must also initialize it as described on page 19. Unpacking and Assembly 1. Unpack the SpectroProofer and make sure you have all the parts shown below: Note: The 44" model is shown. These instructions also apply to the 24" model. Save the original box and packing materials in case you need to ship the equipment. SpectroProofer main unit Backing plates (24" kit) OR Backing plates (44" kit) Mounting rails, bolts, and Allen wrench Spectrophotometer Calibration tile (ILS20EP or ILS20EPUV) and holder Power cord (varies by region) USB cable Cable hooks Calibration strip 7
-
 1
1 -
 2
2 -
 3
3 -
 4
4 -
 5
5 -
 6
6 -
 7
7 -
 8
8 -
 9
9 -
 10
10 -
 11
11 -
 12
12 -
13
-
14
-
15
-
16
-
17
-
18
-
19
-
20
-
21
-
22
-
23
-
24
-
25
-
26
-
27
-
28
-
29
-
30
-
31
-
32
-
33
-
34
-
35
-
36
 |
 |
7
7
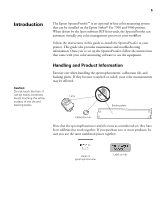
Follow the steps in this section to install the SpectroProofer in your printer.
Before using the SpectroProofer for the first time, you must also initialize it
as described on page 19.
Unpacking and Assembly
1.
Unpack the SpectroProofer and make sure you have all the parts shown
below:
Setting Up the
SpectroProofer
Note:
The 44" model is shown.
These instructions also
apply to the 24" model.
Save the original box and
packing materials in case
you need to ship the
equipment.
SpectroProofer
main unit
Backing plates
(24" kit)
Backing plates
(44" kit)
Mounting rails, bolts, and Allen wrench
Spectrophotometer
(ILS20EP or ILS20EPUV)
Calibration tile
and holder
Power cord
(varies by region)
USB cable
Cable hooks
OR
Calibration
strip