Epson XP-8500 Users Guide - Page 250
Paper Jam Problems in the Rear Cover, Solving Paper Problems, Paper Jam Problems Inside the Product
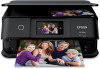 |
View all Epson XP-8500 manuals
Add to My Manuals
Save this manual to your list of manuals |
Page 250 highlights
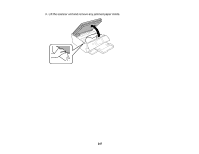
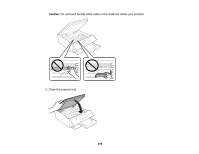
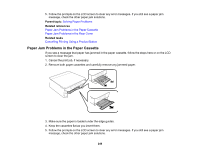
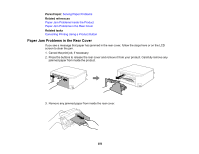
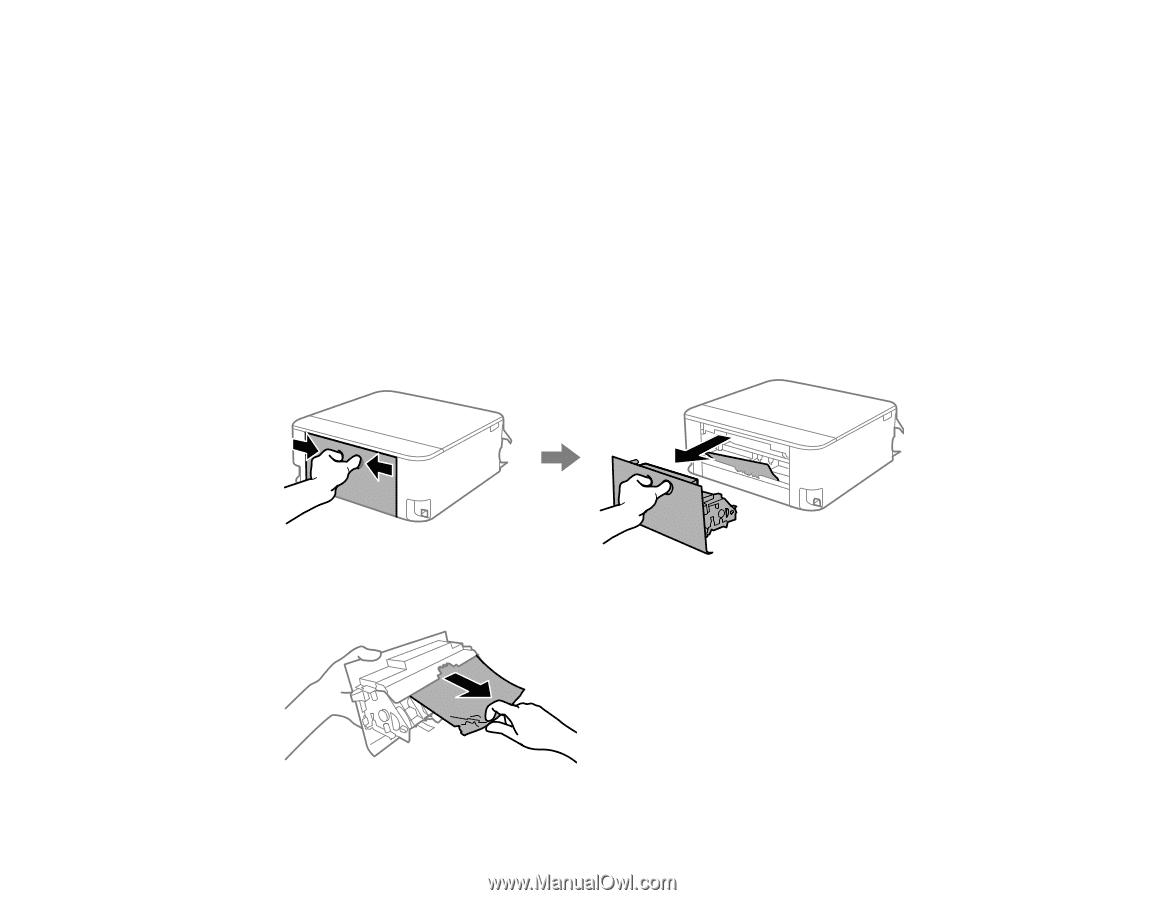
Parent topic: Solving Paper Problems Related references Paper Jam Problems Inside the Product Paper Jam Problems in the Rear Cover Related tasks Cancelling Printing Using a Product Button Paper Jam Problems in the Rear Cover If you see a message that paper has jammed in the rear cover, follow the steps here or on the LCD screen to clear the jam. 1. Cancel the print job, if necessary. 2. Press the buttons to release the rear cover and remove it from your product. Carefully remove any jammed paper from inside the product. 3. Remove any jammed paper from inside the rear cover. 250
-
 1
1 -
2
-
3
-
4
-
5
-
6
-
7
-
8
-
9
-
10
-
11
-
12
-
13
-
14
-
15
-
16
-
17
-
18
-
19
-
20
-
21
-
22
-
23
-
24
-
25
-
26
-
27
-
28
-
29
-
30
-
31
-
32
-
33
-
34
-
35
-
36
-
37
-
38
-
39
-
40
-
41
-
42
-
43
-
44
-
45
-
46
-
47
-
48
-
49
-
50
-
51
-
52
-
53
-
54
-
55
-
56
-
57
-
58
-
59
-
60
-
61
-
62
-
63
-
64
-
65
-
66
-
67
-
68
-
69
-
70
-
71
-
72
-
73
-
74
-
75
-
76
-
77
-
78
-
79
-
80
-
81
-
82
-
83
-
84
-
85
-
86
-
87
-
88
-
89
-
90
-
91
-
92
-
93
-
94
-
95
-
96
-
97
-
98
-
99
-
100
-
101
-
102
-
103
-
104
-
105
-
106
-
107
-
108
-
109
-
110
-
111
-
112
-
113
-
114
-
115
-
116
-
117
-
118
-
119
-
120
-
121
-
122
-
123
-
124
-
125
-
126
-
127
-
128
-
129
-
130
-
131
-
132
-
133
-
134
-
135
-
136
-
137
-
138
-
139
-
140
-
141
-
142
-
143
-
144
-
145
-
146
-
147
-
148
-
149
-
150
-
151
-
152
-
153
-
154
-
155
-
156
-
157
-
158
-
159
-
160
-
161
-
162
-
163
-
164
-
165
-
166
-
167
-
168
-
169
-
170
-
171
-
172
-
173
-
174
-
175
-
176
-
177
-
178
-
179
-
180
-
181
-
182
-
183
-
184
-
185
-
186
-
187
-
188
-
189
-
190
-
191
-
192
-
193
-
194
-
195
-
196
-
197
-
198
-
199
-
200
-
201
-
202
-
203
-
204
-
205
-
206
-
207
-
208
-
209
-
210
-
211
-
212
-
213
-
214
-
215
-
216
-
217
-
218
-
219
-
220
-
221
-
222
-
223
-
224
-
225
-
226
-
227
-
228
-
229
-
230
-
231
-
232
-
233
-
234
-
235
-
236
-
237
-
238
-
239
-
240
-
241
-
242
-
243
-
244
-
 245
245 -
 246
246 -
 247
247 -
 248
248 -
 249
249 -
 250
250 -
 251
251 -
 252
252 -
 253
253 -
 254
254 -
 255
255 -
256
-
257
-
258
-
259
-
260
-
261
-
262
-
263
-
264
-
265
-
266
-
267
-
268
-
269
-
270
-
271
-
272
-
273
-
274
-
275
-
276
-
277
-
278
-
279
-
280
-
281
-
282
-
283
-
284
-
285
-
286
-
287
-
288
-
289
-
290
-
291
-
292
-
293
-
294
-
295
-
296
 |
 |
250
Parent topic:
Solving Paper Problems
Related references
Paper Jam Problems Inside the Product
Paper Jam Problems in the Rear Cover
Related tasks
Cancelling Printing Using a Product Button
Paper Jam Problems in the Rear Cover
If you see a message that paper has jammed in the rear cover, follow the steps here or on the LCD
screen to clear the jam.
1. Cancel the print job, if necessary.
2. Press the buttons to release the rear cover and remove it from your product. Carefully remove any
jammed paper from inside the product.
3. Remove any jammed paper from inside the rear cover.