Fluke TIS20-9Hz User Manual - Page 28
Emissivity Adjustment, TiS10, Display All
 |
View all Fluke TIS20-9Hz manuals
Add to My Manuals
Save this manual to your list of manuals |
Page 28 highlights
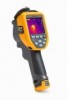
TiS10, TiS20, TiS40, TiS45, TiS50, TiS55, TiS60, TiS65 Users Manual Emissivity Adjustment The correct emissivity values are important for the Imager to make the most accurate temperature measurement calculations. Emissivity of a surface can have a large effect on the apparent temperatures that the Imager observes. Understanding the emissivity of the surface being inspected can, but not always, allow you to obtain more accurate temperature measurements. Note Surfaces with an emissivity of
-
 1
1 -
2
-
3
-
4
-
5
-
6
-
7
-
8
-
9
-
10
-
11
-
12
-
13
-
14
-
15
-
16
-
17
-
18
-
19
-
20
-
21
-
22
-
 23
23 -
 24
24 -
 25
25 -
 26
26 -
 27
27 -
 28
28 -
 29
29 -
 30
30 -
 31
31 -
 32
32 -
 33
33 -
34
-
35
-
36
-
37
-
38
-
39
-
40
-
41
-
42
-
43
-
44
-
45
-
46
-
47
-
48
-
49
-
50
-
51
-
52
 |
 |

TiS10, TiS20, TiS40, TiS45, TiS50, TiS55, TiS60, TiS65
Users Manual
18
Emissivity Adjustment
The correct emissivity values are important for the Imager
to make the most accurate temperature measurement
calculations. Emissivity of a surface can have a large
effect on the apparent temperatures that the Imager
observes. Understanding the emissivity of the surface
being inspected can, but not always, allow you to obtain
more accurate temperature measurements.
Note
Surfaces with an emissivity of
<
0.60 make reliable
and consistent determination of actual
temperatures problematic. The lower the
emissivity, the more potential error is associated
with the Imager's temperature measurement
calculations. This is also true even when
adjustments to the emissivity and reflected
background adjustments are performed properly.
Emissivity is set directly as a value, or from a list of
emissivity values for some common materials.
Note
If the Display is set to
Display All
, you see the
information about current emissivity as
ε
= x.xx
.
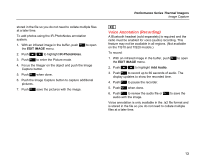
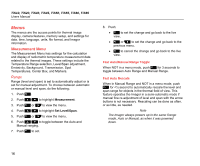
Adjust by Number
To set the emissivity value:
1. Go to
Measurement
>
Emissivity
>
Adjust Number
.
2. Push
W
/
X
to change the value.
A custom emissivity value is indicated when any value not
in the standard emissivity table is selected.
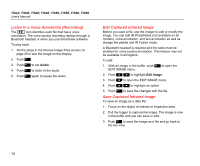
Select by Table
To select from a list of common materials:
1. Go to
Measurement
>
Emissivity
>
Select Table
.
2. Push
W
/
X
to highlight the material.
3. Push
to select the material.
If you set a value that is
<
0.60,
shows on the Imager
display with this caution:
Caution:
Emissivity <0.6
(see Manual)
Push
to clear the message.