Fluke TIS20-9Hz User Manual - Page 37
Camera Menu, Backlight, Video
 |
View all Fluke TIS20-9Hz manuals
Add to My Manuals
Save this manual to your list of manuals |
Page 37 highlights
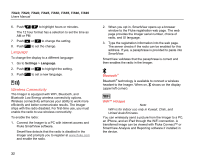
Camera Menu The Camera menu has controls and options for secondary camera features such as auto focus, backlight level, and laser pointer. Backlight The backlight level control is set to low, medium, and high. To set the backlight: 1. Push 2. 2. Push W/X to highlight Camera. 3. Push 1 or Z to view the menu. 4. Push W/X to highlight Backlight. 5. Push 1 or Z to view the menu. 6. Push W/X to highlight an option. 7. Push: • 1 to set the change and go back to the live view. • 2 or Y to set the change and go back to the previous menu. • 3 to cancel the change and go back to the live view. Performance Series Thermal Imagers Menus Video The TiS60 and TiS65 Imagers can record infrared and IR-Fusion™ to the SD card or internal memory in .is3 or .avi format. To record: 1. Go to Camera > Video. 2. Push W/X to select Video/Audio or Video ONLY. A Bluetooth headset is required and the radio must be enabled for voice (audio) recording. This feature may not be available in all regions. 3. Push W/X to select Record Video to enable the recording mode. The icon shows on the display to identify the start recording mode. 4. Push and release the Image Capture button to start recording. The icon shows on the display while recording is in process. 5. Push and release the Image Capture button to stop recording. 27
-
 1
1 -
2
-
3
-
4
-
5
-
6
-
7
-
8
-
9
-
10
-
11
-
12
-
13
-
14
-
15
-
16
-
17
-
18
-
19
-
20
-
21
-
22
-
23
-
24
-
25
-
26
-
27
-
28
-
29
-
30
-
31
-
 32
32 -
 33
33 -
 34
34 -
 35
35 -
 36
36 -
 37
37 -
 38
38 -
 39
39 -
 40
40 -
 41
41 -
 42
42 -
43
-
44
-
45
-
46
-
47
-
48
-
49
-
50
-
51
-
52
 |
 |
