Fluke TIS20-9Hz User Manual - Page 42
Language, Wireless Connectivity
 |
View all Fluke TIS20-9Hz manuals
Add to My Manuals
Save this manual to your list of manuals |
Page 42 highlights
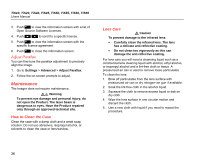
TiS10, TiS20, TiS40, TiS45, TiS50, TiS55, TiS60, TiS65 Users Manual 6. Push Y/Z to highlight hours or minutes. The 12 hour format has a selection to set the time as AM or PM. 7. Push W or X to change the setting. 8. Push to set the change. Language To change the display to a different language: 1. Go to Settings > Language. 2. Push W or X to highlight the setting. 3. Push to set a new language. b Wireless Connectivity The Imager is equipped with WiFi, Bluetooth, and Bluetooth Low Energy wireless connectivity options. Wireless connectivity enhances your ability to work more efficiently and better communicate results. The Imager ships with the radio disabled. For first-time use, you must enable the radio to use wireless connectivity. To enable the radio: 1. Connect the Imager to a PC with internet access and Fluke SmartView software. SmartView detects that the radio is disabled in the Imager and prompts you to register at www.fluke.com and enable the radio. 32 2. When you opt in, SmartView opens up a browser window to the Fluke registration web page. The web page provides the Imager serial number, choice of radio, and UI language. 3. Type the registration information into the web page. The server checks if the radio can be enabled for this address. If yes, a passphrase is provided to paste into SmartView. SmartView validates that the passphrase is correct and then enables the radio in the Imager. Bluetooth® Bluetooth® technology is available to connect a wireless headset to the Imager. When on, shows on the display (upper left corner). WiFi™ Hotspot Note WiFi is for indoor use only in Kuwait, Chile, and United Arab Emirates. You can wirelessly send a picture from the Imager to a PC, an iPhone, and an iPad through the WiFi connection. A transferred image can be viewed with Fluke Connect™ or SmartView Analysis and Reporting software if installed in the device.
-
 1
1 -
2
-
3
-
4
-
5
-
6
-
7
-
8
-
9
-
10
-
11
-
12
-
13
-
14
-
15
-
16
-
17
-
18
-
19
-
20
-
21
-
22
-
23
-
24
-
25
-
26
-
27
-
28
-
29
-
30
-
31
-
32
-
33
-
34
-
35
-
36
-
 37
37 -
 38
38 -
 39
39 -
 40
40 -
 41
41 -
 42
42 -
 43
43 -
 44
44 -
 45
45 -
 46
46 -
 47
47 -
48
-
49
-
50
-
51
-
52
 |
 |
