Fluke TIS20-9Hz User Manual - Page 38
Auto Capture, Camera, Start Capture, Interval, Image Count, Maximum Memory, Manual Trigger
 |
View all Fluke TIS20-9Hz manuals
Add to My Manuals
Save this manual to your list of manuals |
Page 38 highlights
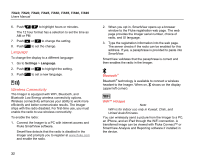
TiS10, TiS20, TiS40, TiS45, TiS50, TiS55, TiS60, TiS65 Users Manual Auto Capture The Auto Capture feature allows you to set the Imager to capture and save an infrared image, or series of images, automatically. Image capture can be triggered manually or with an "apparent temperature" trigger. The temperature trigger is set to start when a value is above or below a set limit. Regardless of how the capture starts, you can set the interval for when successive images are captured and saved. You also can set the number of images that are captured and saved. The upper limit on how many images is dependent on the amount of storage memory available. To set and operate the Auto Capture feature: 1. Go to Camera > Auto Capture. 2. Push 1 to start the capture sequence. In the Auto Capture sub-menu, you will see these options: • Start Capture: Executes the Auto Capture settings in camera memory. • Interval: Push W/X to select the number of hours, minutes, or seconds as an interval between images. • Image Count: Push W/X to manually select a number of images. Or, push the Maximum Memory button to select the option that will continue capturing and saving images until the chosen storage memory is filled or battery power is depleted. • Manual Trigger: When Manual Trigger is selected, push 1 to start the automatic capture of a series of images. • Temp Trigger: Select Temp Trigger and then select Set Temp Trigger to open the adjustment menu. Note The minimum interval available can be affected by the file type and visible light camera settings chosen by the user. Some combinations create larger file sizes that take longer to capture and save and create a higher minimum interval compared to others. 28
-
 1
1 -
2
-
3
-
4
-
5
-
6
-
7
-
8
-
9
-
10
-
11
-
12
-
13
-
14
-
15
-
16
-
17
-
18
-
19
-
20
-
21
-
22
-
23
-
24
-
25
-
26
-
27
-
28
-
29
-
30
-
31
-
32
-
 33
33 -
 34
34 -
 35
35 -
 36
36 -
 37
37 -
 38
38 -
 39
39 -
 40
40 -
 41
41 -
 42
42 -
 43
43 -
44
-
45
-
46
-
47
-
48
-
49
-
50
-
51
-
52
 |
 |
