Harman Kardon AVR 240 Owners Manual - Page 24
Automated Speaker Setup Using EzSet - no sound
 |
View all Harman Kardon AVR 240 manuals
Add to My Manuals
Save this manual to your list of manuals |
Page 24 highlights
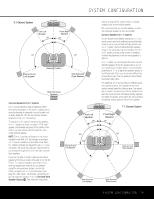
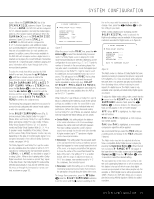
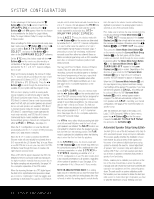
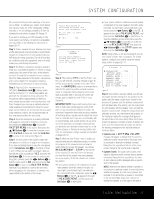
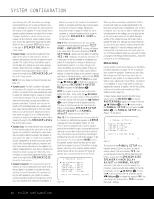
SYSTEM CONFIGURATION To take advantage of this feature, press the ¤ Button n so that the › cursor is next to the UPSAMPLING line and press the ‹/› Buttons o until ON appears. Note that this feature is only available for the Dolby Pro Logic II-Music, Dolby Pro Logic II-Movie, Dolby Pro Logic and Dolby 3 Stereo modes. When all settings for Dolby surround mode setup have been made, press the ¤ Button n so that the › cursor is next to BACK TO SURROUND SELECT , and press the Set Button p to return to the SURROUND SELECT submenu. On the DTS menu, the choices made with the ‹/› Buttons o on the remote are determined by a combination of the type of program material in use and whether the 5.1- or 6.1/7.1-channel configuration is in use. When a DTS source is playing, the choice of modes for 7.1 systems will vary according to the type of program source (DTS Stereo, DTS 5.1, DTS 96/24, DTS-ES Matrix or DTS-ES Discrete). Press the ‹/› Buttons o to scroll through the choices that are available for your system and the program in use. With no source playing, or while an analog audio source is playing, you will only be able to view the DTS Neo:6 surround mode choices. These include DTS Neo:6 3-channel Cinema mode (recommended when front left, right and center speakers are present but no surround speakers are available), DTS Neo:6 5-channel Cinema mode (for movies or television), DTS Neo:6 5-channel Music mode (optimized for music-only materials), and DTS Neo:6 6-channel Cinema and Music modes (available when the Surround Back speaker channels are configured as either LARGE or SMALL; see page 27). When the 5.1 configuration is in use, the AVR will automatically select the 5.1 version of DTS processing when a DTS data stream is selected. When the 6.1/7.1 mode is selected, the DTS-ES Discrete mode will automatically be activated when a DTS source with the ES Discrete "flag" is in use. When a non-ES DTS disc is in use, you may select the DTSES Matrix mode through this menu to create a full eight-channel surround mode. When a DTS 96/24 signal is detected, the AVR 240 defaults to the DTS surround mode, but reproduces the higher-resolution materials that are present due to the higher sampling rate automatically. See page 34 for a complete explanation of the DTS modes. When the incoming bitstream is a DTS digital signal, the AVR 240's sophisticated microprocessor allows you to select a "combination" mode that applies postprocessing so that Dolby Pro Logic IIx or DTS Neo:6 may be used to create back surround channels from a 2.0 or 5.1 source. This will appear in the MODE line by showing both the digital mode and the second mode, separated by a plus sign (e.g., DTS+ DOLBY PRO LOGIC II MUSIC). On the LOGIC 7 menu, the choices made with the ‹/› Buttons o on the remote are determined by whether the 5.1- or 6.1/7.1-channel configuration is in use. In either case, the selection of a Logic 7 mode enables Harman Kardon's exclusive Logic 7 processing to create fully enveloping, multichannel surround sound from either two-channel Stereo or Matrix-encoded programming such as VHS cassettes, laser discs or television broadcasts produced with Dolby surround. You may select from the Music, Cinema or Enhance modes. They work best with two-channel music recordings, surround-encoded programs or standard two-channel programming of any type, respectively. The Logic 7 modes are not available when either Dolby Digital or DTS digital soundtracks are in use. See page 34 for a complete explanation of the Logic 7 modes. On the DSP(SURR) menu, the choices made with the ‹/› Buttons o on the remote select from one of the DSP surround modes that are designed for use with two-channel stereo programs to create a variety of sound field presentations. The choices available are Hall 1, Hall 2 and Theater. The Hall and Theater modes are designed for multichannel installations, and are available in 5.1- or 6.1-channel versions. See pages 34-35 for a complete explanation of the DSP surround modes. The VMAx menu offers virtual processing that delivers a full surround field when only the front left and right speakers are installed. The NEAR mode is recommended for situations where the speakers are less than five feet from the listening position. The FAR mode is optimized for installations where the listening area is more than five feet from the speakers. On the STEREO menu, the choices made with the ‹/› Buttons o on the remote may either turn the surround processing off for a traditional two-channel stereo presentation, or select 5 STEREO or 7 STEREO, depending on whether a 5.1 or 6.1/7.1 configuration is in use. The latter modes feed a two-channel presentation to all speakers, regardless of the number of speakers in use. See page 35 for an explanation of the 5 Stereo and 7 Stereo modes. NOTE ON ANALOG BYPASS MODE: If an analog audio source is selected and you have full-range front speakers, you may select an analog bypass two-channel mode in which the analog signal is routed directly from the input to the volume control, without being digitized or processed. The analog bypass mode is selected as one of the surround modes. First, make sure to remove the tone controls from the circuitry by pressing the Tone Mode Button 5. If the TONE OUT message appears in the Lower Display Line ı, then simply wait a few seconds for the message to disappear. Otherwise, press the ‹/› Buttons )o until TONE OUT does appear. Then, press the Stereo Mode Select Button R on the remote, or press the Surround Mode Group Selector 7 on the front panel until the Stereo modes are selected. Scroll through the stereo modes by pressing either the Stereo Mode Select Button R or the Surround Mode Selector 8 until SURROUND OFF appears in the Lower Display Line ı and on screen. Depending on the direction of your scroll, the DSP Surround Mode Indicator ˆ may or may not be lit. Continue to scroll for the DSP indicator to appear or disappear. When the DSP Surround Mode Indicator ˆ is lit, the input signal is being digitized and bass management settings will be applied. For example, if you have set the front speakers to SMALL, this setting will be selected. When the DSP Surround Mode Indicator ˆ is not lit, analog bypass mode is engaged. The AVR will automatically configure the front speakers as LARGE, overriding your manual configuration. See page 27 for more information on speaker setup. After the selections are made on the Dolby, DTS, Logic 7, DSP (Surround), VMAx or Stereo menus, press the ⁄/¤ Buttons n so that the cursor moves to the BACK TO MASTER MENU line and press the Set Button p. Automated Speaker Setup Using EzSet+ The AVR 240 is one of the first receivers in its class to offer automated speaker setup and system calibration. This process greatly simplifies the installation of your new receiver by using a series of test signals and the power of an advanced digital signal processing system to eliminate the need for manual adjustment of speaker "size", crossover, delay and output level settings. With EzSet+ your new receiver even alerts you to errors in speaker connections that prevent a speaker from functioning. EzSet+ enables you to calibrate your system in a fraction of the time it would take to enter the settings manually, and with results that rival those achieved with expensive test equipment and time-consuming procedures. The end result is a system calibration profile that enables your new receiver to deliver the best possible sound, no matter what type of speakers you have or what the dimensions of your listening room are. 24 SYSTEM CONFIGURATION
-
 1
1 -
2
-
3
-
4
-
5
-
6
-
7
-
8
-
9
-
10
-
11
-
12
-
13
-
14
-
15
-
16
-
17
-
18
-
 19
19 -
 20
20 -
 21
21 -
 22
22 -
 23
23 -
 24
24 -
 25
25 -
 26
26 -
 27
27 -
 28
28 -
 29
29 -
30
-
31
-
32
-
33
-
34
-
35
-
36
-
37
-
38
-
39
-
40
-
41
-
42
-
43
-
44
-
45
-
46
-
47
-
48
-
49
-
50
-
51
-
52
-
53
-
54
-
55
-
56
-
57
-
58
-
59
-
60
-
61
-
62
-
63
-
64
 |
 |