Harman Kardon AVR 240 Owners Manual - Page 26
Manual Setup - harman kardon
 |
View all Harman Kardon AVR 240 manuals
Add to My Manuals
Save this manual to your list of manuals |
Page 26 highlights
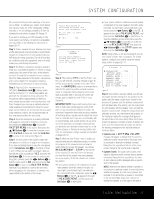
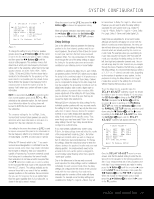
SYSTEM CONFIGURATION your listening room.) For that reason, we strongly recommend that you try to listen as the tone circulates, matching the name shown for each channel to the location of the speaker. If a tone is heard from a speaker position that does not match the on-screen message, stop EzSet+, exit the menus, turn your receiver off and check for proper speaker connections on the rear panel before resuming the setup. When this test is complete, YES will be shown to the right of SPEAKER CHECK on the menu screen. • Speaker Delay: This test will circulate the tones again as the name of each channel is shown to measure the distance from the microphone to each speaker. The results of these tests will be used to set the delay time settings for each active speaker position. When this test is complete, a speaker-tomicrophone (listening position) distance will be shown to the right of the SPEAKER DELAY line on the menu screen. NOTE: A/V Sync Delay must be set manually (see page 30). • Speaker Level: This test circulates a test signal and measures the output from each active speaker position. The results of the measurements are used to adjust the individual channel outputs as needed, so that they are identical. This is an essential element of ensuring that surround sound fields are properly reproduced. If desired, you may use the results of the automated testing as a baseline and then make manual adjustments to trim the output levels to your personal taste, following the instructions shown on page 30 or 40. When this test is complete, an output level adjustment number will be shown to the right of the SPEAKER LEVEL line on the menu screen. • Speaker Size: The measurements and calculations for this test take place at the same time as the test signals are circulated to calculate the output levels; they are used to determine whether the speakers in your system are "large" or "small" for the purposes of bass management. (If desired, you may use the results of the automated testing as a baseline and then make manual adjustments to the speaker size settings independently for each source, following the instructions shown on page 27.) When this test is complete, an output level adjustment number will be shown to the right of the SPEAKER SIZE line on the menu screen. • Speaker Crossover: The measurements and calculations for this test take place at the same time as the test signal is circulated to calculate the levels, and they are used to determine the crossover setting for each speaker in your system to create a seamless transition between the frequencies sent to your main speakers and subwoofer (if available). If desired, you may use the results of the automated testing as a baseline and then make manual adjustments to the crossover settings, following the instructions shown on page 28. When this test is complete, a crossover frequency will be shown to the right of the SPEAKER X-OVER line on the menu screen. Step 9: When all measurements are successfully completed, the test signals will stop and a TEST DONE UNPLUG MIC message will appear in the second line. The cursor will pause at SAVE SETTINGS, allowing you the option of selecting YES or NO. Unplug the microphone and store it in a safe place so that it is available to recalibrate your system if needed due to a change in speakers, preferred listening position, or a major change in the room's furnishings (such as the addition of thick carpeting or plush furniture) that might require different settings. To enter the settings to the receiver's memory and return to the Master Menu, make sure that YES appears at the SAVE SETTINGS line, press the ⁄/¤ Buttons n so that the on-screen cursor is pointing to RETURN TO MASTER MENU and press the Set Button p. NOTE: If you wish to check the test results before exiting the EzSet+ menu, press the ⁄/¤ Buttons n so that the on-screen cursor is at the second line of the menu listings, and then press the ‹/› Buttons o to scroll through the list of speaker positions. The data on each line will also be entered into the listings on the individual SPEAKER SETUP, DELAY ADJUST and CHANNEL ADJUST menus once you exit EzSet+. Step 10: If the measurements are not successful due to a missing or malfunctioning speaker, an ERROR message and menu will appear (Figure 10). The EzSet+ system is programmed to look for speaker pairs at the front left/front right, surround left/surround right and surround back left/surround back right positions. If the tests to any of those three channel pairs indicates that one, but not both of the speakers in the pair is present, the menu will show NONE next to the speaker position where the tests did not report back that a speaker is present. Should this message appear, make note of the suspect speaker location, exit all menus and turn the receiver off. Check all speaker wire connections and then rerun EzSet+. * SPEAKER SIZE * LEFT/RIGHT:SMALL CENTER :SMALL SURROUND :SMALL SURR BACK :SMALL SUBWOOFER :SUB BASS MGR :GLOBAL BACK TO MANUAL SETUP Figure 10 When you have successfully completed the EzSet+ process and made any needed adjustments to the input and surround mode configurations, your receiver is ready for use. If you do not wish to make any manual adjustments to the settings, you may skip the rest of this section and proceed to the Basic Operation section of this manual on page 32 to learn how to operate the AVR 240, although we recommend that you first record your system's settings using the worksheet on page 62 in case the settings need to be reentered due to a power loss or for some other reason. For those situations where you may wish to make a change to the settings entered by EzSet+, follow the instructions on the following pages. Manual Setup Harman Kardon recommends that you use the EzSet+ procedure described on pages 24-26 to configure your receiver for operation. However, you may manually configure your AVR if you have fewer than six speakers in your system, if you have run EzSet+ but wish to make adjustments, if your EzSet+ microphone is not available, or if you simply prefer to make your adjustments manually. In addition, the A/V Sync Delay setting must be performed manually (see Delay Settings section, page 30). To begin manual setup using the full-OSD menu system, press the OSD Button v so that the MASTER MENU appears on screen. Press the ⁄/¤ Buttons n until the › cursor points to the MANUAL SETUP line, and press the Set Button p. The MANUAL SETUP menu (Figure 11) will appear. * MANUAL SETUP * EzSet ACTIVATE:NO SPEAKER SIZE SPEAKER X-OVER DELAY ADJUST CHANNEL ADJUST BACK TO MASTER MENU Figure 11 The first line of the MANUAL SETUP menu indicates whether EzSet+ has been run and its settings saved. If this line indicates YES, then you will be able to see the settings determined by EzSet+ as you view the SPEAKER SIZE, SPEAKER X-OVER, DELAY ADJUST and CHANNEL ADJUST submenus. If you wish to reset the speaker size, crossover, output level and delay settings to their factory defaults, use the ⁄/¤ Buttons n to move the › cursor to point to this line, and then use the ‹/› Buttons o to change this setting to NO. You may change this setting back to YES to reactivate the EzSet+ settings. 26 SYSTEM CONFIGURATION
-
 1
1 -
2
-
3
-
4
-
5
-
6
-
7
-
8
-
9
-
10
-
11
-
12
-
13
-
14
-
15
-
16
-
17
-
18
-
19
-
20
-
 21
21 -
 22
22 -
 23
23 -
 24
24 -
 25
25 -
 26
26 -
 27
27 -
 28
28 -
 29
29 -
 30
30 -
 31
31 -
32
-
33
-
34
-
35
-
36
-
37
-
38
-
39
-
40
-
41
-
42
-
43
-
44
-
45
-
46
-
47
-
48
-
49
-
50
-
51
-
52
-
53
-
54
-
55
-
56
-
57
-
58
-
59
-
60
-
61
-
62
-
63
-
64
 |
 |
