HP 240 HP 450 Notebook PC and HP 455 Notebook PC Maintenance and Service Guide - Page 55
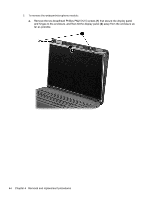
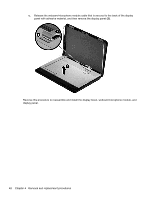
Release the adhesive strip, and then disconnect the display panel cable
 |
View all HP 240 manuals
Add to My Manuals
Save this manual to your list of manuals |
Page 55 highlights
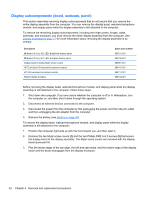
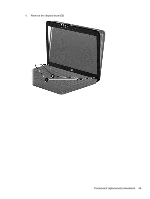
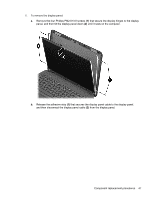
6. To remove the display panel: a. Remove the four Phillips PM2.0×3.0 screws (1) that secure the display hinges to the display panel, and then tilt the display panel down (2) until it rests on the computer. b. Release the adhesive strip (1) that secures the display panel cable to the display panel, and then disconnect the display panel cable (2) from the display panel. Component replacement procedures 47
-
 1
1 -
2
-
3
-
4
-
5
-
6
-
7
-
8
-
9
-
10
-
11
-
12
-
13
-
14
-
15
-
16
-
17
-
18
-
19
-
20
-
21
-
22
-
23
-
24
-
25
-
26
-
27
-
28
-
29
-
30
-
31
-
32
-
33
-
34
-
35
-
36
-
37
-
38
-
39
-
40
-
41
-
42
-
43
-
44
-
45
-
46
-
47
-
48
-
49
-
 50
50 -
 51
51 -
 52
52 -
 53
53 -
 54
54 -
 55
55 -
 56
56 -
 57
57 -
 58
58 -
 59
59 -
 60
60 -
61
-
62
-
63
-
64
-
65
-
66
-
67
-
68
-
69
-
70
-
71
-
72
-
73
-
74
-
75
-
76
-
77
-
78
-
79
-
80
-
81
-
82
-
83
-
84
-
85
-
86
-
87
-
88
-
89
-
90
-
91
-
92
-
93
-
94
-
95
-
96
-
97
-
98
-
99
-
100
-
101
-
102
-
103
-
104
-
105
-
106
-
107
-
108
-
109
-
110
-
111
-
112
-
113
-
114
-
115
-
116
-
117
-
118
-
119
-
120
-
121
-
122
-
123
-
124
-
125
-
126
-
127
-
128
-
129
-
130
-
131
-
132
-
133
-
134
-
135
-
136
-
137
-
138
-
139
-
140
-
141
-
142
 |
 |
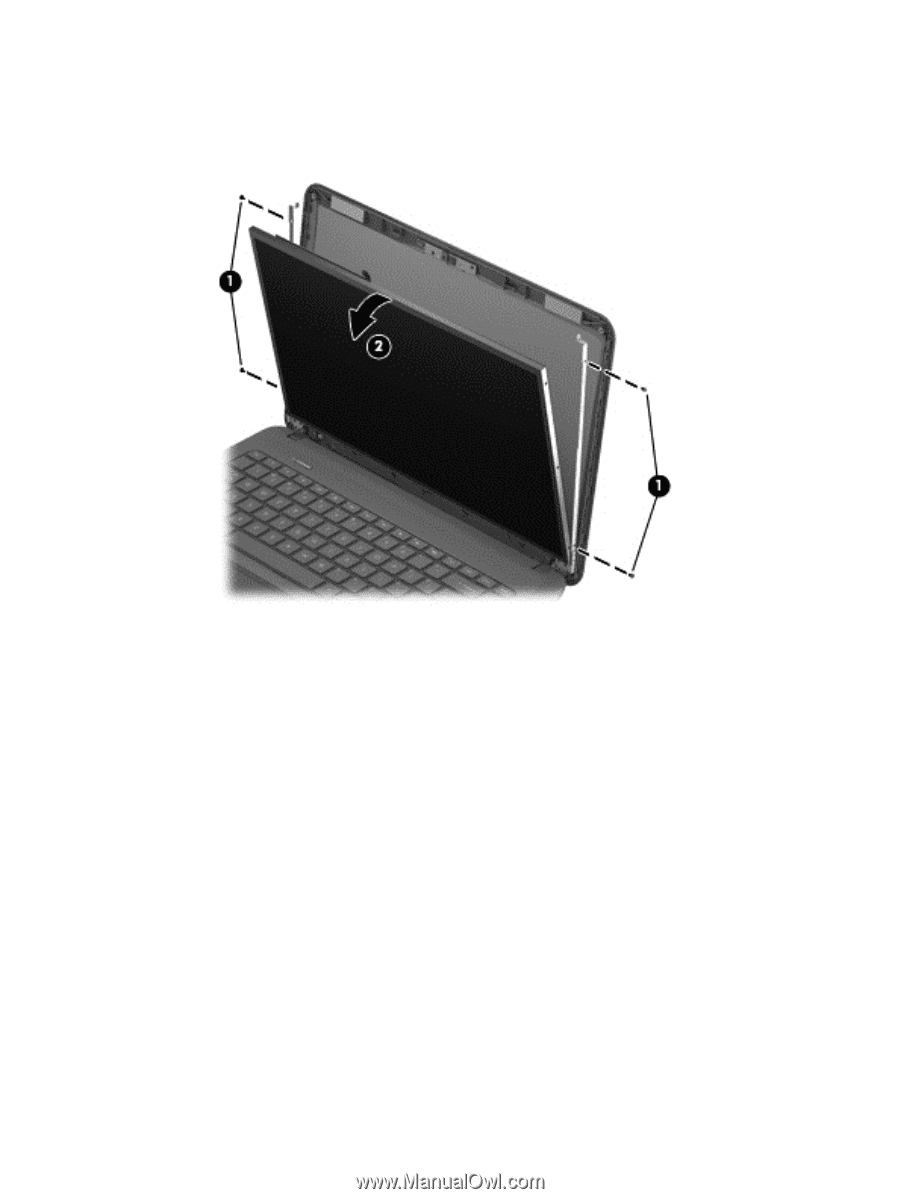
6.
To remove the display panel:
a.
Remove the four Phillips PM2.0×3.0 screws
(1)
that secure the display hinges to the display
panel, and then tilt the display panel down
(2)
until it rests on the computer.
b.
Release the adhesive strip
(1)
that secures the display panel cable to the display panel,
and then disconnect the display panel cable
(2)
from the display panel.
Component replacement procedures
47