HP 240 HP 450 Notebook PC and HP 455 Notebook PC Maintenance and Service Guide - Page 69
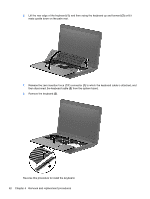
the back of the keyboard until the keyboard disengages from the computer.
 |
View all HP 240 manuals
Add to My Manuals
Save this manual to your list of manuals |
Page 69 highlights
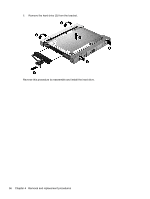
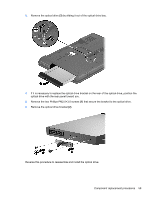
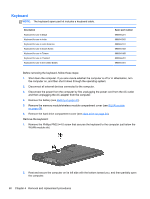
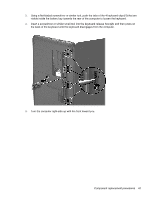
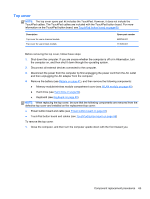
3. Using a flat-bladed screwdriver or similar tool, push the tabs of the 4 keyboard clips (1) that are visible inside the battery bay towards the rear of the computer to loosen the keyboard. 4. Insert a screwdriver or similar small tool into the keyboard release hole (2), and then press on the back of the keyboard until the keyboard disengages from the computer. 5. Turn the computer right-side up with the front toward you. Component replacement procedures 61
-
 1
1 -
2
-
3
-
4
-
5
-
6
-
7
-
8
-
9
-
10
-
11
-
12
-
13
-
14
-
15
-
16
-
17
-
18
-
19
-
20
-
21
-
22
-
23
-
24
-
25
-
26
-
27
-
28
-
29
-
30
-
31
-
32
-
33
-
34
-
35
-
36
-
37
-
38
-
39
-
40
-
41
-
42
-
43
-
44
-
45
-
46
-
47
-
48
-
49
-
50
-
51
-
52
-
53
-
54
-
55
-
56
-
57
-
58
-
59
-
60
-
61
-
62
-
63
-
 64
64 -
 65
65 -
 66
66 -
 67
67 -
 68
68 -
 69
69 -
 70
70 -
 71
71 -
 72
72 -
 73
73 -
 74
74 -
75
-
76
-
77
-
78
-
79
-
80
-
81
-
82
-
83
-
84
-
85
-
86
-
87
-
88
-
89
-
90
-
91
-
92
-
93
-
94
-
95
-
96
-
97
-
98
-
99
-
100
-
101
-
102
-
103
-
104
-
105
-
106
-
107
-
108
-
109
-
110
-
111
-
112
-
113
-
114
-
115
-
116
-
117
-
118
-
119
-
120
-
121
-
122
-
123
-
124
-
125
-
126
-
127
-
128
-
129
-
130
-
131
-
132
-
133
-
134
-
135
-
136
-
137
-
138
-
139
-
140
-
141
-
142
 |
 |
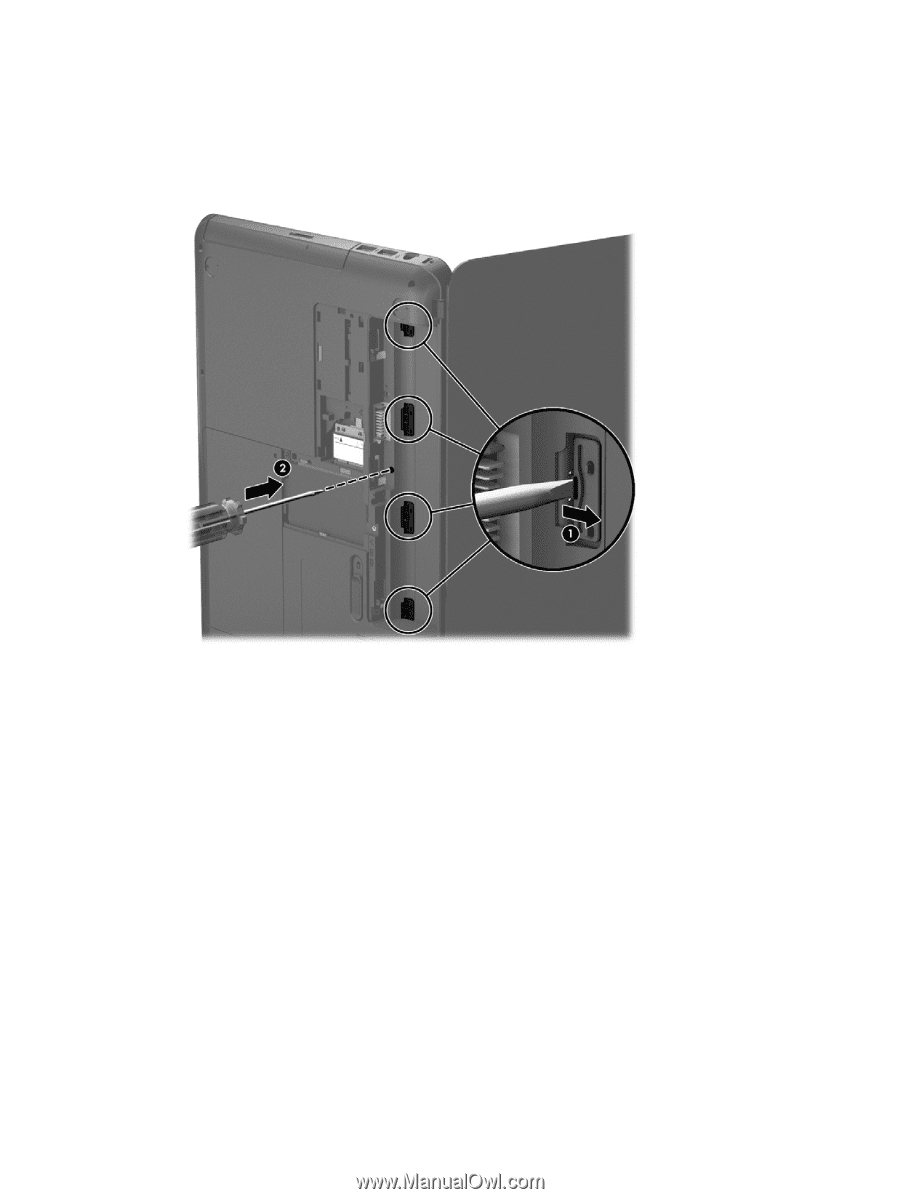
3.
Using a flat-bladed screwdriver or similar tool, push the tabs of the 4 keyboard clips
(1)
that are
visible inside the battery bay towards the rear of the computer to loosen the keyboard.
4.
Insert a screwdriver or similar small tool into the keyboard release hole
(2)
, and then press on
the back of the keyboard until the keyboard disengages from the computer.
5.
Turn the computer right-side up with the front toward you.
Component replacement procedures
61