HP 240 HP 450 Notebook PC and HP 455 Notebook PC Maintenance and Service Guide - Page 97
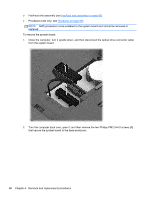
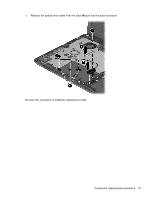
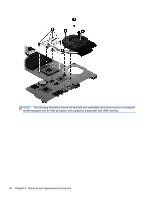
Reverse this procedure to install the system board.
 |
View all HP 240 manuals
Add to My Manuals
Save this manual to your list of manuals |
Page 97 highlights
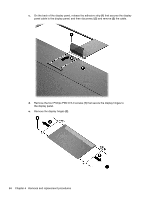
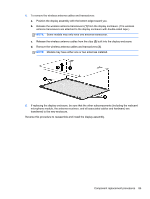
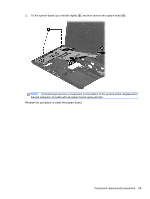
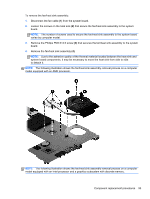
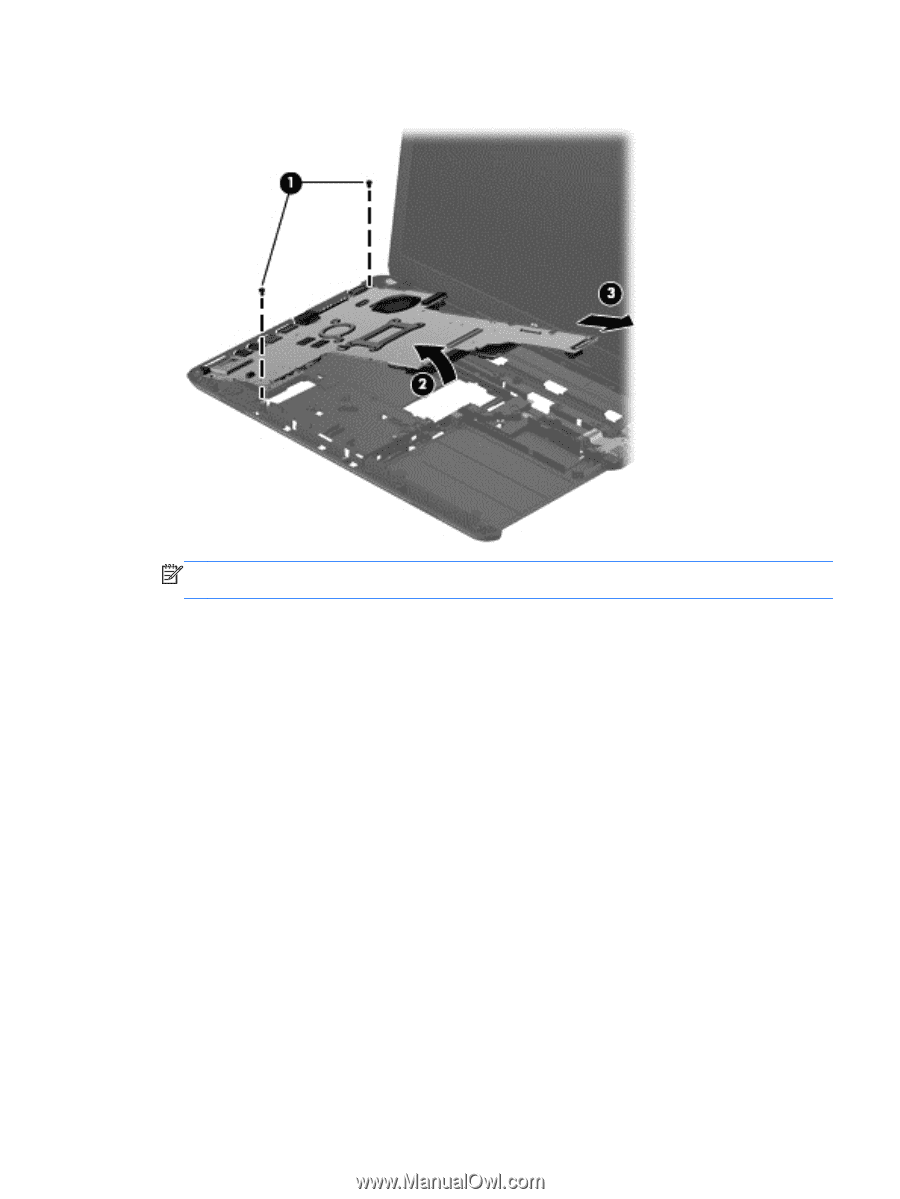
3. Tilt the system board up to the left slightly (2), and then remove the system board (3). NOTE: A thermal pad services a component on the bottom of the system board. Replacement thermal material is included with all system board spare part kits. Reverse this procedure to install the system board. Component replacement procedures 89
-
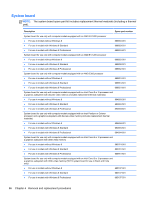
 1
1 -
2
-
3
-
4
-
5
-
6
-
7
-
8
-
9
-
10
-
11
-
12
-
13
-
14
-
15
-
16
-
17
-
18
-
19
-
20
-
21
-
22
-
23
-
24
-
25
-
26
-
27
-
28
-
29
-
30
-
31
-
32
-
33
-
34
-
35
-
36
-
37
-
38
-
39
-
40
-
41
-
42
-
43
-
44
-
45
-
46
-
47
-
48
-
49
-
50
-
51
-
52
-
53
-
54
-
55
-
56
-
57
-
58
-
59
-
60
-
61
-
62
-
63
-
64
-
65
-
66
-
67
-
68
-
69
-
70
-
71
-
72
-
73
-
74
-
75
-
76
-
77
-
78
-
79
-
80
-
81
-
82
-
83
-
84
-
85
-
86
-
87
-
88
-
89
-
90
-
91
-
 92
92 -
 93
93 -
 94
94 -
 95
95 -
 96
96 -
 97
97 -
 98
98 -
 99
99 -
 100
100 -
 101
101 -
 102
102 -
103
-
104
-
105
-
106
-
107
-
108
-
109
-
110
-
111
-
112
-
113
-
114
-
115
-
116
-
117
-
118
-
119
-
120
-
121
-
122
-
123
-
124
-
125
-
126
-
127
-
128
-
129
-
130
-
131
-
132
-
133
-
134
-
135
-
136
-
137
-
138
-
139
-
140
-
141
-
142
 |
 |
3.
Tilt the system board up to the left slightly
(2)
, and then remove the system board
(3)
.
NOTE:
A thermal pad services a component on the bottom of the system board. Replacement
thermal material is included with all system board spare part kits.
Reverse this procedure to install the system board.
Component replacement procedures
89