HP D4360 Full User Guide - Page 70
Calibrate print quality, View estimated ink levels, Clean the Print Cartridges - cleaning
 |
UPC - 883585617203
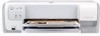
View all HP D4360 manuals
Add to My Manuals
Save this manual to your list of manuals |
Page 70 highlights
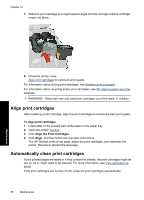
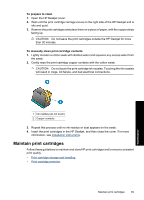
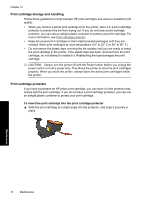
To clean the print cartridges 1. Open the printer Toolbox. 2. Click Clean the Print Cartridges. 3. Click Clean, and then follow the onscreen instructions. If your documents are still faded after cleaning, manually clean the print cartridge contacts. For more information, see Manually clean print cartridges. CAUTION: Clean print cartridges only when necessary. Unnecessary cleaning wastes ink and shortens the life of the cartridge. Calibrate print quality Perform a print quality calibration if light or dark horizontal lines appear in documents that are printed with the tri-color and black print cartridges. Before performing a print quality calibration, clean the print cartridges, and then reprint the document. If the lines still occur, perform a print quality calibration. For more information on cleaning the cartridges, see Automatically clean print cartridges. To calibrate print quality 1. Load Letter or A4 unused plain white paper in the paper tray. 2. Verify that both a black and a tri-color print cartridge are installed in the printer. 3. Open the printer Toolbox. 4. Click Print Quality Calibration. 5. Click Continue, and then follow the onscreen instructions. View estimated ink levels Follow these instructions to view the estimated ink levels of the print cartridges that are installed in the printer: NOTE: Ink from the cartridges is used in the printing process in a number of different ways, including in the initialization process, which prepares the device and cartridges for printing, and in printhead servicing, which keeps print nozzles clear and ink flowing smoothly. In addition, some residual ink is left in the cartridge after it is used. For more information, see www.hp.com/go/inkusage. To check the ink levels 1. Open the printer Toolbox. 2. Click the Estimated Ink Levels tab. NOTE: If the print cartridges were used before being installed in the printer, or have been refilled, the estimated ink levels on the Estimated Ink level tab may be inaccurate or unavailable. The Estimated Ink Levels tab also contains print cartridge ordering information. To view this information, click the Print Cartridge Information button. Maintenance Calibrate print quality 67
-
 1
1 -
2
-
3
-
4
-
5
-
6
-
7
-
8
-
9
-
10
-
11
-
12
-
13
-
14
-
15
-
16
-
17
-
18
-
19
-
20
-
21
-
22
-
23
-
24
-
25
-
26
-
27
-
28
-
29
-
30
-
31
-
32
-
33
-
34
-
35
-
36
-
37
-
38
-
39
-
40
-
41
-
42
-
43
-
44
-
45
-
46
-
47
-
48
-
49
-
50
-
51
-
52
-
53
-
54
-
55
-
56
-
57
-
58
-
59
-
60
-
61
-
62
-
63
-
64
-
 65
65 -
 66
66 -
 67
67 -
 68
68 -
 69
69 -
 70
70 -
 71
71 -
 72
72 -
 73
73 -
 74
74 -
 75
75 -
76
-
77
-
78
-
79
-
80
-
81
-
82
-
83
-
84
-
85
-
86
-
87
-
88
-
89
-
90
-
91
-
92
-
93
-
94
-
95
-
96
-
97
-
98
-
99
-
100
-
101
-
102
-
103
-
104
-
105
-
106
-
107
-
108
-
109
-
110
-
111
-
112
-
113
-
114
-
115
-
116
-
117
-
118
-
119
-
120
-
121
-
122
-
123
-
124
-
125
-
126
-
127
-
128
-
129
-
130
-
131
-
132
-
133
-
134
-
135
-
136
-
137
 |
 |
