HP Indigo WS6600 Dripping Prevention and ITM Heating Hood Service -- CA393-101 - Page 63
Press in Ready status, Main Menu > PIP and Blanket > First Transfer
 |
View all HP Indigo WS6600 manuals
Add to My Manuals
Save this manual to your list of manuals |
Page 63 highlights
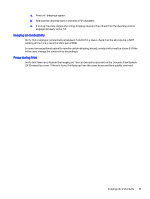
1. In Systab Editor, set IO_COOLER_FAN to 10000. 2. Place the Anemometer at the outlet duct as shown below. The vane should be in the middle of the utility cabinet outlet duct. Air velocity should be 5 ± 2 m/sec. Figure 3-43 Utility cabinet outlet Press in Ready status Floow these stteps for dripping correction procedures when the press in ready status. 1. Put the press into Ready status. 2. Check the machine temperature control as follows. With the press in Ready (print) status, touch Main Menu > Press status > System status, and verify that temperature values are within specifications. Figure 3-44 System status showing machine temperature 3. In Systab Editor, IO_Outlet_Temperature_Sensor, the value should be between 20°C and 24°C. 4. Using a lint-free wipe with imaging oil, wipe the entire PIP surface, including the PIP shoulders. 5. Run the First transfer calibration: Main Menu > PIP and Blanket > First Transfer. 6. Perform the following test procedure: 60 Chapter 3 Troubleshooting
-
 1
1 -
2
-
3
-
4
-
5
-
6
-
7
-
8
-
9
-
10
-
11
-
12
-
13
-
14
-
15
-
16
-
17
-
18
-
19
-
20
-
21
-
22
-
23
-
24
-
25
-
26
-
27
-
28
-
29
-
30
-
31
-
32
-
33
-
34
-
35
-
36
-
37
-
38
-
39
-
40
-
41
-
42
-
43
-
44
-
45
-
46
-
47
-
48
-
49
-
50
-
51
-
52
-
53
-
54
-
55
-
56
-
57
-
 58
58 -
 59
59 -
 60
60 -
 61
61 -
 62
62 -
 63
63 -
 64
64 -
 65
65 -
 66
66 -
 67
67 -
 68
68 -
69
-
70
-
71
-
72
 |
 |
