HP LaserJet Enterprise MFP M430 LaserJet Enterprise MFP M430 M431 User Guide - Page 110
Default scan settings for Scan to USB Drive setup
 |
View all HP LaserJet Enterprise MFP M430 manuals
Add to My Manuals
Save this manual to your list of manuals |
Page 110 highlights
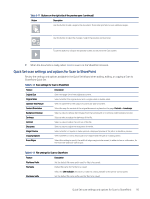
3. If you clicked Add, the Quick Sets Setup page opens. Complete the following information: a. Quick Set Name: Enter a title for the new Quick Set. b. Quick Set Description: Enter a description of the Quick Set. c. Quick Set Start Option: To set how the Quick Set starts, click either Enter application, then user presses Start or Start instantly when selected from the Home Screen. 4. Select a default location where scanned files are saved on USB storage devices inserted into the USB port on the control panel, and then click Next. The default location options are: ● Save at root directory of the USB storage device. ● Create or place in this folder on the USB Storage Device - The path to the folder on the USB storage device must be specified when using this file location option. A backslash \ must be used to separate folder\subfolder names in the path. 5. Select an option from the Condition on Which to Notify: drop-down list, and then click Next. This setting determines if, or how, users are notified when a Save To USB Quick Set job completes or fails. The options for the Condition on Which to Notify: setting are: ● Do not notify ● Notify when job completes ● Notify only if job fails 6. Choose the Scan Settings for the Quick Set, and then click Next. NOTE: For more information on the available scan settings, see Default scan settings for Scan to USB Drive setup on page 98 7. Choose the File Settings for the Quick Set, and then click Next. NOTE: For more information on the available file settings, see Default scan settings for Scan to USB Drive setup on page 98 8. Review the summary of settings, and then click Finish to save the Quick Set, or click Previous to edit the settings. Default scan settings for Scan to USB Drive setup Review the default settings for Scan to USB Drive setup. Table 6-14 Scan settings for Scan to USB Drive setup Feature Description Original Size Select the page size of the original document. Original Sides Select whether the original document is single-sided or double-sided. Optimize Text/Picture Select to optimize for the output of a particular type of content. Content Orientation Select the way the content of the original document is placed on the page: Portrait or Landscape. Background Cleanup Select a value to remove faint images from the background or to remove a light background color. Darkness Select a value to adjust the darkness of the file. 98 Chapter 6 Scan
-
 1
1 -
2
-
3
-
4
-
5
-
6
-
7
-
8
-
9
-
10
-
11
-
12
-
13
-
14
-
15
-
16
-
17
-
18
-
19
-
20
-
21
-
22
-
23
-
24
-
25
-
26
-
27
-
28
-
29
-
30
-
31
-
32
-
33
-
34
-
35
-
36
-
37
-
38
-
39
-
40
-
41
-
42
-
43
-
44
-
45
-
46
-
47
-
48
-
49
-
50
-
51
-
52
-
53
-
54
-
55
-
56
-
57
-
58
-
59
-
60
-
61
-
62
-
63
-
64
-
65
-
66
-
67
-
68
-
69
-
70
-
71
-
72
-
73
-
74
-
75
-
76
-
77
-
78
-
79
-
80
-
81
-
82
-
83
-
84
-
85
-
86
-
87
-
88
-
89
-
90
-
91
-
92
-
93
-
94
-
95
-
96
-
97
-
98
-
99
-
100
-
101
-
102
-
103
-
104
-
 105
105 -
 106
106 -
 107
107 -
 108
108 -
 109
109 -
 110
110 -
 111
111 -
 112
112 -
 113
113 -
 114
114 -
 115
115 -
116
-
117
-
118
-
119
-
120
-
121
-
122
-
123
-
124
-
125
-
126
-
127
-
128
-
129
-
130
-
131
-
132
-
133
-
134
-
135
-
136
-
137
-
138
-
139
-
140
-
141
-
142
-
143
-
144
-
145
-
146
-
147
-
148
-
149
-
150
-
151
-
152
-
153
-
154
-
155
-
156
-
157
-
158
-
159
-
160
-
161
-
162
-
163
-
164
-
165
-
166
-
167
-
168
-
169
-
170
-
171
-
172
-
173
-
174
-
175
-
176
-
177
-
178
-
179
-
180
-
181
-
182
-
183
-
184
-
185
-
186
-
187
-
188
-
189
-
190
-
191
-
192
-
193
-
194
-
195
-
196
-
197
-
198
-
199
-
200
-
201
-
202
-
203
-
204
-
205
-
206
-
207
-
208
-
209
-
210
-
211
-
212
-
213
-
214
-
215
-
216
-
217
-
218
-
219
-
220
-
221
-
222
-
223
-
224
-
225
-
226
-
227
-
228
-
229
-
230
-
231
-
232
-
233
-
234
-
235
-
236
-
237
-
238
-
239
-
240
-
241
-
242
-
243
-
244
-
245
-
246
-
247
-
248
-
249
-
250
-
251
-
252
-
253
-
254
-
255
-
256
-
257
-
258
-
259
-
260
-
261
-
262
-
263
-
264
-
265
-
266
 |
 |