HP LaserJet Enterprise MFP M430 LaserJet Enterprise MFP M430 M431 User Guide - Page 171
B2.D2 jam error in tray 2
 |
View all HP LaserJet Enterprise MFP M430 manuals
Add to My Manuals
Save this manual to your list of manuals |
Page 171 highlights
13.B2.D2 jam error in tray 2 Use the following procedure to check for paper in all possible jam locations related to Tray 2. Recommended action for customers When a jam occurs, the control panel displays an animation that assists in clearing the jam. ● 13.B2.D2 Paper jam in tray 2 1. Remove the tray from the printer. 2 2. Remove the paper from the tray, and discard any damaged paper. 2 3. Verify that the rear paper guide is adjusted to the indentation for the correct paper size. If necessary, pinch the release and move the rear paper guide to the correct position. It should click into place. A4 11 B5 2 13.B2.D2 jam error in tray 2 159
-
 1
1 -
2
-
3
-
4
-
5
-
6
-
7
-
8
-
9
-
10
-
11
-
12
-
13
-
14
-
15
-
16
-
17
-
18
-
19
-
20
-
21
-
22
-
23
-
24
-
25
-
26
-
27
-
28
-
29
-
30
-
31
-
32
-
33
-
34
-
35
-
36
-
37
-
38
-
39
-
40
-
41
-
42
-
43
-
44
-
45
-
46
-
47
-
48
-
49
-
50
-
51
-
52
-
53
-
54
-
55
-
56
-
57
-
58
-
59
-
60
-
61
-
62
-
63
-
64
-
65
-
66
-
67
-
68
-
69
-
70
-
71
-
72
-
73
-
74
-
75
-
76
-
77
-
78
-
79
-
80
-
81
-
82
-
83
-
84
-
85
-
86
-
87
-
88
-
89
-
90
-
91
-
92
-
93
-
94
-
95
-
96
-
97
-
98
-
99
-
100
-
101
-
102
-
103
-
104
-
105
-
106
-
107
-
108
-
109
-
110
-
111
-
112
-
113
-
114
-
115
-
116
-
117
-
118
-
119
-
120
-
121
-
122
-
123
-
124
-
125
-
126
-
127
-
128
-
129
-
130
-
131
-
132
-
133
-
134
-
135
-
136
-
137
-
138
-
139
-
140
-
141
-
142
-
143
-
144
-
145
-
146
-
147
-
148
-
149
-
150
-
151
-
152
-
153
-
154
-
155
-
156
-
157
-
158
-
159
-
160
-
161
-
162
-
163
-
164
-
165
-
 166
166 -
 167
167 -
 168
168 -
 169
169 -
 170
170 -
 171
171 -
 172
172 -
 173
173 -
 174
174 -
 175
175 -
 176
176 -
177
-
178
-
179
-
180
-
181
-
182
-
183
-
184
-
185
-
186
-
187
-
188
-
189
-
190
-
191
-
192
-
193
-
194
-
195
-
196
-
197
-
198
-
199
-
200
-
201
-
202
-
203
-
204
-
205
-
206
-
207
-
208
-
209
-
210
-
211
-
212
-
213
-
214
-
215
-
216
-
217
-
218
-
219
-
220
-
221
-
222
-
223
-
224
-
225
-
226
-
227
-
228
-
229
-
230
-
231
-
232
-
233
-
234
-
235
-
236
-
237
-
238
-
239
-
240
-
241
-
242
-
243
-
244
-
245
-
246
-
247
-
248
-
249
-
250
-
251
-
252
-
253
-
254
-
255
-
256
-
257
-
258
-
259
-
260
-
261
-
262
-
263
-
264
-
265
-
266
 |
 |
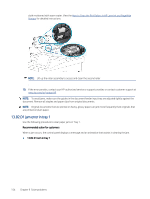
13.B2.D2 jam error in tray 2
Use the following procedure to check for paper in all possible jam locations related to Tray 2.
Recommended action for customers
When a jam occurs, the control panel displays an animation that assists in clearing the jam.
●
13.B2.D2 Paper jam in tray 2
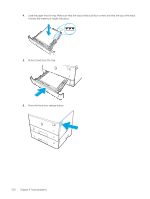
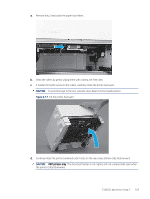
1.
Remove the tray from the printer.
2
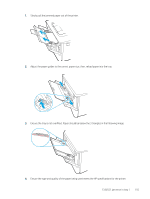
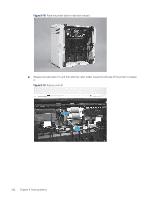
2.
Remove the paper from the tray, and discard any damaged paper.
2
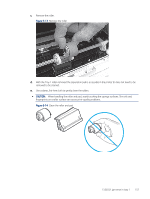
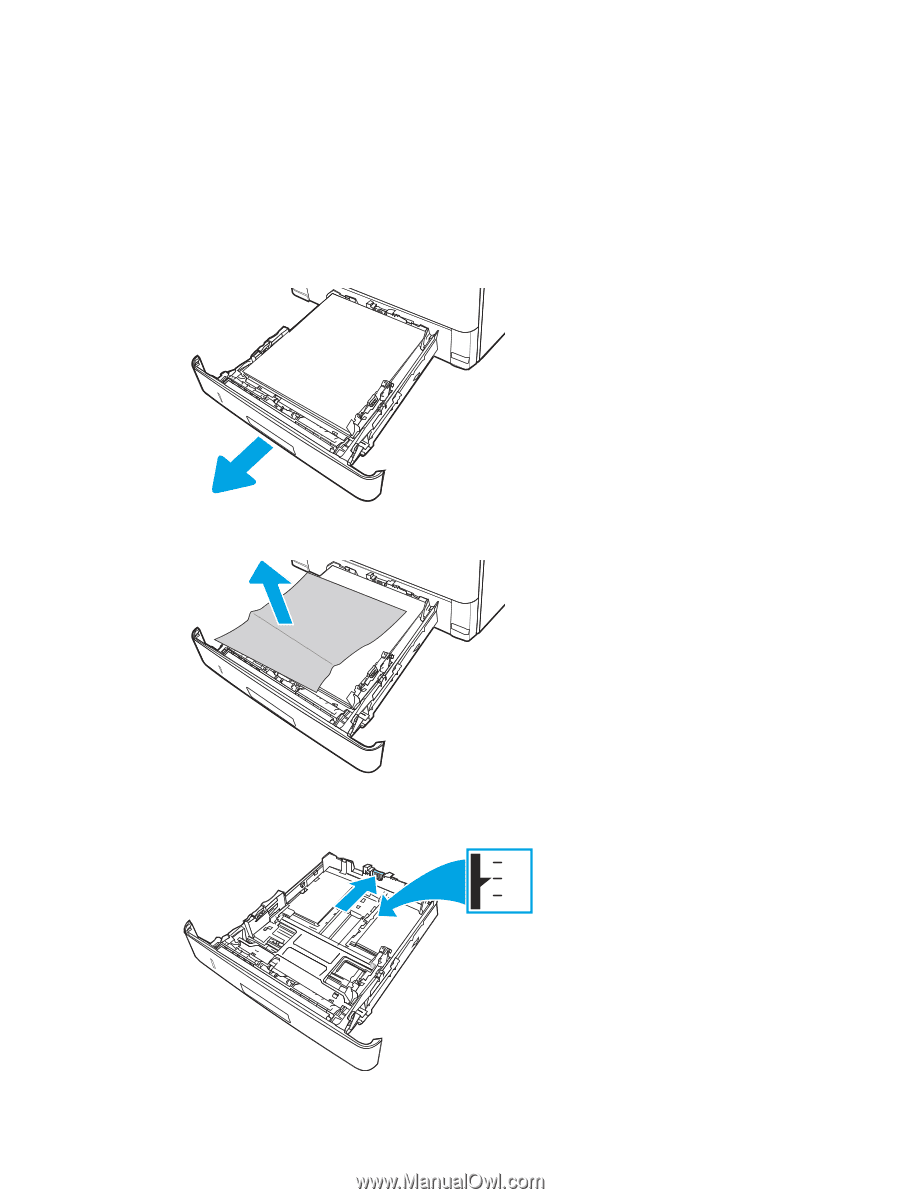
3.
Verify that the rear paper guide is adjusted to the indentation for the correct paper size. If necessary, pinch
the release and move the rear paper guide to the correct position. It should click into place.
2
11
B5
A4
13.B2.D2 jam error in tray 2
159