HP Latex 3100 Double-sided Day Night Kit User Guide - Page 13
Double-sided Day Night Kit platen substrate protector installation, IMPORTANT, Load side B, Finish.
 |
View all HP Latex 3100 manuals
Add to My Manuals
Save this manual to your list of manuals |
Page 13 highlights
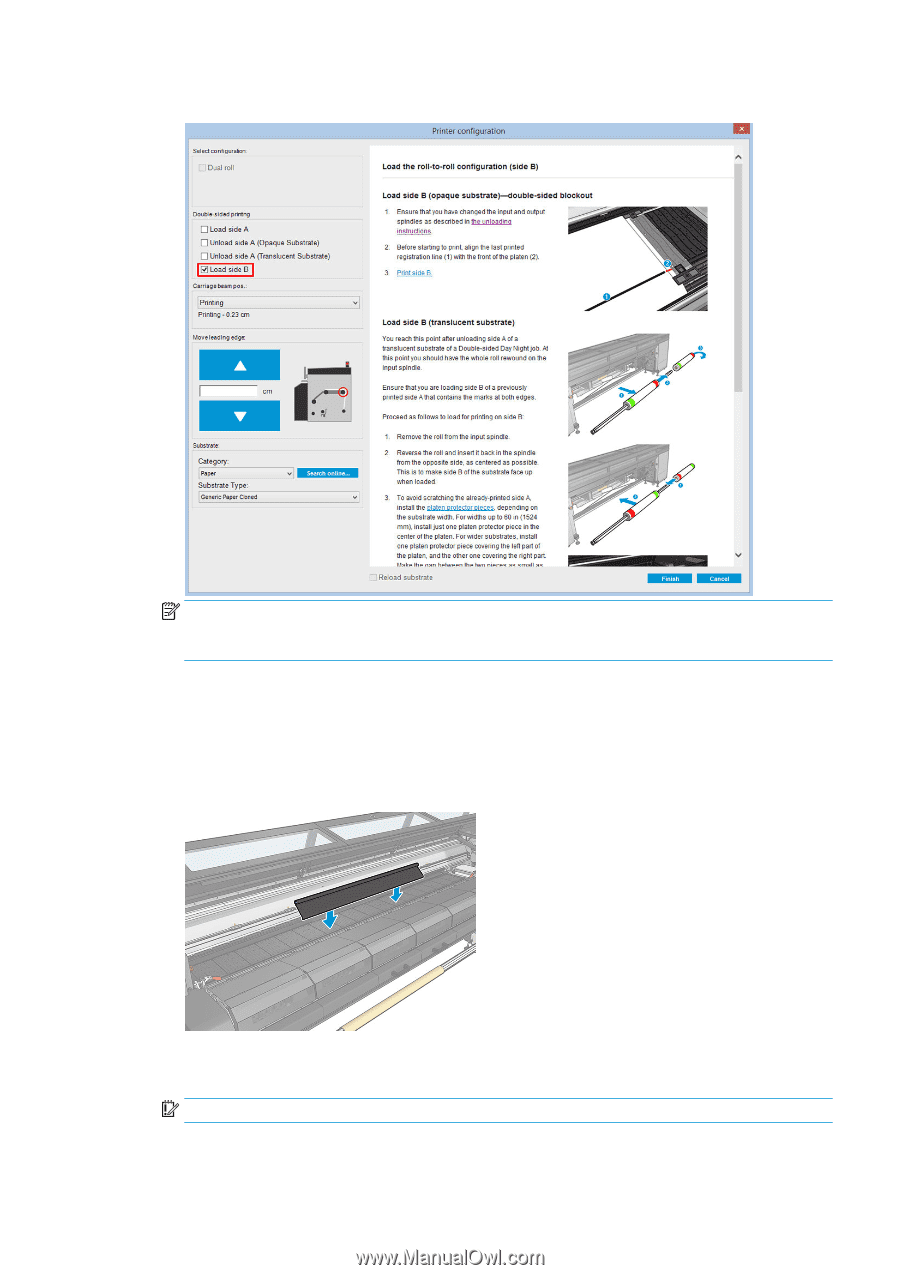
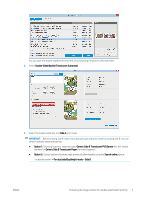
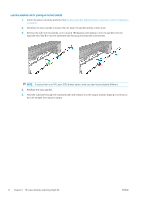
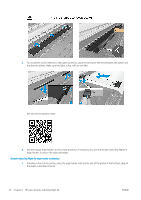
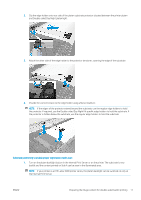
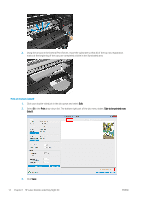
6. Check Load side B in the Load Substrate window, and click Finish. NOTE: The carriage beam position is automatically raised in case its current height is not safe for scanning edges with the platen substrate protector installed. It is then automatically lowered or raised to the previous position at the end of the substrate load process. When using the Double-sided Day and Night Kit some elements need to be installed to print side B of a job: Double-sided Day Night Kit platen substrate protector installation 1. Place the protector on the platen and drop the far side of the protector on the far side of the platen, in the space between the platen and the roller; it is magnetic and will attach itself. Nevertheless make sure it is attached to the base and not to the LED guide. 2. Unroll the platen substrate protector fabric covering all the platen. Try to cover all the platen with the protector, or use two protectors. It is important to try to cover at least all the printed content. IMPORTANT: Place the platen protector with the label face down, in contact with the platen. ENWW Preparing the image content for double-sided backlit printing 9
-
 1
1 -
2
-
3
-
4
-
5
-
6
-
7
-
 8
8 -
 9
9 -
 10
10 -
 11
11 -
 12
12 -
 13
13 -
 14
14 -
 15
15 -
 16
16 -
 17
17 -
 18
18 -
19
-
20
-
21
-
22
-
23
-
24
-
25
 |
 |