HP ML310 ProLiant ML310 Generation 2 Server User Guide - Page 23
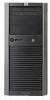
After installing hardware options, replace the access panel. Be sure that the panel
 |
View all HP ML310 manuals
Add to My Manuals
Save this manual to your list of manuals |
Page 23 highlights
Server Operations 23 3. Open the tower bezel ("Unlocking the Tower Bezel" on page 22). 4. Loosen the two captive thumbscrews. 5. Slide the access panel toward the rear of the server, and remove from the server. After installing hardware options, replace the access panel. Be sure that the panel is locked into place securely before powering up the server.
-
 1
1 -
2
-
3
-
4
-
5
-
6
-
7
-
8
-
9
-
10
-
11
-
12
-
13
-
14
-
15
-
16
-
17
-
 18
18 -
 19
19 -
 20
20 -
 21
21 -
 22
22 -
 23
23 -
 24
24 -
 25
25 -
 26
26 -
 27
27 -
 28
28 -
29
-
30
-
31
-
32
-
33
-
34
-
35
-
36
-
37
-
38
-
39
-
40
-
41
-
42
-
43
-
44
-
45
-
46
-
47
-
48
-
49
-
50
-
51
-
52
-
53
-
54
-
55
-
56
-
57
-
58
-
59
-
60
-
61
-
62
-
63
-
64
-
65
-
66
-
67
-
68
-
69
-
70
-
71
-
72
-
73
-
74
-
75
-
76
-
77
-
78
-
79
-
80
-
81
-
82
-
83
-
84
-
85
-
86
-
87
-
88
-
89
-
90
-
91
-
92
-
93
-
94
-
95
-
96
-
97
-
98
-
99
-
100
-
101
-
102
-
103
-
104
-
105
-
106
-
107
-
108
-
109
-
110
-
111
-
112
-
113
-
114
-
115
-
116
-
117
-
118
-
119
-
120
-
121
-
122
-
123
-
124
 |
 |

Server Operations
23
3.
Open the tower bezel ("Unlocking the Tower Bezel" on page
22
).
4.
Loosen the two captive thumbscrews.
5.
Slide the access panel toward the rear of the server, and remove from the
server.
After installing hardware options, replace the access panel. Be sure that the panel
is locked into place securely before powering up the server.