HP NetServer LP 2000r Installing IBM OS/2 on an HP Netserver - Page 26
To begin installing OS/2 Warp 4, 0 or OS/2 Warp Server 4.0 place the Installation Diskette
 |
View all HP NetServer LP 2000r manuals
Add to My Manuals
Save this manual to your list of manuals |
Page 26 highlights
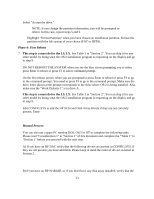
If you experience any problems doing the generic installation process then try using the custom installation process. Procedure #1: Install IBM OS/2 product using standard IBM installation process and then apply Hewlett-Packard specific drivers. Phase 1: Create Copy of IBM diskettes 1. Make copies of IBM diskettes. Label the copies "Work Install Diskette", "Work Diskette 1", and for Warp 4.0 you will have a "Work Diskette 2". Phase 2: OS/2 Start OS/2 Installation 2. Install the product using IBM standard installation procedure. Start installation of OS/2 using copy of IBM "Installation" Diskette To begin installing OS/2 Warp 4,0 or OS/2 Warp Server 4.0 place the Installation Diskette in drive A, insert the IBM OS/2 CD-ROM and boot the system. 3. Insert "Work Diskette 1" when prompted for IBM Diskette 1. (Warp 4.0 will also ask for Diskette 2) When you are prompted to insert Diskette 1 and press Enter, insert the copy of "Work Diskette 1" created with the Drivers/Utility diskette, then press Enter. An OS/2 logo appears, and after some time you will see a screen titled "Welcome to OS/2". Press Enter again to continue. Select "Advanced Installation" if you want to partition your drives. Follow the prompts to create partitions as needed. Select "Accept the drive". NOTE: If you change the partition information, you will be prompted to reboot. In this case, repeat steps 2 and 3. Highlight "Format Partition" when you have chosen an installation partition. Format the partition with the file system of your choice (FAT or HPFS). The system will take about 20 minutes copying files. Phase 3: First Reboot 4. Remove the diskette as requested and Press Enter to reboot the system at the first reboot screen. 5. Complete the OS/2 Configuration screen. It is important that you select VGA for the display configuration. You can change this after the installation is complete. Select Next to continue. ( If you have a NetServer E40 or Lpr,at the System configuration panel select "CD-ROM 26
-
 1
1 -
2
-
3
-
4
-
5
-
6
-
7
-
8
-
9
-
10
-
11
-
12
-
13
-
14
-
15
-
16
-
17
-
18
-
19
-
20
-
 21
21 -
 22
22 -
 23
23 -
 24
24 -
 25
25 -
 26
26 -
 27
27 -
 28
28 -
 29
29 -
 30
30 -
 31
31 -
32
-
33
-
34
-
35
-
36
-
37
-
38
 |
 |