HP OMEN 15-ek0000 Maintenance and Service Guide - Page 64
Remove the antenna cables from their routing path in the computer, Remove the display assembly
 |
View all HP OMEN 15-ek0000 manuals
Add to My Manuals
Save this manual to your list of manuals |
Page 64 highlights
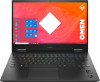
1. Prepare the computer for disassembly (Preparation for disassembly on page 31). 2. Remove the bottom cover (Bottom cover on page 31). 3. Remove the solid-state drives (Solid-state drive on page 32). 4. Remove the battery (see Battery on page 37). 5. Remove the fans (see Fans on page 45). 6. Remove the system board (see System board on page 48). Remove the display assembly: 1. Lift the three pieces of tape that secure the antenna cables (1). 2. Remove the antenna cables from their routing path in the computer (2). 3. Remove the six Phillips M2.5 × 3.5 screws (1) that secure the display to the computer. 54 Chapter 6 Removal and replacement procedures for authorized service provider parts
-
 1
1 -
2
-
3
-
4
-
5
-
6
-
7
-
8
-
9
-
10
-
11
-
12
-
13
-
14
-
15
-
16
-
17
-
18
-
19
-
20
-
21
-
22
-
23
-
24
-
25
-
26
-
27
-
28
-
29
-
30
-
31
-
32
-
33
-
34
-
35
-
36
-
37
-
38
-
39
-
40
-
41
-
42
-
43
-
44
-
45
-
46
-
47
-
48
-
49
-
50
-
51
-
52
-
53
-
54
-
55
-
56
-
57
-
58
-
 59
59 -
 60
60 -
 61
61 -
 62
62 -
 63
63 -
 64
64 -
 65
65 -
 66
66 -
 67
67 -
 68
68 -
 69
69 -
70
-
71
-
72
-
73
-
74
-
75
-
76
-
77
-
78
-
79
-
80
-
81
-
82
-
83
-
84
-
85
-
86
-
87
-
88
-
89
-
90
-
91
-
92
-
93
-
94
-
95
-
96
-
97
-
98
-
99
-
100
 |
 |

1.
Prepare the computer for disassembly (
Preparation for disassembly
on page
31
).
2.
Remove the bottom cover (
Bottom cover
on page
31
).
3.
Remove the solid-state drives (
Solid-state drive
on page
32
).
4.
Remove the battery (see
Battery
on page
37
).
5.
Remove the fans (see
Fans
on page
45
).
6.
Remove the system board (see
System board
on page
48
).
Remove the display assembly:
1.
Lift the three pieces of tape that secure the antenna cables
(1)
.
2.
Remove the antenna cables from their routing path in the computer
(2)
.
3.
Remove the six Phillips M2.5 × 3.5 screws
(1)
that secure the display to the computer.
54
Chapter 6
Removal and replacement procedures for authorized service provider parts