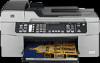
HP Officejet J5700 User Guide - Macintosh - Page 88
Stop scanning, Edit a scanned preview image, Print a scanned image, Change default scan settings
 |
View all HP Officejet J5700 manuals
Add to My Manuals
Save this manual to your list of manuals |
Page 88 highlights
Chapter 8 3. Press OK to select the default application to receive the scan, or press to select a different application, and then press OK. A preview image of the scan appears on your computer, where you can edit it. 4. Make any edits to the preview image, and then click Accept when you are finished. The HP All-in-One sends the scan to the selected application. Stop scanning To stop scanning ▲ Press Cancel on the control panel. Edit a scanned preview image You can use the tools in the HP Scan Pro window to modify a preview image. Any changes that you make, such as brightness, image type, resolution, and more, apply to this scan session only. You can do the following using the HP Scan Pro software: • Select a portion of the image • Change the image type and quality • Change the resolution • Crop or straighten the image • Adjust the brightness or contrast • Adjust the color or saturation • Sharpen or blur the image • Rotate the image • Resize the image For more information, see the HP Scan Pro section of the HP Photosmart Mac Help. Print a scanned image You can print a scanned image from the HP Scan Pro scan preview software. For more information, see the HP Scan Pro section of the HP Photosmart Mac Help. Change default scan settings You can use the tools in the software you installed with the HP All-in-One to permanently change certain settings for all scan sessions. You can also use your favorite application as the default destination for viewing scanned images. You can change the default destination application associated with the Scan button in the software you installed with the HP All-in-One, and the Scan To button on the control panel. This section contains the following topics: • Add a new image save destination • Change the default destination 86 Use the scan features
-
 1
1 -
2
-
3
-
4
-
5
-
6
-
7
-
8
-
9
-
10
-
11
-
12
-
13
-
14
-
15
-
16
-
17
-
18
-
19
-
20
-
21
-
22
-
23
-
24
-
25
-
26
-
27
-
28
-
29
-
30
-
31
-
32
-
33
-
34
-
35
-
36
-
37
-
38
-
39
-
40
-
41
-
42
-
43
-
44
-
45
-
46
-
47
-
48
-
49
-
50
-
51
-
52
-
53
-
54
-
55
-
56
-
57
-
58
-
59
-
60
-
61
-
62
-
63
-
64
-
65
-
66
-
67
-
68
-
69
-
70
-
71
-
72
-
73
-
74
-
75
-
76
-
77
-
78
-
79
-
80
-
81
-
82
-
 83
83 -
 84
84 -
 85
85 -
 86
86 -
 87
87 -
 88
88 -
 89
89 -
 90
90 -
 91
91 -
 92
92 -
 93
93 -
94
-
95
-
96
-
97
-
98
-
99
-
100
-
101
-
102
-
103
-
104
-
105
-
106
-
107
-
108
-
109
-
110
-
111
-
112
-
113
-
114
-
115
-
116
-
117
-
118
-
119
-
120
-
121
-
122
-
123
-
124
-
125
-
126
-
127
-
128
-
129
-
130
-
131
-
132
-
133
-
134
-
135
-
136
-
137
-
138
-
139
-
140
-
141
-
142
-
143
-
144
-
145
-
146
-
147
-
148
-
149
-
150
-
151
-
152
-
153
-
154
-
155
-
156
-
157
-
158
-
159
-
160
-
161
-
162
-
163
-
164
-
165
-
166
-
167
-
168
-
169
-
170
-
171
-
172
-
173
-
174
-
175
-
176
-
177
-
178
-
179
-
180
-
181
-
182
-
183
-
184
-
185
-
186
-
187
-
188
-
189
-
190
-
191
-
192
-
193
-
194
-
195
-
196
-
197
-
198
-
199
-
200
-
201
-
202
-
203
-
204
-
205
-
206
-
207
-
208
-
209
-
210
-
211
-
212
-
213
-
214
-
215
-
216
-
217
-
218
-
219
-
220
-
221
-
222
-
223
-
224
-
225
-
226
-
227
-
228
-
229
-
230
-
231
-
232
-
233
-
234
-
235
-
236
-
237
-
238
-
239
-
240
-
241
-
242
-
243
-
244
-
245
-
246
-
247
-
248
-
249
-
250
-
251
-
252
-
253
-
254
-
255
-
256
-
257
-
258
-
259
-
260
-
261
-
262
-
263
-
264
-
265
-
266
-
267
-
268
-
269
-
270
-
271
-
272
-
273
-
274
-
275
-
276
-
277
-
278
-
279
-
280
-
281
-
282
-
283
-
284
-
285
-
286
-
287
-
288
-
289
-
290
-
291
-
292
-
293
-
294
-
295
-
296
 |
 |
