HP OmniBook 900 HP OmniBook 900 Reference Guide - Page 67
To connect an external monitor, To enable the built-in and external displays, To change display
 |
View all HP OmniBook 900 manuals
Add to My Manuals
Save this manual to your list of manuals |
Page 67 highlights
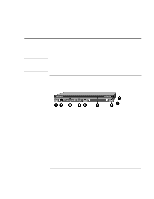
Expanding the OmniBook Connecting External Devices To connect an external monitor You can connect a VGA, SVGA, XGA, or SXGA monitor to your OmniBook-or UXGA for a computer with "900 B" after the serial number. A 12-inch internal display supports standard SVGA mode (800 by 600 pixels), and a 13-inch display supports XGA mode (1024 by 768 pixels). 1. Press the blue power button for one second to suspend the OmniBook. 2. Connect the monitor cable to the monitor, then to the monitor port on the back of the OmniBook. 3. Connect the monitor to a power source and turn it on. 4. Press the blue power button to turn on the OmniBook. 5. If the external monitor has a different resolution from the internal display, adjust the display properties (My Computer, Control Panel, Display, Settings). Hint Turn on the monitor before turning on the computer. This makes plug-and-play features on the monitor available to the computer. To enable the built-in and external displays • For a temporary change, press Fn+F5 to cycle through the display options (Internal, External, Both). • For a permanent change in which display is active, change the Video Display Device setting in the BIOS Setup utility (see below). • For a display connected to a video adapter in a docking system, the docking display is automatically selected when it is detected. To change this behavior, change the Primary Video Adapter setting in the BIOS Setup utility (see below). To change BIOS display settings, see the next topic. To change display settings in the BIOS Setup utility 1. From the Start menu, shut down, then restart the OmniBook. 2. When you see the HP logo, press F2 to enter the BIOS Setup utility. 3. From the Main menu, use the down arrow to highlight Video Display Device. Reference Guide 67
-
 1
1 -
2
-
3
-
4
-
5
-
6
-
7
-
8
-
9
-
10
-
11
-
12
-
13
-
14
-
15
-
16
-
17
-
18
-
19
-
20
-
21
-
22
-
23
-
24
-
25
-
26
-
27
-
28
-
29
-
30
-
31
-
32
-
33
-
34
-
35
-
36
-
37
-
38
-
39
-
40
-
41
-
42
-
43
-
44
-
45
-
46
-
47
-
48
-
49
-
50
-
51
-
52
-
53
-
54
-
55
-
56
-
57
-
58
-
59
-
60
-
61
-
 62
62 -
 63
63 -
 64
64 -
 65
65 -
 66
66 -
 67
67 -
 68
68 -
 69
69 -
 70
70 -
 71
71 -
 72
72 -
73
-
74
-
75
-
76
-
77
-
78
-
79
-
80
-
81
-
82
-
83
-
84
-
85
-
86
-
87
-
88
-
89
-
90
-
91
-
92
-
93
-
94
-
95
-
96
-
97
-
98
-
99
-
100
-
101
-
102
-
103
-
104
-
105
-
106
-
107
-
108
-
109
-
110
-
111
-
112
-
113
-
114
-
115
-
116
-
117
-
118
-
119
-
120
-
121
-
122
-
123
-
124
-
125
-
126
-
127
-
128
-
129
-
130
-
131
-
132
-
133
-
134
-
135
-
136
-
137
-
138
-
139
-
140
-
141
-
142
-
143
-
144
-
145
 |
 |