HP OmniBook XE2-DE HP OmniBook XE2 Notebook PC - Setup Guide - Page 18
To set up Windows - notebook pc
 |
View all HP OmniBook XE2-DE manuals
Add to My Manuals
Save this manual to your list of manuals |
Page 18 highlights
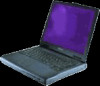
Introducing the OmniBook PC Setting Up the Computer Year 2000 Note To set up Windows The HP OmniBook has Microsoft Windows 98 preinstalled on the hard disk drive. The first time you turn on your computer, a Windows Setup program will automatically run so that you can customize your setup. Hewlett-Packard makes no representation or warranty about the Year 2000 readiness of non-HP products including preinstalled operating systems or application software. You should contact the software manufacturer directly to determine if you need to do anything else to ensure compliance. Microsoft has indicated that many of its operating system software products and applications require customer installation of software patches for Year 2000 compliance and may require additional patches in the future. The need for such patches most likely applies to the operating system software and any Microsoft applications shipped with this product. You are urged to contact Microsoft at http://www.microsoft.com/y2k, at 1-888-MSFTY2K (U.S. and Canada only), or at your local Microsoft office. Before you begin, connect the AC adapter to your notebook, since your battery may not be sufficiently charged to complete the Windows setup. Also, be sure to connect the notebook to the phone line. For information on connecting your modem, see "To connect a phone line" on page 16. 1. Press the blue power button. 2. The Windows Setup program starts automatically. 3. Follow the instructions as they appear on the screen. During setup, you are prompted to: • Enter a user name. • Accept the License Agreement. You can also register your computer at this time. Follow the instructions on the screen during setup, or-if registration does not occur during setup--click Next on the desktop wallpaper or double-click the Registration icon on the desktop. If you experience any connection problems with your modem, you can try redialing. If that doesn't work, you can skip the product registration and ISP selection for now. 18 Setup Guide
-
 1
1 -
2
-
3
-
4
-
5
-
6
-
7
-
8
-
9
-
10
-
11
-
12
-
 13
13 -
 14
14 -
 15
15 -
 16
16 -
 17
17 -
 18
18 -
 19
19 -
 20
20 -
 21
21 -
 22
22 -
 23
23 -
24
-
25
-
26
-
27
-
28
-
29
-
30
-
31
-
32
-
33
-
34
-
35
-
36
-
37
-
38
-
39
-
40
-
41
-
42
-
43
-
44
-
45
-
46
-
47
-
48
-
49
-
50
-
51
-
52
-
53
-
54
-
55
-
56
-
57
-
58
-
59
-
60
-
61
-
62
-
63
-
64
-
65
-
66
-
67
-
68
-
69
-
70
-
71
-
72
-
73
-
74
-
75
-
76
-
77
-
78
 |
 |