HP PageWide Pro 452dn User Guide - Page 69
The product picks up multiple sheets of paper, Prevent paper jams, Clear jams
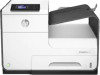 |
View all HP PageWide Pro 452dn manuals
Add to My Manuals
Save this manual to your list of manuals |
Page 69 highlights
The product picks up multiple sheets of paper If the product picks up multiple sheets of paper from the tray, try these solutions: ● Remove the stack of paper from the tray and flex it, rotate it 180 degrees, and flip it over. Do not fan the paper. Return the stack of paper to the tray. ● Use only paper that meets HP specifications for this product. ● Use paper that is not wrinkled, folded, or damaged. If necessary, use paper from a different package. Make sure all paper in the tray is the same type and size. ● Make sure the tray is not overfilled. If it is, remove the entire stack of paper from the tray, straighten the stack, and then return less paper to the tray. Even if the tray is not overfilled, try using a lower stack of media, such as half. ● Make sure the paper guides in the tray are adjusted correctly for the size of paper. Align the guides with the paper-size markings in the bottom of the tray. ● Print from another tray. Prevent paper jams To reduce the number of paper jams, try these solutions: ● Use only paper that meets HP specifications for this product. Lightweight, short-grain paper is not recommended. ● Use paper that is not wrinkled, folded, or damaged. If necessary, use paper from a different package. ● Use paper that has not previously been printed or copied on. ● Make sure the tray is not overfilled. If it is, remove the entire stack of paper from the tray, straighten the stack, and then return some of the paper to the tray. ● Make sure the paper guides in the tray are adjusted correctly for the size of paper. Adjust the guides so they are touching the paper stack without bending it. ● Make sure that the tray is fully inserted in the product. ● If you are printing on heavy, embossed, or perforated paper, use Tray 1, the multipurpose tray on the left side of the printer, and then feed sheets manually one at a time. Clear jams ● Jam locations ● Clear jams in Tray 1 (multipurpose tray) ● Clear jams in Tray 2 ● Clear jams in optional Tray 3 ● Clear jams in the left door ● Clear jams in the output bin ● Clear jams in the duplexer NOTE: For best results, do not turn off the product before clearing paper jams. ENWW Jams and paper-feed issues 59
-
 1
1 -
2
-
3
-
4
-
5
-
6
-
7
-
8
-
9
-
10
-
11
-
12
-
13
-
14
-
15
-
16
-
17
-
18
-
19
-
20
-
21
-
22
-
23
-
24
-
25
-
26
-
27
-
28
-
29
-
30
-
31
-
32
-
33
-
34
-
35
-
36
-
37
-
38
-
39
-
40
-
41
-
42
-
43
-
44
-
45
-
46
-
47
-
48
-
49
-
50
-
51
-
52
-
53
-
54
-
55
-
56
-
57
-
58
-
59
-
60
-
61
-
62
-
63
-
 64
64 -
 65
65 -
 66
66 -
 67
67 -
 68
68 -
 69
69 -
 70
70 -
 71
71 -
 72
72 -
 73
73 -
 74
74 -
75
-
76
-
77
-
78
-
79
-
80
-
81
-
82
-
83
-
84
-
85
-
86
-
87
-
88
-
89
-
90
-
91
-
92
-
93
-
94
-
95
-
96
-
97
-
98
-
99
-
100
-
101
-
102
-
103
-
104
-
105
-
106
-
107
-
108
-
109
-
110
-
111
-
112
-
113
 |
 |
