HP Photosmart 1115 HP PhotoSmart 1215/1115 - (English) Basics Guide - Page 25
photo color, model 1215, factory default, settings
 |
View all HP Photosmart 1115 manuals
Add to My Manuals
Save this manual to your list of manuals |
Page 25 highlights
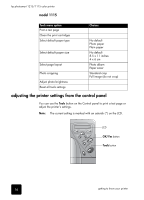
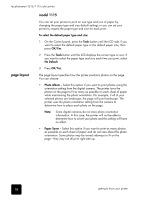
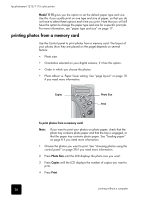
hp photosmart 1215/1115 color printer photo color (model 1215) factory default settings When printing directly from the memory card, you can set the printer to print photos in Color, Black & White, Sepia, or Antique. Photos printed in Sepia print in brown tones and look similar to photos produced in the early 1900s. Photos printed in Antique print in the same brown tones as Sepia but with some pale colors added to give the appearance that they are hand colored. Note: This setting is only active when printing from a memory card; it is inactive when printing from the computer. To change the photo color: 1 On the Control panel, press the Tools button until the LCD asks if you want to adjust the color options for the next print, then press OK/Yes. 2 Press the right side of the Tools button again to select Color, Black & White, Sepia, or Antique. 3 Press OK/Yes. Note: After you finish printing the photo, the photo color setting returns to the default setting, Color. If you want to continue printing in Black & White, Sepia or Antique, you need to change the photo color setting before each print job. If you made adjustments to the print settings, you can reset the printer to the original factory settings. To use the factory settings: 1 On the Control panel, press the Tools button until the LCD asks if you want to reset all the tools settings. 2 Press OK/Yes. 21
-
 1
1 -
2
-
3
-
4
-
5
-
6
-
7
-
8
-
9
-
10
-
11
-
12
-
13
-
14
-
15
-
16
-
17
-
18
-
19
-
 20
20 -
 21
21 -
 22
22 -
 23
23 -
 24
24 -
 25
25 -
 26
26 -
 27
27 -
 28
28 -
 29
29 -
 30
30 -
31
-
32
-
33
-
34
-
35
-
36
-
37
-
38
-
39
-
40
-
41
-
42
-
43
-
44
-
45
-
46
-
47
-
48
 |
 |
