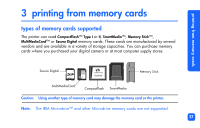
HP Photosmart 130 HP Photosmart 130 printer - (English) Photo Print Guide - Page 31
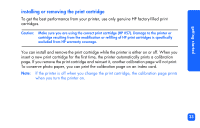
After you insert the print cartridge, the printer
 |
View all HP Photosmart 130 manuals
Add to My Manuals
Save this manual to your list of manuals |
Page 31 highlights
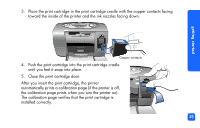
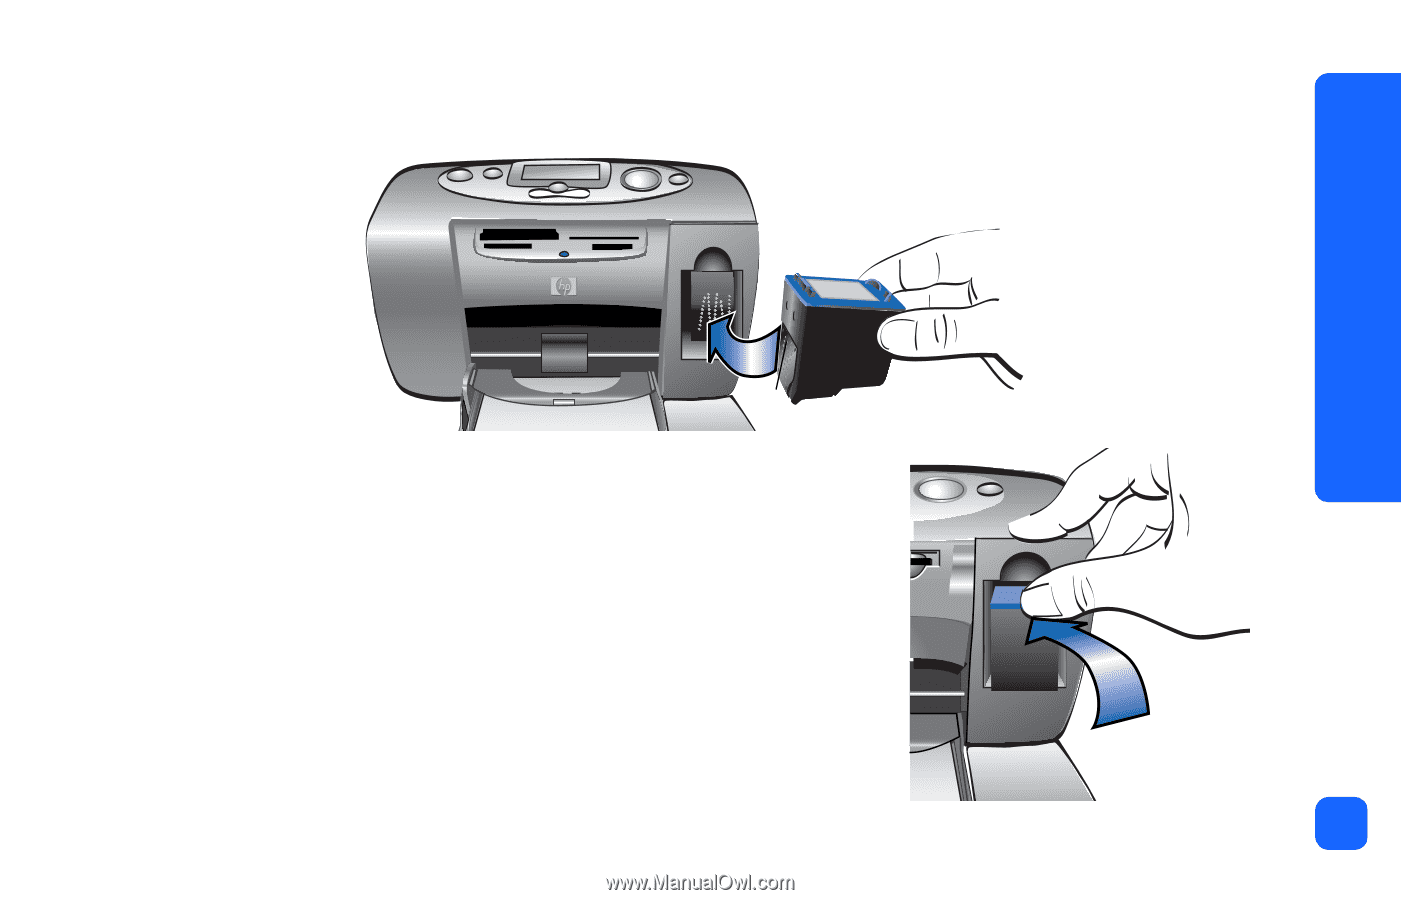
getting started 3. Place the print cartridge in the print cartridge cradle with the copper contacts facing toward the inside of the printer and the ink nozzles facing down. Copper contacts 4. Push the print cartridge into the print cartridge cradle until you feel it snap into place. 5. Close the print cartridge door. After you insert the print cartridge, the printer automatically prints a calibration page (if the printer is off, the calibration page prints when you turn the printer on). The calibration page verifies that the print cartridge is installed correctly. 25
-
 1
1 -
2
-
3
-
4
-
5
-
6
-
7
-
8
-
9
-
10
-
11
-
12
-
13
-
14
-
15
-
16
-
17
-
18
-
19
-
20
-
21
-
22
-
23
-
24
-
25
-
 26
26 -
 27
27 -
 28
28 -
 29
29 -
 30
30 -
 31
31 -
 32
32 -
 33
33 -
 34
34 -
 35
35 -
 36
36 -
37
-
38
-
39
-
40
-
41
-
42
-
43
-
44
-
45
-
46
-
47
-
48
-
49
-
50
-
51
-
52
-
53
-
54
-
55
-
56
-
57
-
58
-
59
-
60
-
61
-
62
-
63
-
64
-
65
-
66
-
67
-
68
-
69
-
70
-
71
-
72
-
73
-
74
-
75
-
76
-
77
-
78
-
79
-
80
-
81
-
82
-
83
-
84
-
85
-
86
-
87
-
88
-
89
-
90
-
91
-
92
-
93
-
94
-
95
-
96
-
97
-
98
-
99
-
100
 |
 |
getting started
25
3.
Place the print cartridge in the print cartridge cradle with the copper contacts facing
toward the inside of the printer and the ink nozzles facing down.
4.
Push the print cartridge into the print cartridge cradle
until you feel it snap into place.
5.
Close the print cartridge door.
After you insert the print cartridge, the printer
automatically prints a calibration page (if the printer is off,
the calibration page prints when you turn the printer on).
The calibration page verifies that the print cartridge is
installed correctly.
Copper contacts