HP Photosmart 240 HP Photosmart 240 series - (English) Basics Guide - Page 55
error messages, Message, Possible cause, Solution
 |
View all HP Photosmart 240 manuals
Add to My Manuals
Save this manual to your list of manuals |
Page 55 highlights
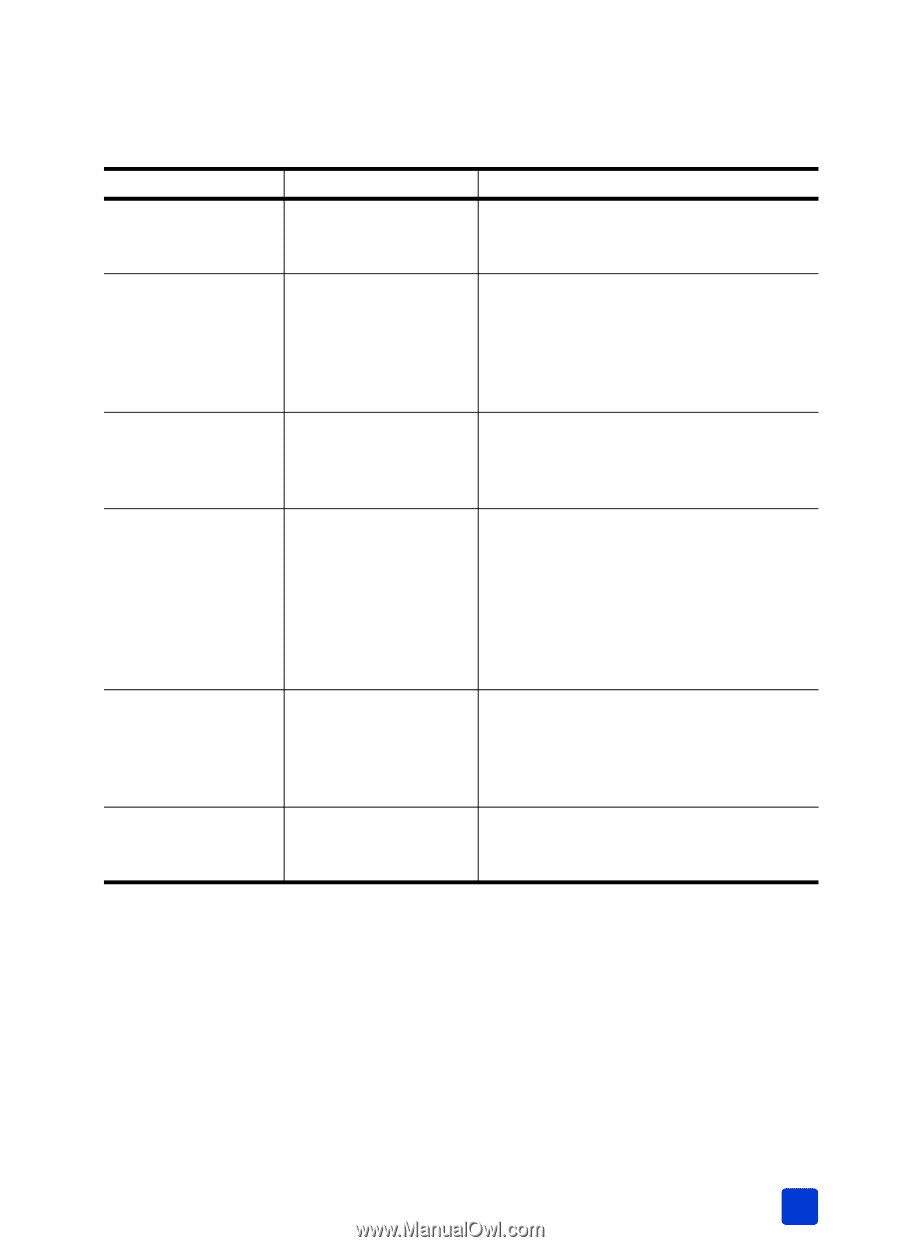
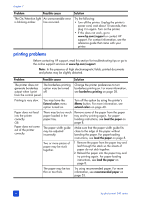
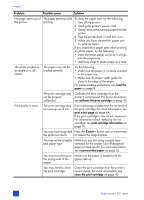
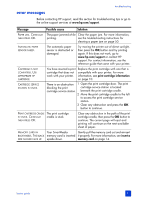
error messages troubleshooting Before contacting HP support, read this section for troubleshooting tips or go to the online support services at www.hp.com/support. Message Possible cause Solution PAPER JAM. CLEAR JAM THEN PRESS OK. The paper jammed while Clear the paper jam. For more information, printing. see the troubleshooting instructions for clearing a paper jam on page 50. AUTOMATIC PAPER SENSOR FAILED. The automatic paper sensor is obstructed or damaged. Try moving the printer out of direct sunlight, then press the OK button and try printing again. If this does not work, go to www.hp.com/support or contact HP support. For contact information, see the reference guide that came with your printer. CARTRIDGE IS NOT COMPATIBLE. USE APPROPRIATE HP CARTRIDGE. CARTRIDGE SERVICE STATION IS STUCK. You have inserted a print Replace the print cartridge with one that is cartridge that does not compatible with your printer. For more work with your printer. information, see print cartridge information on page 10. There is an obstruction 1 Open the print cartridge door. The print blocking the print cartridge service station is located cartridge service station. beneath the print cartridge cradle. 2 Move the print cartridge cradle to the left to access the print cartridge service station. 3 Clear any obstruction and press the OK button to continue. PRINT CARTRIDGE CRADLE The print cartridge IS STUCK. CLEAR JAM cradle is stuck. THEN PRESS OK. Clear any obstruction in the path of the print cartridge cradle, then press the OK button to continue. The current page will eject and printing will continue on the next available sheet of paper. MEMORY CARD IN Your SmartMedia Gently pull the memory card out and reinsert BACKWARDS. THE BLACK memory card is inserted it properly. For more information, see insert a SIDE SHOULD FACE UP. upside down. memory card on page 14. basics guide 51
-
 1
1 -
2
-
3
-
4
-
5
-
6
-
7
-
8
-
9
-
10
-
11
-
12
-
13
-
14
-
15
-
16
-
17
-
18
-
19
-
20
-
21
-
22
-
23
-
24
-
25
-
26
-
27
-
28
-
29
-
30
-
31
-
32
-
33
-
34
-
35
-
36
-
37
-
38
-
39
-
40
-
41
-
42
-
43
-
44
-
45
-
46
-
47
-
48
-
49
-
 50
50 -
 51
51 -
 52
52 -
 53
53 -
 54
54 -
 55
55 -
 56
56 -
 57
57 -
 58
58 -
 59
59 -
 60
60 -
61
-
62
-
63
-
64
 |
 |