HP ProLiant ML310e HP ProLiant ML310e Gen8 Server User Guide - Page 37
Eight-bay SFF hot-plug drive cage option, Remove all installed drives.
 |
View all HP ProLiant ML310e manuals
Add to My Manuals
Save this manual to your list of manuals |
Page 37 highlights
19. Power up the server (on page 18). Eight-bay SFF hot-plug drive cage option To install the component: 1. Power down the server (on page 18). 2. Remove all power: a. Disconnect each power cord from the power source. b. Disconnect each power cord from the server. 3. Remove the tower bezel (on page 19). 4. Remove the access panel (on page 20). 5. Remove the air baffle (on page 21). 6. Remove all installed drives. 7. Disconnect the drive cage cables: a. Disconnect the Mini-SAS cable from the system board. b. Disconnect the drive power cable from the 10-pin power supply connector. 8. Remove the LFF drive cage assembly. Hardware options installation 37
-
 1
1 -
2
-
3
-
4
-
5
-
6
-
7
-
8
-
9
-
10
-
11
-
12
-
13
-
14
-
15
-
16
-
17
-
18
-
19
-
20
-
21
-
22
-
23
-
24
-
25
-
26
-
27
-
28
-
29
-
30
-
31
-
 32
32 -
 33
33 -
 34
34 -
 35
35 -
 36
36 -
 37
37 -
 38
38 -
 39
39 -
 40
40 -
 41
41 -
 42
42 -
43
-
44
-
45
-
46
-
47
-
48
-
49
-
50
-
51
-
52
-
53
-
54
-
55
-
56
-
57
-
58
-
59
-
60
-
61
-
62
-
63
-
64
-
65
-
66
-
67
-
68
-
69
-
70
-
71
-
72
-
73
-
74
-
75
-
76
-
77
-
78
-
79
-
80
-
81
-
82
-
83
-
84
-
85
-
86
-
87
-
88
-
89
-
90
-
91
-
92
-
93
-
94
-
95
-
96
-
97
-
98
-
99
-
100
-
101
-
102
-
103
-
104
-
105
-
106
-
107
 |
 |
Hardware options installation 37
19.
Power up the server (on page
18
).
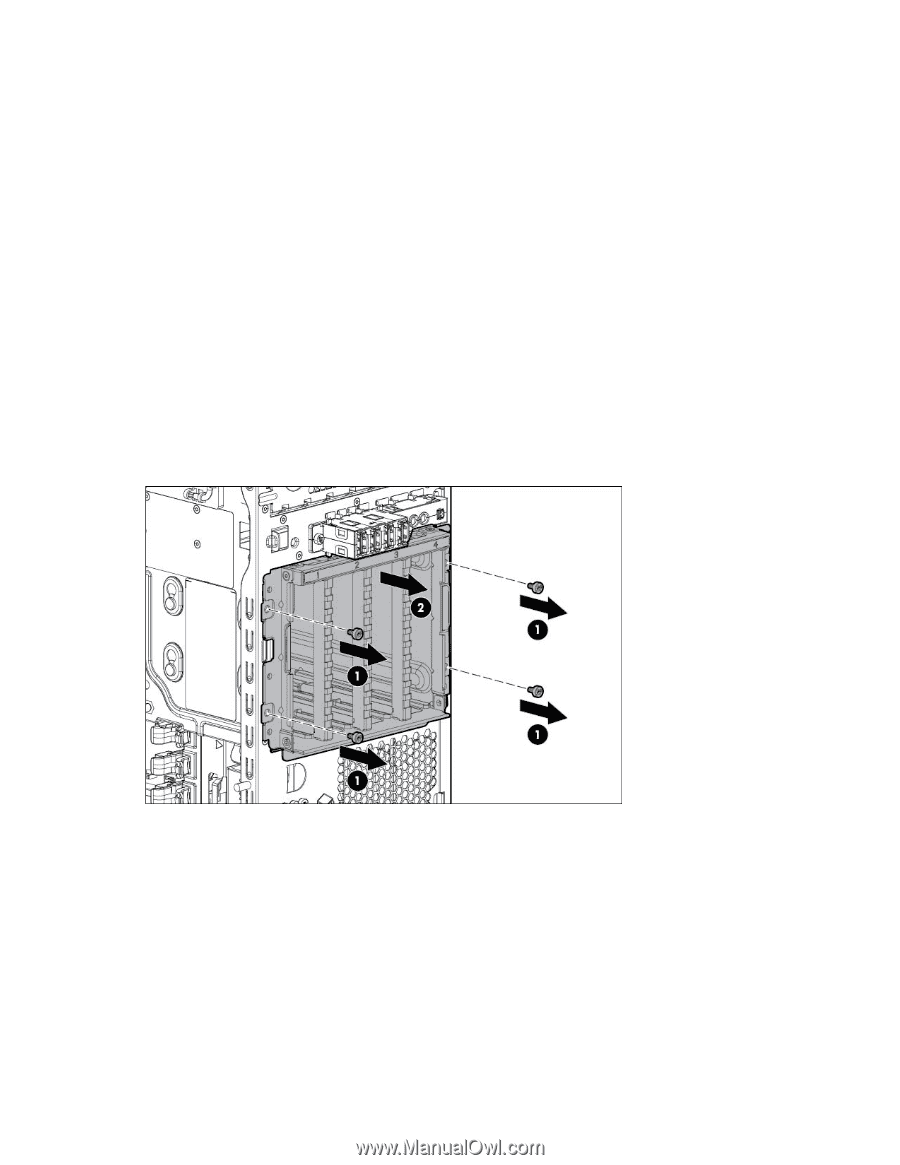
Eight-bay SFF hot-plug drive cage option
To install the component:
1.
Power down the server (on page
18
).
2.
Remove all power:
a.
Disconnect each power cord from the power source.
b.
Disconnect each power cord from the server.
3.
Remove the tower bezel (on page
19
).
4.
Remove the access panel (on page
20
).
5.
Remove the air baffle (on page
21
).
6.
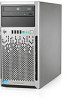
Remove all installed drives.
7.
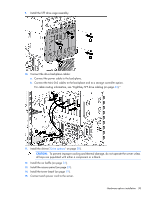
Disconnect the drive cage cables:
a.
Disconnect the Mini-SAS cable from the system board.
b.
Disconnect the drive power cable from the 10-pin power supply connector.
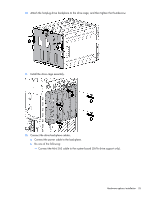
8.
Remove the LFF drive cage assembly.