HP ProLiant ML310e HP ProLiant ML310e Gen8 Server User Guide - Page 53
Enabling the dedicated iLO management port, Network, Network Interface Adapter
 |
View all HP ProLiant ML310e manuals
Add to My Manuals
Save this manual to your list of manuals |
Page 53 highlights
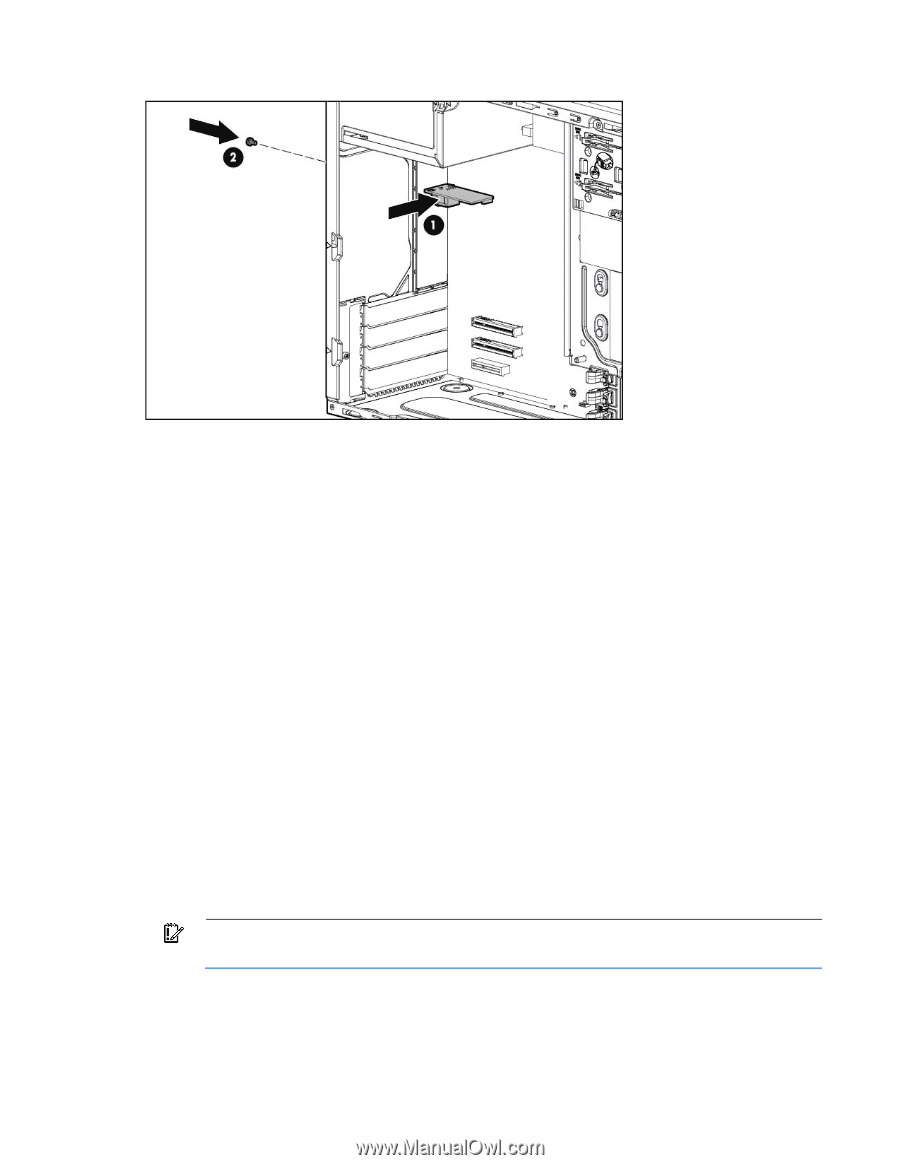
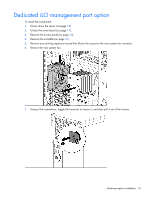
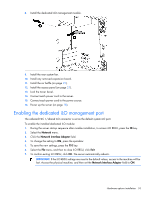
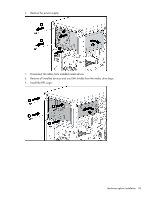
8. Install the dedicated iLO management module. 9. Install the rear system fan. 10. Install any removed expansion board. 11. Install the air baffle (on page 22). 12. Install the access panel (on page 21). 13. Lock the tower bezel. 14. Connect each power cord to the server. 15. Connect each power cord to the power source. 16. Power up the server (on page 18). Enabling the dedicated iLO management port The onboard NIC 1/shared iLO connector is set as the default system iLO port. To enable the installed dedicated iLO module: 1. During the server startup sequence after module installation, to access iLO RBSU, press the F8 key. 2. Select the Network menu. 3. Click the Network Interface Adapter field. 4. To change the setting to ON, press the spacebar. 5. To save the new settings, press the F10 key. 6. Select the File menu, and then to close iLO RBSU, click Exit. 7. To confirm exiting iLO RBSU, click OK. The server automatically reboots. IMPORTANT: If the iLO RBSU settings are reset to the default values, access to the machine will be lost. Access the physical machine, and then set the Network Interface Adapter field to ON. Hardware options installation 53
-
 1
1 -
2
-
3
-
4
-
5
-
6
-
7
-
8
-
9
-
10
-
11
-
12
-
13
-
14
-
15
-
16
-
17
-
18
-
19
-
20
-
21
-
22
-
23
-
24
-
25
-
26
-
27
-
28
-
29
-
30
-
31
-
32
-
33
-
34
-
35
-
36
-
37
-
38
-
39
-
40
-
41
-
42
-
43
-
44
-
45
-
46
-
47
-
 48
48 -
 49
49 -
 50
50 -
 51
51 -
 52
52 -
 53
53 -
 54
54 -
 55
55 -
 56
56 -
 57
57 -
 58
58 -
59
-
60
-
61
-
62
-
63
-
64
-
65
-
66
-
67
-
68
-
69
-
70
-
71
-
72
-
73
-
74
-
75
-
76
-
77
-
78
-
79
-
80
-
81
-
82
-
83
-
84
-
85
-
86
-
87
-
88
-
89
-
90
-
91
-
92
-
93
-
94
-
95
-
96
-
97
-
98
-
99
-
100
-
101
-
102
-
103
-
104
-
105
-
106
-
107
 |
 |