HP ProLiant ML310e HP ProLiant ML310e Gen8 Server User Guide - Page 47
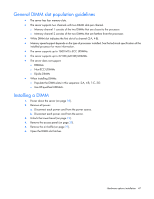
General DIMM slot population guidelines, Installing a DIMM, When installing DIMMs
 |
View all HP ProLiant ML310e manuals
Add to My Manuals
Save this manual to your list of manuals |
Page 47 highlights
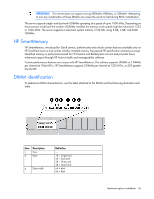
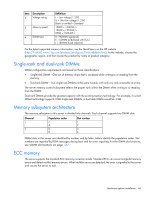
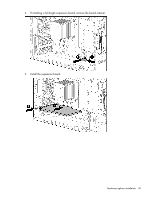
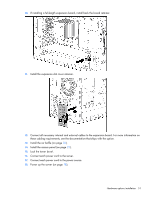
General DIMM slot population guidelines • The server has four memory slots. • The server supports two channels with two DIMM slots per channel. o Memory channel 1 consists of the two DIMMs that are closest to the processor. o Memory channel 2 consists of the two DIMMs that are farthest from the processor. • White DIMM slot indicates the first slot of a channel (2-A, 4-B). • Memory speed support depends on the type of processor installed. See the technical specification of the installed processor for more information. • The server supports up to 1600 MT/s ECC UDIMMs. • The server supports up to 32 GB (4x8 GB) UDIMMs. • The server does not support: o RDIMMs o Non-ECC UDIMMs o Elpida DIMMs • When installing DIMMs: o Populate the DIMM slots in this sequence: 2-A, 4-B, 1-C, 3-D. o Use HP-qualified UDIMMs. Installing a DIMM 1. Power down the server (on page 18). 2. Remove all power: a. Disconnect each power cord from the power source. b. Disconnect each power cord from the server. 3. Unlock the tower bezel (on page 19). 4. Remove the access panel (on page 20). 5. Remove the air baffle (on page 21). 6. Open the DIMM slot latches. Hardware options installation 47
-
 1
1 -
2
-
3
-
4
-
5
-
6
-
7
-
8
-
9
-
10
-
11
-
12
-
13
-
14
-
15
-
16
-
17
-
18
-
19
-
20
-
21
-
22
-
23
-
24
-
25
-
26
-
27
-
28
-
29
-
30
-
31
-
32
-
33
-
34
-
35
-
36
-
37
-
38
-
39
-
40
-
41
-
 42
42 -
 43
43 -
 44
44 -
 45
45 -
 46
46 -
 47
47 -
 48
48 -
 49
49 -
 50
50 -
 51
51 -
 52
52 -
53
-
54
-
55
-
56
-
57
-
58
-
59
-
60
-
61
-
62
-
63
-
64
-
65
-
66
-
67
-
68
-
69
-
70
-
71
-
72
-
73
-
74
-
75
-
76
-
77
-
78
-
79
-
80
-
81
-
82
-
83
-
84
-
85
-
86
-
87
-
88
-
89
-
90
-
91
-
92
-
93
-
94
-
95
-
96
-
97
-
98
-
99
-
100
-
101
-
102
-
103
-
104
-
105
-
106
-
107
 |
 |
